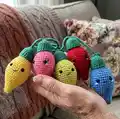
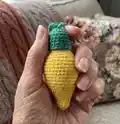
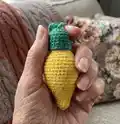
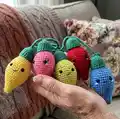
About This The Festive Lights Amigurumi Pattern
This pattern creates adorable plush lightbulb amigurumi that can be strung together as a festive garland. Each bulb is worked in continuous rounds with a separate cap (socket) and cord to assemble. The design is perfect for mixing bright colors and adding personality with small faces or embroidery.
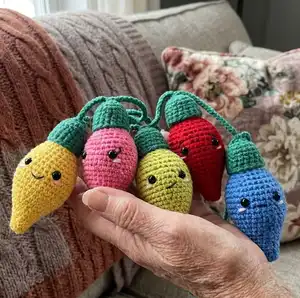
You will crochet the bulb body, switch to the cap color for the screw detail, and make sockets to chain into a cord. The pattern includes placement notes for safety eyes and tips for stuffing and finishing.
Why You'll Love This The Festive Lights Amigurumi Pattern
I absolutely love this pattern because it turns simple stitches into a playful string of lights that brighten any room. I enjoy how easy it is to customize each bulb with different colors and tiny faces, making every set unique. The texture created by working in the back loops for the cap gives the bulbs a neat, finished look I find really satisfying. I also love that the sockets and cord allow you to create a functional garland that hangs well and keeps each bulb secure.
Switch Things Up
I love changing up the colours to make themed garlands; use classic red and green for a Christmas look or pastels for a spring vibe.
I often swap yarn to a slightly thinner weight and a smaller hook to create mini lights perfect for keychains or mobiles.
I sometimes replace safety eyes with embroidered eyes or felt for a softer, child-safe finish.
I like to embroider different mouth shapes to give each bulb its own personality — a smile, a smirk, or a sleepy little line makes them unique.
Try making the sockets and cord in contrasting colours to make the bulbs pop and add visual interest to your garland.
For a more rustic style, use wool or aran-weight yarn and a larger hook for chunky, cozy bulbs that feel handmade and substantial.
I sometimes add a small loop of yarn at each end instead of long tail chains to hang the garland from hooks or nails easily.
Consider adding a bit of wire inside the cord for a slightly poseable garland that can hold a shape around banisters or doorways.
Make a few bulbs with glitter or metallic yarn for special occasions or party decorations to catch the light and sparkle.
I recommend experimenting with spacing between sockets — CH 15 to CH 25 — to create denser or more spaced-out garlands depending on your display.
Common Mistakes & How to Fix Them
✗ Placing safety eyes too low or too close can distort the face placement; place eyes between rows 15 and 16 about five stitches apart to keep features balanced.
✗ Forgetting to stuff the tip first causes a floppy pointy end; start stuffing from the tip and add small amounts evenly as you work to maintain the bulb shape.
✗ Skipping stitch markers when marking the start and end of the cap coil will make the screw inconsistent; place secondary markers in the front loop as instructed to track the coil start and end.
✗ Using different yarn weights for bulbs and sockets alters fit; make sure to use the same yarn type and recommended hook size for consistent sizing and a snug socket fit.
✗ Closing the opening before stuffing fully will make finishing difficult; fasten off leaving a tail and continue stuffing so you can close neatly once firm.