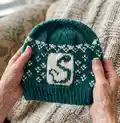
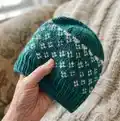
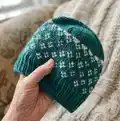
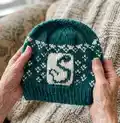
About This Slytherin Knit Hat Pattern
This pattern creates a worsted-weight Slytherin knit hat with a central 'S' fair isle panel and scattered contrast motifs. It includes a simple brim rib, charted colorwork for the body, and detailed crown decrease rounds. The hat is knit in the round on DPNs or a short circular needle.
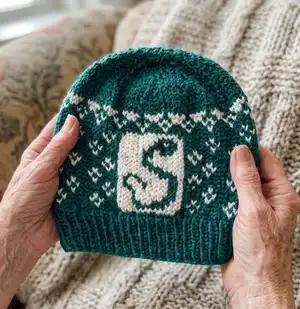
The charted panel covers the main body between rows 1-25 and the crown shaping is worked in green. Perfect for knitters who enjoy colorwork and neat finishing techniques.
Why You'll Love This Slytherin Knit Hat Pattern
I absolutely love this pattern because it combines classic fair isle colorwork with a crisp house emblem that really stands out. I enjoy how the chart lets you see the design laid out before you pick up the needles, making planning simple and satisfying. The brim is a comforting k1/p1 rib that keeps the hat snug and wearable while the crown decreases shape the top neatly. Working the crown decreases in alternating 'knit across' and 'kX, SSK' rounds makes finishing feel like a small, rewarding challenge every few rounds.
Switch Things Up
I love how easy it is to customize this hat by changing the contrast color; try a metallic silver or pale grey for a classic Slytherin look.
I often swap yarn weights to make different sizes: using DK weight with smaller needles produces a sleeker beanie while bulky yarn creates a chunky, cozy version.
I sometimes convert the colorwork into duplicate stitch after knitting a solid hat if stranded knitting feels too daunting; it still gives a crisp emblem.
I recommend experimenting with a pompom on top for a playful finish — use the contrast color or make a two-tone pompom for added flair.
I like to center the chart differently depending on wearer preference; you can shift the 'S' panel slightly to the side for an asymmetrical look.
I sometimes line the hat with a thin fleece for extra warmth and wind protection when wearing in very cold weather.
I also enjoy adding a small earflap modification for kids by knitting extra stitches down the sides and shaping earflaps with decreases.
I recommend blocking the hat to open up the stitches and even out the colorwork, which can dramatically improve the finished appearance.
I encourage you to play with color palettes — deep jewel tones, muted pastels, or high-contrast pairs all change the hat's personality.
I often stitch a few duplicate stitched stars or small motifs around the brim for personalization; it makes each hat unique and meaningful.
Common Mistakes & How to Fix Them
✗ Casting on the wrong number of stitches will throw off the chart alignment; double-check you have cast on 84 stitches before beginning the brim.
✗ Ignoring gauge causes the finished hat to be too large or too small; swatch in stockinette stitch and adjust needle size until you reach 16 sts and 24 rows = 4 inches.
✗ Not practicing stranded tension during colorwork leads to puckering and uneven stitches; carry floats loosely across the back and periodically catch long floats to keep tension even.
✗ Failing to place increases evenly in Row 1 will distort the stitch count; make one (m1) every 12 stitches exactly to reach 90 stitches total before working the chart.