About This Ladybug Keychains Amigurumi Pattern
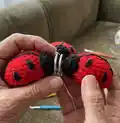
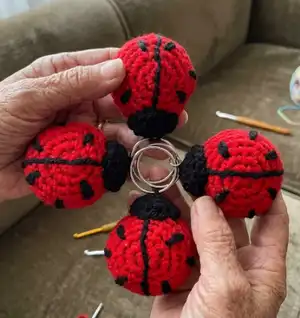
This pattern creates small ladybug keychains worked in DK weight yarn with simple shaping and embroidery details. You will make two halves (back and tummy), join them together, attach the head and keychain, and add a central stripe and spots. It is compact and perfect for making multiple as gifts or for markets.
The instructions include UK and US term versions, step-by-step joining instructions, and clear finishing notes for neat results. No advanced tools are required—just basic crochet supplies and a little patience.
Why You'll Love This Ladybug Keychains Amigurumi Pattern
I absolutely love this pattern because it turns a few simple rounds into a charming little keepsake that everyone smiles at. I enjoy the small, satisfying shaping as the halves grow and join to form a plump ladybug. The embroidered back stripe and spots let me add personality to each piece, so no two are exactly the same. I also love that these make quick, lovely gifts and use small yarn scraps, so they are economical and eco-friendly.
Switch Things Up
I love customizing these little ladybugs by changing the main body color; try pastel shades for a softer, baby-friendly version.
I also make them in metallic or sparkly DK yarn for a festive look that works well as holiday ornaments.
If you want a larger version, I change to a heavier yarn and a larger hook and increase rounds proportionally to keep the shape balanced.
I sometimes add tiny safety eyes or French knot eyes instead of embroidered spots for a different expression.
Try using felt spots glued and stitched on for a neat, flat look that is quick to finish.
I often replace the keyring with a cord loop to make a zipper pull or bag charm for children.
To create a magnet version, I sew a small flat magnet into the inside of the tummy section before closing the final seam.
Adding a small loop of chain or ribbon before you sew the head on gives a different hanging style if you want a decorative hanger instead of a keyring.
I sometimes embroider initials or a tiny heart on the underside to personalize gifts for special occasions.
For a toy-safe version for very small children, avoid keyrings and use embroidered features only, and ensure all ends and joins are securely sewn and woven in.
Common Mistakes & How to Fix Them
✗ Skipping the stitch marker when working in continuous rounds can make you lose track of the round; place a marker at the last stitch of each round to keep orientation consistent.
✗ Overstuffing the body will cause the stuffing to show through the fabric and distort the shape; stuff gradually and only until the piece can be squeezed slightly when pinched.
✗ Cutting ends too short after fastening off makes assembly and sewing difficult; leave the recommended end lengths (15cm or 50cm) for threading and attaching pieces securely.
✗ Not flipping or positioning ends as instructed can cause joins to be on the wrong side; follow the flipping instructions carefully when preparing halves for joining to ensure seams are neat.