About This Mini Turtle Amigurumi Pattern
This pattern creates a tiny amigurumi turtle with a separate shell and belly joined together while crocheting the legs and tail. The design uses simple single crochet increases and decreases, worked in continuous rounds and back loops when joining pieces. It includes clear guidance for placing safety eyes or attaching half-beads and optional embroidery for shell decoration.

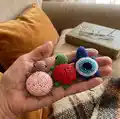
Perfect for making pocket-sized gifts, keychains, or a set of colorful mini turtles. Photographs and alternate instructions for plush yarn heads are included for additional versatility.
Why You'll Love This Mini Turtle Amigurumi Pattern
I absolutely love this pattern because it transforms a few simple rounds into a sweet little turtle full of personality. I enjoy how quickly the mini takes shape — the shell and belly join is a clever way to crochet legs and tail in one go. The pattern lets me mix colors and add tiny embroidered details for unique results every time. Sharing this little project is a joy because it makes a thoughtful handmade gift that finishes fast and looks professional.
Switch Things Up
I love how easy it is to customize this mini turtle pattern by changing yarn colors; try pale pastels for a sweet nursery look or bright contrasting threads for a playful set.
I often swap the yarn weight and hook to make different sizes — bulky yarn with a larger hook gives a chunky, plush mini while fine thread makes a delicate tiny charm.
I like to embroider decorative patterns on the shell before assembly, using contrasting yarn to create stars, spirals, or floral motifs that make each turtle unique.
Instead of safety eyes, I sometimes use French knots or tiny felt circles glued in place for a handmade, soft finish safe for small children.
For a keychain, I add a short chain or loop at the top of the shell before finishing rounds to attach a metal jump ring and keyring.
I sometimes insert a small bell or a pebble into the stuffing for a different tactile or sound effect — secure it inside the body so it won’t come loose.
I also experiment with tiny accessories like crocheted hats or scarves scaled down to the mini size; these are great for seasonal sets or gifts.
If you want a posed turtle, add a small piece of wire inside the legs for slight posability, making sure to wrap and secure the wire so it won’t poke through.
I recommend trying different eye sizes — 6 mm beads work well for minis, while 10 mm safety eyes give a cuter, more pronounced expression on plush-head versions.
I enjoy making sets in a gradient of shades to display on a shelf or give as a themed gift; mixing textures like cotton and bamboo yarns adds visual interest.
Common Mistakes & How to Fix Them
✗ Not working in BLO when joining shell and belly can cause the parts not to align correctly; make sure to work in the back loops only of both shell and belly as instructed.
✗ Cutting the yarn before joining shell and belly will make it difficult to crochet legs and tail seamlessly; do not cut the yarn and join the parts with the same working yarn.
✗ Placing safety eyes too low or too close changes the face proportion; insert safety eyes between the rounds indicated and leave 8-9 single crochet between them for correct spacing.
✗ Overstuffing the head or body causes distorted shapes and bulging seams; stuff gradually and evenly, checking shape as you go to maintain a natural rounded form.