🧢 Beautiful ✨ Detailed πŸ’ Adorable

Mini Flower Basket & Flowers Amigurumi Pattern

Mini Flower Basket & Flowers Amigurumi Pattern
4.3β˜… Rating
3-5 Hours Time Needed
3.1K Made This
βœ‚οΈ

Intermediate Level

Ideal for those with basic crochet experience, featuring slightly more advanced stitches and techniques to expand your skills.

⏱️

Bite-Sized Project

Finishes in 2-4 hoursβ€”perfect for an afternoon of creative relaxation.

🏑

Cozy Accent

A warm touch for your space that transforms ordinary corners into inviting nooks filled with handmade charm.

About This Mini Flower Basket & Flowers Amigurumi Pattern

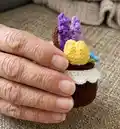
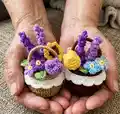
This pattern creates a tiny crocheted flower basket with an assortment of mini flowers and leaves. It includes clear instructions for the basket cover, lace, body, handle, and multiple flower types. You will use small hooks and fine yarn for delicate details, plus optional wire stems for posability. The finished pieces are perfect for decoration, gift toppers, or display.
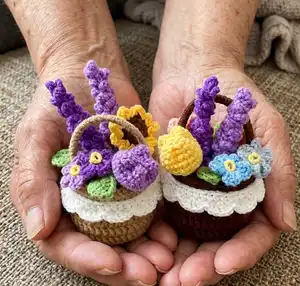
Mini Flower Basket & Flowers Amigurumi Pattern crochet pattern - detailed view of completed project

Complete with materials list, stitch abbreviations, and step-by-step rounds for each element. Photos and assembly tips help you arrange the flowers inside the basket for a polished final presentation.

Why You'll Love This Mini Flower Basket & Flowers Amigurumi Pattern

I absolutely love this pattern because it brings together tiny, detailed flowers with a cozy basket that feels like a little scene in miniature. I enjoyed designing the variety of flowers so you can mix and match shapes and colors. I love how quick each individual piece is to make, yet how satisfying the finished arrangement looks when combined. I also appreciate that you can customize yarns and colorways to create seasonal or themed bouquets to gift or display.

Mini Flower Basket & Flowers Amigurumi Pattern step 1 - construction progress Mini Flower Basket & Flowers Amigurumi Pattern step 2 - assembly progress Mini Flower Basket & Flowers Amigurumi Pattern step 3 - details and accessories Mini Flower Basket & Flowers Amigurumi Pattern step 4 - final assembly and finishing

Switch Things Up

I love how easily you can customize this pattern by changing colors; I often pick pastel palettes for a soft look or bold brights for a cheerful display.

I sometimes make the basket larger by using a thicker yarn and a larger hook to create a decorative centerpiece version.

I also swap the wire stems for pipe cleaners when crafting with kids because they are safer and still shapeable.

I like to add tiny embroidered details or French knots to the flower centers for extra texture and charm.

If you want a cluster of tiny bouquets, I make multiple sets of flowers in different sizes and arrange them at varying heights with different wire lengths.

I sometimes add beads to the wire stems before covering them with yarn to give the arrangement a hidden weight for balance.

Try combining textures by crocheting some flowers in fluffy or boucle yarn for contrast against smooth cotton petals.

I recommend experimenting with metallic or glittery threads in small accents to create a festive holiday-themed basket.

If you prefer a no-wire option, use small felt discs inside the basket to anchor the flower bases securely without stems.

I enjoy making matching sets of four mini baskets in complementary colorways to gift as a collection for seasonal decor.

Common Mistakes & How to Fix Them

βœ— Skipping the instruction to sew the basket lace onto Round 8 will make the lace sit incorrectly; sew the lace to the edge of Round 8 before starting Round 9 for a neat finish. βœ— Forgetting to put wire on where indicated makes stems limp and unshapable; follow the '(put wire on)' steps and catch the wire under the yarn at the beginning of the round to secure it. βœ— Stuffing the basket fully before sewing can distort the shape and make finishing difficult; stuff the basket body halfway through sewing then finish stuffing after closing for best shape. βœ— Not checking stitch counts after increases or decreases can lead to mismatched rounds; count stitches at the end of each round, especially after increase rounds, to maintain the correct shape.
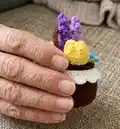
Mini Flower Basket & Flowers Amigurumi Pattern

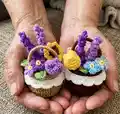
Create a delightful mini flower basket filled with tiny crocheted blooms using simple stitches and clear instructions. This pattern guides you through making a basket base, scalloped lace, handle, and a variety of miniature flowers and leaves. Perfect as a charming gift or a sweet decorative accent for shelves and desks. You will find step-by-step rounds, material lists, and helpful assembly tips to complete your floral scene.

Intermediate 3-5 Hours

Materials Needed for Mini Flower Basket & Flowers Amigurumi Pattern

β€” Main Fabric

  • 01
    Basket: #3 light 5ply yarn (pick colors you like), small amounts of brown, beige or your chosen basket color
  • 02
    Flowers: #2 fine 4ply yarn (pick colors you like) including yellow, pink, purple, green, white, brown for centers
  • 03
    Small amount of white or cream yarn for basket lace
  • 04
    Green yarn (#2) for leaves and stems

β€” Tools Required

  • 01
    Crochet hook size 3.0mm and 3.5mm for basket (use 3.0mm recommended)
  • 02
    Crochet hook size 2.0mm and 2.5mm for flowers and details
  • 03
    Stitch markers
  • 04
    Tapestry needle
  • 05
    Scissors
  • 06
    Wire (0.3-0.5mm diameter) to be used as flower stems
  • 07
    Polyester stuffing

Progress Tracker

0% Complete

β€” Basket Cover :

Round 1 :

14dc in magic loop (14st)

Round 2 :

14dc inc (28st)

Round 3 :

14[dc, dc inc] (42st)

β€” Basket Lace :

Row 1 :

45ch, 44sc, turn (44st)

Row 2 :

11[ch, dc, dc inc, dc, ch, ss] (66st)

β€” Basket Body :

Round 1 :

14dc in magic loop (14st)

Round 2 :

14dc inc (28st)

Round 3 :

14[dc, dc inc] (42st)

Round 4 :

42dc blo (42st)

Round 5-8 :

21[dc, dc flo] (42st)

Info :

Sew the basket lace on the edge of Round 8 before starting Round 9.

Round 9 :

42sc (42st)

Infos :

Crochet the basket cover and the body together while crocheting Round 9, or sew them together after you finish Round 9. Stuffing the basket body halfway through sewing.

β€” Basket Handle :

Row 1 :

32ch, (put wire on) 31sc (31st)

β€” Mini Leaf :

Round 1 :

7ch, (put wire on) sc, hdc, 2dc, hdc, (3sc), hdc, 2dc, hdc, sc (13st)

β€” Mini Lavender :

Row 1 :

26ch, 10[sc, 3ch, ss-in the 3rd ch], 10[sc, 4ch, ss-in the 4th ch], 5[sc, 5ch, ss-in the 5th ch]

Info :

Wrap the fabric around a wire with the right side facing out.

β€” Mini Forget-Met-Not :

Round 1 :

5[3ch, dc, 3ch, ss] in magic loop

Info :

Make a stamen. 1. Wrap yarn around a wire about 1cm. 2. Bend it into a circle. 3. Insert the wire into the center of the flower.

Info :

Adjust the position of the stamen.

β€” Mini Sunflower :

Round 1 :

6sc in magic loop (6st)

Round 2 :

6inc (12st)

Info :

Make one each with brown and green yarn.

Round 3 :

11[(3ch, dc, 3ch), ss]

Infos :

Make the 2 round pieces’ wrong sides facing each other, work into any 2 parallel stitches of them, and crochet Round 3 with yellow yarn. Insert a wire in the center of the flower.

β€” Mini Rose :

Row 1 :

28ch, work into the 4th chain-12[(3dc), ch, sk], (3dc), turn (51st)

Row 2 :

13[ch, dc, dc inc, dc, ch, ss] (78st)

Infos :

Roll the fabric into the shape of a rose, and keep it in shape by sewing. Insert a wire in the center of the flower.

β€” Mini Tulip :

Round 1 :

6sc in magic loop (6st)

Round 2 :

6inc (12st)

Round 3 :

6[sc, inc] (18st)

Round 4-8 :

18sc (18st)

Infos :

Leave some yarn and sew a cross on the last round. Insert a wire in the center of the flower.

β€” Assembly :

Info :

Sew the basket lace on the edge of Round 8 before starting Round 9, attach the handle to the sides of the basket, insert leaves and wire stems, and arrange flowers into the basket opening. Insert flowers into the basket and secure as desired.

Info :

Finished!

Assembly Instructions

  • Sew the basket lace along the edge of Round 8 before starting Round 9 to ensure the scalloped lace sits neatly around the basket.
  • Attach the basket cover to the body by crocheting them together during Round 9 or sewing them together after finishing Round 9 for a seamless join.
  • Secure the handle ends to opposite sides of the basket body with strong stitches, hiding ends and wire inside the handle for a neat finish.
  • Insert wire stems into the center of each flower (rose, tulip, sunflower, lavender, forget-me-not) and arrange them inside the basket, securing wires and hiding ends under the cover.
  • Stuff the basket body halfway through sewing to shape it, then finish stuffing and close securely to keep stability while arranging flowers.

Important Notes

  • πŸ’‘Use stitch markers to keep track of rounds and turns, especially during increases and for the basket lace alignment.
  • πŸ’‘When instructed '(put wire on)', place the wire on the hook under the working yarn and crochet that round with the wire secured to create strong stems.
  • πŸ’‘Stuff the basket gradually and check shape while sewing to avoid overstuffing or uneven surfaces.
  • πŸ’‘Pin and position all parts before final sewing to ensure correct placement and symmetry of handle, lace, and flowers.

This charming mini flower basket and flower set brings instant handmade joy to any room. Perfect for gifting or adding a sweet decorative touch to shelves and desks. Make a seasonal set in different colorways and enjoy arranging your tiny bouquet. 🧺🌸

You ask,

we answer.

FAQs

What size will the finished piece be?

The finished mini basket measures approximately a few inches across depending on yarn and hook size; using the recommended threads yields a pocket-sized decorative basket ideal for display.

Can I use different yarn weights for this pattern?

Yes, but changing yarn weight and hook will alter the finished size; use appropriate hooks and expect the basket and flowers to scale up or down accordingly.

Do I need wire for the flowers?

Wire (0.3-0.5mm) is recommended to create posable stems and support for some flowers; you can omit wire for a softer look but stems will be less stable.

How long does this project typically take to complete?

This project generally takes 3-5 hours depending on how many flowers you make and your experience with small-detail work.