About This Mini Cat Amigurumi Pattern
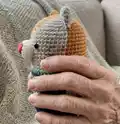
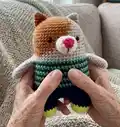
This pattern creates a striped mini cat amigurumi with a two-color face, snout, ears, arms and divided legs. It uses magic ring starts, simple increases and decreases, and color changes guided by symbol charts. The finished toy measures approximately 15 cm when using fingering weight on a 3 mm hook or similar when using the recommended worsted yarn and 3 mm hook.

Detailed round-by-round instructions cover head, body, legs, arms, snout and ears, plus placement guides for eyes, cheeks and beard. Clear assembly notes and photos are provided to help you sew and finish each part accurately.
Why You'll Love This Mini Cat Amigurumi Pattern
I absolutely love this pattern because it combines simple amigurumi shaping with playful color blocking to create a character with real personality. The striped body and two-tone face make each cat uniquely charming and fun to stitch. I enjoy how approachable the shaping is — increases and decreases are straightforward but result in a professional-looking toy. Sewing the snout, eyes and small details is where the project truly comes alive for me.
Switch Things Up
I love how many ways you can customize this mini cat pattern to make it your own.
You can swap the colors to create tuxedo, calico or monochrome versions — try pastels for a soft nursery buddy.
If you want a larger toy, use bulkier yarn and a larger hook; for a keychain sized cat use finer yarn and a smaller hook.
I often add tiny embroidered eyebrows or whiskers to change the expression — it really changes the personality.
Try different eye types: safety eyes for durability, or French knot embroidered eyes for a softer, handmade look.
Change the stripe pattern width by altering how many rounds you work in each stripe color to make unique sweaters.
Make outfits: crochet a little removable scarf or tiny hat in contrasting yarn to give the cat seasonal style.
I sometimes add a small bell or ribbon collar for a playful touch, just sew it on securely so it won't come loose.
For more poseability, you can add lightweight wire inside the arms before flattening, or use wooden pins in the feet for standing support.
Finally, try different nose shapes and colors: a triangular embroidered nose or felt nose changes the whole face design and feel.
Common Mistakes & How to Fix Them
✗ Skipping stitch markers during the leg divide will cause miscounted stitches; place markers at the center and mark the 31st stitch of round 36 to identify the first leg.
✗ Forgetting to change yarn colors according to the symbol chart will leave the stripes incorrect; refer to the SYMBOL PATTERN on page 1 and switch colors at the indicated rounds.
✗ Stuffing too early or too much makes shaping difficult and lumpy; stuff gradually and finish stuffing before closing the last rounds to keep smooth curves.
✗ Not securing long tails when fastening off can cause seams to loosen; leave a long tail and weave it through remaining loops to close and secure properly.
✗ Placing safety eyes after too many rounds can misalign them on the face; attach eyes between rounds 13 and 14 as instructed to keep facial proportions correct.