🧢 Beautiful ✨ Detailed πŸ’ Adorable

Winter Is Coming Beanie Pattern

Winter Is Coming Beanie Pattern
4.5β˜… Rating
2-3 Hours Time Needed
4.1K Made This
βœ‚οΈ

Beginner Friendly Level

Perfect for those just starting their crochet journey, with clear instructions and simple techniques

⏱️

Bite-Sized Project

Finishes in 2-4 hoursβ€”perfect for an afternoon of creative relaxation.

πŸ‘•

Casual Chic

Relaxed style with a modern twist, perfect for everyday wear while maintaining that handcrafted uniqueness.

About This Winter Is Coming Beanie Pattern

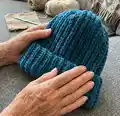
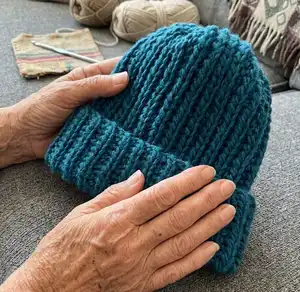
This pattern creates a crocheted beanie worked flat that mimics the look of the fisherman's rib knit stitch. It uses half double crochet through the back loop to form deep ribs and is fully customizable to any head size. The instructions are clear and simpleβ€”perfect for beginners who want a textured, cozy hat.

Winter Is Coming Beanie Pattern crochet pattern - detailed view of completed project

You will work in rows back and forth and then join the piece into a tube to form the hat. Adjust chain length and number of rows to fit different head circumferences and heights.

Why You'll Love This Winter Is Coming Beanie Pattern

I absolutely love this pattern because it gives knit-like rib texture using basic crochet stitches, which feels like the best of both crafts. I enjoy how quickly the deep ribs form with HDC in the back loop, creating a chunky, cozy look with minimal fuss. I also love that it is completely customizable β€” changing the chain length or number of rows changes the fit instantly. Making one of these feels rewarding in a single afternoon and it makes a lovely handmade gift.

Winter Is Coming Beanie Pattern step 1 - construction progress Winter Is Coming Beanie Pattern step 2 - assembly progress Winter Is Coming Beanie Pattern step 3 - details and accessories Winter Is Coming Beanie Pattern step 4 - final assembly and finishing

Switch Things Up

I love experimenting with yarn weight to change the look: a bulky yarn and 8 mm hook makes thick, dramatic ribs while a lighter yarn with a smaller hook gives a finer ribbed hat.

You can add a pompom to the top for a classic winter look; make a large pompom in a contrasting color or match the hat for a coordinated finish.

Try striping every few rows with a second color to create a two-tone fisherman\'s rib effect that is playful and modern.

I often increase or decrease the starting chain to make sizes for children or adults; measure the head and subtract 4 cm for a comfortable fit.

Make a deeper fold-over cuff by working extra rows before joining so you can double the brim for added warmth and structure.

For a slouchy style, add a few extra rows to the height before closing the top and avoid pulling the top too tight when finishing.

I sometimes embroider a small logo or initial on the cuff after finishing to personalize hats before gifting them.

Consider adding a fleece lining for extra warmth and comfort; cut a circle of fabric and sew it inside before weaving in ends.

Want earflaps? Add short rectangular panels to each side before joining and braid cords for ties to keep the hat secure in windier weather.

I also like to make matching sets by crocheting a scarf or mitts using the same HDC back loop rib technique for a coordinated winter set.

To create a more fitted beanie, decrease the initial chain by a few stitches and test frequently on the recipient\'s head to dial in the perfect snugness.

If you prefer a neater seam, mattress stitch the edges together instead of slip stitching for a less visible join on the outside.

Common Mistakes & How to Fix Them

βœ— Not measuring the chain length correctly can make the hat too tight or too loose; measure the head circumference and subtract about 4 cm before deciding your chain length and adjust accordingly. βœ— Skipping the instruction to work HDC through the back loop will remove the rib texture; always insert your hook into the back loop only to create the fisherman rib effect. βœ— Forgetting to join the final row with slip stitches vertically can leave an open seam; join the two sides with 40 slt as instructed to create a neat tube before closing the top. βœ— Working with inconsistent tension produces uneven ribs and width; maintain consistent, moderate tension across all rows and check your width as you go to match the target measurement.

Winter Is Coming Beanie Pattern

Make a cozy, customizable beanie worked flat that recreates the fisherman's rib look using simple half double crochet stitches. This pattern is perfect if you want a quick, stylish hat you can adjust to any head size. Follow step-by-step instructions for the ribbed rows and finishing to create a warm, textured cap.

Beginner Friendly 2-3 Hours

Materials Needed for Winter Is Coming Beanie Pattern

β€” Main Fabric

  • 01
    Morelfil BigBall - 100 gr (main yarn used in sample)
  • 02
    Wool - approximately 100 gr (noted as alternative '100 gr of wool' in materials)

β€” Tools Required

  • 01
    Crochet hook size 8 mm
  • 02
    Yarn used: 100 gr Morelfil BigBall (or similar bulky yarn)
  • 03
    Scissors (for cutting yarn)
  • 04
    Yarn needle for weaving in ends

Progress Tracker

0% Complete

β€” Materials :

Info :

Yarn: I used 100 gr of Morelfil BigBall

Info :

Materials: with a hook of 8 mm, I used 100 gr of wool.

Info :

Hook: 8 mm, I used this size, but you can use any size according to the yarn used, bigger is your hook, bigger will appear your ribs.

Info :

Techniques used: slip stitch, half double crochet.

Info :

Gauge: No gauge required; you can work adapting the shape to the head dimension. In my case the gauge was 14 lines x 20 stitches for 10x10 cm

Info :

My final dimension was: 49 cm for the circumference and 32 cm for the height. Also in this case you can adapt your dimension to the shape of your head.

β€” Abbreviations :

Infos :

Chain: ch. Half Double Crochet: hdc. Slip Stitch: slt

β€” Pattern :

Info :

Let\'s go!

Row 0 :

Chain to reach about 35 cm, in my case 40 ch.

Info :

Let\'s crochet in rows, back and forth. All rows except for the last one will be made with HDC stitch made through the back loop.

Row 1 :

40 hdc

Row 2 :

chain, 40 hdc though the back loop

Row 3 :

chain, 40 hdc though the back loop

Row Repeat :

Repeat *Row 2 and 3* until reach a width of 53 cm, in my case I worked 56 rows. You can adjust your width measuring the head less 4 cm.

Last row :

join the two sides in vertical with 40 slt. You will now have a tube. See pictures below.

Finishing :

Cut the yarn and pull yarn through the remaining stitches, tighten together and fasten. Your beanie is ready!

Assembly Instructions

  • Join the two sides in vertical alignment with 40 slip stitches to form a tube before closing the top.
  • After forming the tube, cut the yarn leaving a long tail and pull the tail through the remaining stitches to close the top securely.
  • Tighten the pulled yarn to gather the top evenly, then fasten off and weave the tail into the inside using a yarn needle.
  • Fold the bottom edge as desired to form a cuff or leave unfolded; adjust before final weaving to set the brim.
  • Adjust width and height by measuring the head minus 4 cm for a snug fit and altering chain length or number of rows accordingly.

Important Notes

  • πŸ’‘Work half double crochet through the back loop only to create the fisherman's rib texture and consistent vertical ribs.
  • πŸ’‘Measure your head as you go and aim for a fabric width about 4 cm less than head circumference to ensure a snug stretch fit.
  • πŸ’‘Join the panel with slip stitches vertically to make a clean seam before closing the top; pin the seam if needed before joining.
  • πŸ’‘Keep consistent tension throughout all rows so the ribs line up neatly and the finished circumference matches your measurements.

This Winter Is Coming Beanie is a simple, satisfying project that gives knit-like ribs using crochet techniques. Make it in bulky yarn for a quick, cozy hat or adapt the size for kids and adults easily. Perfect for thoughtful handmade gifts and last-minute winter accessories. 🧢🧀

You ask,

we answer.

FAQs

What size will the finished piece be?

The sample finished beanie measured 49 cm in circumference and 32 cm in height using 40 chains and 56 rows, but you can easily adjust chain length and rows to match your head size.

Can I use different yarn weights for this pattern?

Yes, you can use different yarn weights but this will change the final size and rib appearance; use an appropriate hook for your chosen yarn and check width as you go.

Do I need prior crochet experience for this pattern?

This pattern is beginner friendly and only uses half double crochet through the back loop and slip stitches, so basic knowledge of crochet stitches is sufficient.

How long does this project typically take to complete?

Most crocheters complete this beanie in about 2-3 hours using bulky yarn, though time may vary by experience level and yarn choice.