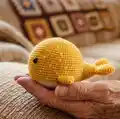
About This Wallace and Wanda Whales Amigurumi Pattern
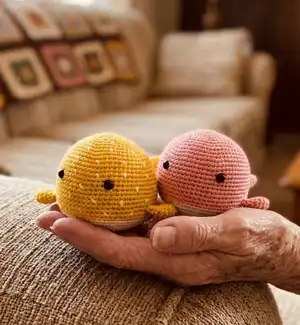
This pattern creates two small amigurumi whales named Wallace and Wanda. The basic body shape is the same for both; Wallace includes a fair isle color-dot pattern while Wanda remains solid. The pattern uses DK cotton and simple amigurumi techniques with step-by-step rounds for body, tail, and fins.
Written in US terminology with complete round-by-round instructions. Includes materials, abbreviations, and assembly guidance for accurate finishing.
Why You'll Love This Wallace and Wanda Whales Amigurumi Pattern
I absolutely love this pattern because it combines a clean, minimalist shape with a playful fair isle detail that makes Wallace so delightful. I enjoy how quickly the whale body comes together — the shaping is satisfying and efficient. The design is versatile, so I often customize color palettes to match nursery themes or gift recipients. Making the separate fins and joining them to form the tail is one of my favorite assembly moments because it brings real personality to the toy.
Switch Things Up
I love how easily this pattern adapts to different colorways — I often switch Color A to soft pastels for a nursery-friendly whale.
If you want a chunkier whale, I use a bulkier yarn and a larger hook to make a cuddly version; for minis, choose sport weight yarn and a smaller hook.
I sometimes embroider small smiles or freckles instead of using safety eyes for toys meant for very young children.
Try substituting Color B with a bright contrast for bold polka-dot effects, or use variegated yarn for subtle organic spots.
I like to add a tiny crocheted bow or a felt collar for character — small accessories make each whale unique.
For more durability, consider sewing the safety eyes from the inside with a backing washer or embroidering eyes instead.
I sometimes lightly scent the stuffing with a dryer sheet for a pleasant handmade gift aroma; avoid strong scents for baby items.
If you want posable fins, insert a short piece of bendable craft wire inside the fin when assembling and stitch the base closed.
I recommend practicing the color dot repeat on a swatch first to get comfortable carrying yarn and hiding floats.
When making multiples, I chain-stitch a small fabric tag with the recipients name and sew it into a seam for a personal touch.
Common Mistakes & How to Fix Them
✗ Not inserting safety eyes at the correct rounds can make facial placement uneven; insert the safety eyes between rounds 17 and 18 spaced about 13 stitches apart to ensure symmetry.
✗ Carrying the contrast yarn incorrectly when making color dots will create visible floats; carry the yarn on the wrong side and work over the unused strand every few stitches to keep floats tidy.
✗ Forgetting to stuff as you go leads to lumps or flat shapes; stuff firmly while working and overstuff slightly before finishing a section so the filling fills out the shape evenly.
✗ Skipping stitch markers when working continuous rounds causes miscounts; place a stitch marker at the beginning of each round and move it up after completing the round to keep track.
✗ Using tight tension for decreases creates gaps at shaping rounds; maintain consistent moderate tension and use an invisible decrease where recommended to avoid holes.