🧢 Beautiful ✨ Detailed πŸ’ Adorable

Sterling the Star Amigurumi Pattern

Sterling the Star Amigurumi Pattern
4.4β˜… Rating
2-3 Hours Time Needed
3.0K Made This
βœ‚οΈ

Intermediate Level

Ideal for those with basic crochet experience, featuring slightly more advanced stitches and techniques to expand your skills.

⏱️

Bite-Sized Project

Finishes in 2-4 hoursβ€”perfect for an afternoon of creative relaxation.

🧸

Cute Companion

An adorable friend to cherish, handcrafted with love to bring comfort and joy for years to come.

About This Sterling the Star Amigurumi Pattern

This pattern makes Sterling the Star β€” a 10" point-to-point stuffed star worked in worsted weight yarn. You will crochet five identical points, join them into a round, and shape the body with decreases and stuffing. The pattern is worked in continuous spiral and uses back loops only to create a neat ridge detail.

Sterling the Star Amigurumi Pattern crochet pattern - detailed view of completed project

Includes full round-by-round instructions, assembly notes, and a felt eyes tutorial to finish the face. Optional 15mm safety eyes or felt eyes are both supported for a custom look.

Why You'll Love This Sterling the Star Amigurumi Pattern

I absolutely love this pattern because it turns simple stitches into a charming 3D star with personality. I enjoy how the points are crocheted individually and then joined β€” it feels like building a tiny project piece by piece. The finished star is cuddly but structured, and the felt eye tutorial lets me add small, handmade details that really bring it to life. Making a set of stars is a relaxing, satisfying process I always enjoy gifting to friends and family.

Sterling the Star Amigurumi Pattern step 1 - construction progress Sterling the Star Amigurumi Pattern step 2 - assembly progress Sterling the Star Amigurumi Pattern step 3 - details and accessories Sterling the Star Amigurumi Pattern step 4 - final assembly and finishing

Switch Things Up

I love how easy it is to customize Sterling the Star with color changes β€” try striping two or more colors across the points for a playful look.

You can make a mini version by using fingering weight yarn and a smaller hook for a keychain-sized star that fits in the palm of your hand.

For a chunkier, more huggable star, use bulky yarn with a larger hook and increase stuffing to keep the shape plush and round.

I often experiment with different eye styles: try embroidered eyes for a softer, child-safe finish or shiny safety eyes for a glossy, characterful face.

Embellish with tiny sequins or French knots in contrasting yarn to add freckles or star-like sparkles on the points.

Change the expression by moving the eyes slightly closer or farther apart β€” eye placement can dramatically change the star's personality.

Consider stitching on a small mouth or blush using pink embroidery floss for an extra touch of charm.

I sometimes add a loop at the top (a few chain stitches secured) so the star can be hung as an ornament or mobile piece.

To create a set, make several stars in graduated sizes and colors to display together or package as a handmade gift trio.

If you want a sturdier toy for young children, skip felt and use securely fastened safety eyes, and sew seams extra firmly with a doubled yarn tail for durability.

Common Mistakes & How to Fix Them

βœ— Skipping the instruction to work through the back loops only will change the texture and ridge detail; always work BLO as noted to keep the intended look. βœ— Forgetting to use a stitch marker while working in a continuous spiral will cause misplaced rounds; place and move a marker at the start of each round to keep your count accurate. βœ— Not stuffing points gradually results in lumpy shapes that distort the star; start with a small amount in each point and slowly add more stuffing as you join and work inward. βœ— Attaching safety eyes too late or in the wrong round can lead to misplacement; attach safety eyes at the front at round 7 as indicated for the pictured positioning. βœ— Cutting felt eyes too small or too large will change the face proportions; trim the felt slowly to a one-by-one check size (eyes used are roughly 3/4" across) before final sewing.

Sterling the Star Amigurumi Pattern

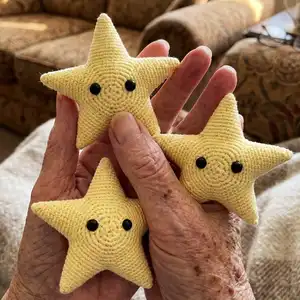
Create a sweet, cuddly star with this complete Sterling the Star amigurumi pattern. You will make five pointed sections and join them to form a plush star with optional felt or safety eyes. The pattern includes step-by-step rounds, stuffing and finishing instructions, plus a full felt-eyes tutorial so you can personalize the face. Perfect for gifting or decorating a nursery, this pattern helps you build confidence with shaping and joining techniques.

Intermediate 2-3 Hours

Materials Needed for Sterling the Star Amigurumi Pattern

β€” Main Fabric

  • 01
    Worsted weight yarn (#4), Butterscotch (Shown in Loops and Thread Impeccable Solids) β€” ~120 yards
  • 02
    Black craft felt (for felt eyes, optional) β€” small scrap
  • 03
    White Size 3 cotton crochet thread (or another thin white yarn) β€” small amount for highlights

β€” Tools Required

  • 01
    Crochet hook size G (4.00mm) or size needed to obtain a firm fabric
  • 02
    Tapestry needle
  • 03
    Stitch marker
  • 04
    Polyester stuffing
  • 05
    15mm black safety eyes (2) OR black felt for sewn eyes
  • 06
    Scissors
  • 07
    Black embroidery floss or sewing thread (for felt eyes)
  • 08
    2 different sized sewing needles (one for floss and one for crochet thread)
  • 09
    Straight pins (with white heads) for positioning felt eyes

Progress Tracker

0% Complete

β€” Materials :

Infos :

Worsted weight yarn (Shown in Loops and Thread Impeccable Solids) Butterscotch (120 yards). G (4.00mm) hook or size needed to obtain a firm fabric. Tapestry Needle. Stitch Marker. Stuffing. Eyes: 15mm black safety eyes OR Black felt (See tutorial at the end of the pattern).

β€” Notes :

Infos :

All pieces are worked through the back loops only. The pattern is worked in continuous spiral. Use a stitch marker to mark the start of the round.

β€” Points (Make 5) :

Round 1 :

SC 4 in Magic Ring β€” 4 sts

Round 2 :

(SC 2 in next st) 4 times β€” 8 sts

Round 3 :

SC in each st around

Round 4 :

(SC 2 in next st, SC in next st) 4 times β€” 12 sts

Round 5 :

SC in each st around

Round 6 :

(SC 2 in next st, SC in next 2 sts) 4 times β€” 16 sts

Round 7 :

SC in each st around

Round 8 :

(SC 2 in next st, SC in next 3 sts) 4 times β€” 20 sts

Round 9 :

SC in each st around

Round 10 :

(SC 2 in next st, SC in next 4 sts) 4 times β€” 24 sts

Round 11 :

SC in each st around

Round 12 :

(SC 2 in next st, SC in next 5 sts) 4 times β€” 28 sts

Round 13 :

SC in each st around

Round 14 :

(SC 2 in next st, SC in next 6 sts) 4 times β€” 32 sts

Round 15 :

SC in each st around

Round 16 :

(SC 2 in next st, SC in next 7 sts) 4 times β€” 36 sts

Info :

Fasten off with long tail. Do not fasten off the fifth point; continue to work for the body (on next page).

β€” Front :

Round 1 :

(SC2tog, SC in next 7 sts) 2 times; to join next point, (SC2tog in next point, SC in next 7 sts, SC2tog, SC in next 7 sts). Repeat for each point β€” 80 sts

Info :

To join in a round, SC2tog the first 2 sts of round 1, this is the first SC2tog of round 2

Round 2 :

(SC2tog, SC in next 6 sts) 10 times β€” 70 sts

Round 3 :

(SC2tog, SC in next 12 sts) 5 times β€” 65 sts

Round 4 :

(SC2tog, SC in next 11 sts) 5 times β€” 60 sts

Round 5 :

(SC2tog, SC in next 10 sts) 5 times β€” 55 sts

Round 6 :

(SC2tog, SC in next 9 sts) 5 times β€” 50 sts

Round 7 :

(SC2tog, SC in next 3 sts) 10 times β€” 40 sts

Round 8 :

(SC2tog, SC in next 2 sts) 10 times β€” 30 sts

Round 9 :

(SC2tog, SC in next st) 10 times β€” 20 sts

Round 10 :

(SC2tog) 10 times β€” 10 sts

Round 11 :

(SC2tog) 5 times β€” 5 sts

Info :

Fasten off.

β€” Back :

Info :

To join the yarn, locate the junction of the points where there is no yarn tail and attach the yarn to the first stitch of the point to the left.

Info :

Follow the instructions as for the Front.

Info :

After round 8, stop and sew up the holes created by where the points are connected.

Info :

If using safety eyes, attach them now to the front of the star at round 7. Felt eyes will be attached after the star is finished.

Info :

Stuff the star, beginning with the points. For best results, start with a little bit of stuffing in each point and slowly fill up each point. Once all of the points are stuffed, begin stuff the body.

Info :

Continue working, stopping and adding a little more stuffing every few rounds until the end.

Info :

Fasten off.

β€” Finishing :

Info :

If using felt eyes, skip ahead to the tutorial at the end. Weave in any loose ends.

β€” How to Sew on Felt Eyes :

Step One: Gather Materials :

Your amigurumi; Black craft felt; Black embroidery floss or sewing thread; White Size 3 cotton crochet thread (or another thin white yarn); 2 different sized sewing needle (one for the floss and one for the crochet thread); Straight pins (with white heads).

Step Two: Cut the Felt :

Using small, sharp scissors cut the felt into a rough circle shape slightly larger than the desired size. Slowly trim around the edges until the eyes are the right size and shape. The eyes I used are roughly 3/4" across.

Step Three: Sew on the Eyes :

Before you start sewing, position the eye and pin it in place. I find it helpful to use a pin with a white head as it mimics the position and look of the eye highlight. The felt will be sewn on using an applique stitch, which are small whipstitches made around the circumference of the eye. Use a single strand of embroidery floss and the smaller needle to sew the eye into place.

Step Four: Create the Highlight :

Use the pins to help decided where you want the highlight to be. The highlights themselves are simply French knots, with the yarn wrapped once around needle. Pull the ends of the white thread to snug up the knot. If you don't like the way it looks, simply pull the knot out and try again with a new thread.

Step Five: Finish Your Amigurumi :

Tie loose ends together securely with square knots and pull the ends into the stuffing.

Info :

The felt eyes are now complete!

Assembly Instructions

  • Attach safety eyes to the front of the star at round 7 if using safety eyes, placing them evenly spaced and secured according to the eye manufacturer's instructions.
  • After joining points and working through round 8 on the Back, stop and sew up the holes created where the points are connected to close gaps neatly before continuing.
  • Stuff the star beginning with the points: place a small amount of stuffing in each point, then once all points are filled, stuff the body progressively as you continue rounds.
  • To join the yarn on the Back, locate the junction of the points where there is no yarn tail and attach the yarn to the first stitch of the point to the left for a seamless join.
  • Weave in any loose ends and tie loose threads with square knots, then pull the ends into the stuffing to hide them and secure the finish.

Important Notes

  • πŸ’‘All pieces are worked through the back loops only to create the textured ridge detail; do not omit BLO.
  • πŸ’‘The pattern is worked in a continuous spiral β€” use a stitch marker to mark the start of each round and move it as you progress.
  • πŸ’‘Stuff gradually, beginning with a small amount in each point and adding more every few rounds for smooth shaping.
  • πŸ’‘If using safety eyes attach them at round 7 on the front; if using felt, complete the felt-eye tutorial at the end before final finishing.
  • πŸ’‘After round 8 on the Back, sew up the holes where points were joined to prevent stuffing from showing through.

Make Sterling the Star to add a handmade friend to your home or gift to someone special. This bright, cheerful star is perfect for nurseries, shelves, or a pocket of joy on the go. Add felt or safety eyes and a tiny embroidered smile for extra personality. 🧢✨

You ask,

we answer.

FAQs

What size will the finished piece be?

The finished amigurumi measures approximately 10 inches point-to-point when using the recommended worsted weight yarn and a G (4.00mm) hook.

Can I use different yarn weights for this pattern?

Yes, you can use different yarn weights, but the final size and fabric density will change; adjust your hook size and expect a different finished size if you choose another yarn weight.

Do I need prior crochet experience for this pattern?

This pattern is rated intermediate because it uses continuous spiral working, decreases (SC2tog), joining multiple points and shaping; basic amigurumi and single crochet experience is recommended.

How long does this project typically take to complete?

Most crocheters complete this project in 2-3 hours, though time may vary depending on experience, finishing choices (felt eyes vs safety eyes), and how quickly you stuff and assemble.

When should I attach the eyes?

If using safety eyes, attach them to the front of the star at round 7; if using felt eyes follow the felt-eye tutorial at the end of the pattern and sew them on after the star is finished.