About This Spiderman Amigurumi Pattern
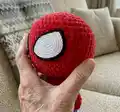
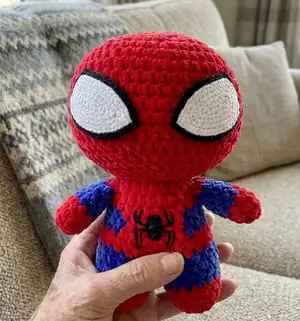
This pattern creates a charming Spiderman amigurumi approximately 10 inches tall using Premier Parfait chunky yarn. It is written for the Peter Parker colorway with clear notes to adapt each section for a Miles Morales version. The instructions include head, arms, legs, body assembly, eye templates, and spider detailing using puffy paint or felt.
Perfect for an intermediate crocheter who enjoys color changes and finishing details. The chunky yarn makes a soft, plush toy that works great as a handmade gift or keepsake.
Why You'll Love This Spiderman Amigurumi Pattern
I absolutely love this pattern because it combines simple amigurumi construction with playful colorwork that brings Spiderman to life. I enjoy how the chunky yarn creates a soft, huggable texture perfect for gifting or display. The pattern is flexible — I wrote notes so you can easily make either the Peter Parker or Miles Morales version. I also love the small finishing details like the felt eyes and painted spider which make each plush feel unique and hand-crafted.
Switch Things Up
I love customizing this pattern by changing colorways; try pastel tones for a soft, whimsical edition or bold neons for a modern twist.
You can make the plush larger or smaller by swapping yarn weight and hook size; bulky yarn with a larger hook gives a chunky cuddle buddy, while thinner yarn creates a mini keychain-sized friend.
I often swap the felt eyes for safety eyes or embroidered eyes to vary the look and add personality to each plush.
Instead of puffy paint for the spider, try cutting a small felt spider and sewing or gluing it on for a tidy, dimensional effect.
For a posable toy, add thin wire inside the arms before stuffing or use pipe cleaners for bendable limbs that hold a pose.
I like to add tiny crocheted accessories like a scarf, cape, or mask to personalize each character and create little themed gift sets.
Try embroidering a different emblem on the chest to create other superhero mash-ups or entirely new characters.
If making for a baby, use yarn labeled safe for baby items and replace glued pieces with securely embroidered features for safety.
Experiment with texture by alternating two strands of different yarns held together for a marled look, or add surface crochet to create webbing details on the body.
I sometimes stitch contrasting cuffs or boot trims in a third color to accentuate the limbs and add more visual interest to the finished plush.
Common Mistakes & How to Fix Them
✗ Skipping color change planning causes awkward transitions and mismatched stripes; plan and mark your color-change rows and carry yarn neatly or cut and weave tails to keep color blocks tidy.
✗ Overstuffing the head or body makes shaping difficult and can distort stitch definition; stuff gradually and evenly, checking shape as you go to maintain rounded, smooth forms.
✗ Not leaving long tails for sewing means you will have trouble joining parts securely; always leave a long tail when fastening off for easy sewing and secure attachment.
✗ Failing to count stitches after increases and decreases leads to incorrect shaping and uneven rounds; count stitches at the end of each round, especially after shaping rounds, to stay on track.