๐Ÿงถ Beautiful โœจ Detailed ๐Ÿ’ Adorable

Snowflake Ornament Pattern

Snowflake Ornament Pattern
4.7โ˜… Rating
1-2 Hours Time Needed
3.1K Made This
โœ‚๏ธ

Beginner Friendly Level

Perfect for those just starting their crochet journey, with clear instructions and simple techniques

โฑ๏ธ

Quick Make

Complete in under 2 hoursโ€”lightning fast fun for instant gratification and quick gifts.

๐ŸŽ„

Holiday Cheer

Festive fun for the season, bringing handmade magic to celebrations and creating new family traditions.

About This Snowflake Ornament Pattern

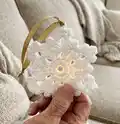
This pattern creates a charming white snowflake ornament measuring about 13 cm (5") across when worked in the recommended yarn. It uses basic crochet stitchesโ€”chains, double crochets, treblesโ€”and simple stitch groupings to form a beautiful lacy shape. The instructions are written round-by-round so you can follow along easily and finish quickly.

Snowflake Ornament Pattern crochet pattern - detailed view of completed project

Perfect for holiday decorating, gift-making, or crafting a string of snowflakes for a garland. Finished pieces can be embellished or stiffened for extra durability and display.

Why You'll Love This Snowflake Ornament Pattern

I absolutely love this pattern because it turns a few simple stitches into a delicate, festive ornament that looks much more intricate than it is. I enjoy how quickly you can make multiple snowflakes for gifts or a garland, and the finished size is perfect for both trees and window displays. The pattern uses basic techniques, so I can relax and enjoy the rhythmic process while still producing a lovely result. It also adapts easily to different yarns or threads for varied looks.

Snowflake Ornament Pattern step 1 - construction progress Snowflake Ornament Pattern step 2 - assembly progress Snowflake Ornament Pattern step 3 - details and accessories Snowflake Ornament Pattern step 4 - final assembly and finishing

Switch Things Up

I love how easily this snowflake adapts to color changes; try soft pastels for a vintage look or metallic yarn for extra sparkle.

To make the snowflake smaller, use finer thread and a smaller hook โ€” this is perfect for delicate garlands or gift tags.

Want a bolder look? Use bulky yarn and a larger hook to create a chunky snowflake that makes a strong decorative statement.

I often add beads to the center or on the points by threading them onto the yarn before working the stitch to create a subtle shimmer.

For a stiff, display-friendly ornament I brush fabric stiffener or diluted glue onto the finished snowflake and pin it flat to dry.

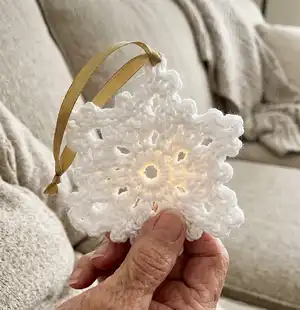
If you prefer a hangable ribbon, choose a gold or silver ribbon threaded through an outer space and knot it for a polished finish.

I also like combining two snowflakes back-to-back, sewing them together around the edges for a thicker, double-sided ornament.

Try embroidering a small initial or date in the center for a personalized keepsake that marks a special year.

Make a string of mixed-size snowflakes to create a winter garland โ€” spacing them with knots or beads between each piece for interest.

Experiment with different stitch heights in Round 3 to slightly alter the point shape and give your snowflakes unique silhouettes.

Common Mistakes & How to Fix Them

โœ— Skipping the initial join when forming the ring can create an uneven center; always join ch 6 with a slip stitch to form a neat ring before starting Round 1. โœ— Failing to keep consistent tension will lead to snowflakes of varying sizes; maintain steady tension and check the gauge to achieve a 13 cm finished piece. โœ— Not counting ch-3 spaces and repeats in Round 2 and Round 3 often results in missing points; mark the first space and count repeats carefully as you work around. โœ— Fastening off too early or not weaving in ends properly can cause the ornament to unravel; weave in ends securely with a yarn needle and trim close to the fabric.

Snowflake Ornament Pattern

Make a delicate crocheted snowflake ornament to brighten your holiday tree. This easy, compact pattern gives clear step-by-step rounds so you can complete it quickly. Using Red Heart Niki yarn and a 3.75 mm hook, you will create a 13 cm (5") decorative snowflake. Perfect for gifting, tree decorating, or turning into festive garlands.

Beginner Friendly 1-2 Hours

Materials Needed for Snowflake Ornament Pattern

โ€” Main Fabric

  • 01
    Red Heart Niki (A) - 1 ball 02034 White
  • 02
    Red Heart Niki, Art. 9809634 available in 50 g (1.76 oz), 106 m (116 yd) balls

โ€” Tools Required

  • 01
    Crochet hook 3.75mm (US F-5)
  • 02
    Yarn needle

Progress Tracker

0% Complete

โ€” Snowflake :

Info :

Snowflake measures 13 cm [5"] in diameter.

Info :

With A, ch 6; join with a slip st to form a ring.

Round 1 :

Ch 1, 12 dc in ring; join with a slip st in first dc โ€“ 12 dc.

Round 2 :

Ch 1, dc in first st, [ch 3, dc in next dc] 11 times; htr in first dc to join and form last space โ€“ 12 ch-3 spaces.

Round 3 :

Ch 1, dc over htr, *(2 tr, ch 3, 2 tr) in next space**, dc in next space; repeat from * around, ending last repeat at **; join with a slip st in first dc.

Round 4 :

Ch 4, slip st in same st as joining, *ch 2, (dc, ch 3, dc, ch 5, dc, ch 3, dc) in next ch-3 space, ch 2**, (slip st, ch 4, slip st) in next dc; repeat from * around, ending last repeat at **; join with a slip st in slip st of last round. Fasten off.

Info :

FINISHING: Weave in ends. Add hanging loop of your choice.

Info :

Abbreviations: ch = chain; cm = centimeters; dc = double crochet; htr = half treble crochet; mm = millimeters; st(s) = stitch(es); tr = triple or treble crochet; [ ] = work directions in brackets the number of times specified; * or ** = repeat whatever follows the * or ** as indicated.

Assembly Instructions

  • Weave in all loose yarn ends securely using a yarn needle so the snowflake will not unravel during use.
  • Add a hanging loop of your choice by threading ribbon, twine, or yarn through one of the outer ch-3 spaces and knotting or sewing it in place.
  • Position the hanging loop at the tip of one snowflake point so the snowflake hangs flat and sew the loopโ€™s ends down if necessary for extra stability.
  • Trim any excess yarn and gently shape or steam-block the snowflake so it lays flat before displaying or storing.

Important Notes

  • ๐Ÿ’กUse the recommended hook and yarn to achieve the stated 13 cm gauge, or adjust hook size to match the gauge.
  • ๐Ÿ’กWeave in ends before adding the hanging loop to keep the back of the snowflake neat and secure.
  • ๐Ÿ’กWork repeats carefully and count ch-3 spaces to ensure the snowflake has all 12 points and is symmetrical.
  • ๐Ÿ’กFasten off and secure joins neatly to avoid any loose stitches that could catch or pull during handling.

This pretty Snowflake Ornament is a lovely, quick holiday project that adds handmade charm to your tree and gifts.๐ŸŽ„ Snowflakes work up fast so you can make a collection of them for garlands or gift tags.โ„๏ธ Enjoy making these delicate decorations with simple stitches and a touch of festive creativity.

You ask,

we answer.

FAQs

What size will the finished piece be?

The finished snowflake measures approximately 13 cm (5") in diameter when using the recommended yarn and 3.75 mm hook.

Can I use different yarn weights for this pattern?

Yes, you can use different yarn weights or crochet thread, but the finished size will change; adjust your hook size accordingly to maintain fabric structure.

Do I need prior crochet experience for this pattern?

This pattern is rated beginner friendly; basic knowledge of chains, double crochet, treble crochet, and working in rounds is helpful.

How should I finish the snowflake for hanging?

Weave in ends with a yarn needle and add a hanging loop of ribbon, yarn, or twine through an outer ch-3 space; you can also stiffen the snowflake if desired.