About This Small Pumpkin Amigurumi Pattern
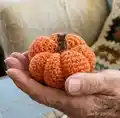
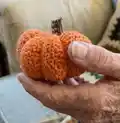
This pattern creates a small, segmented crochet pumpkin that is perfect for fall decor and gift-giving. The pumpkin is made in simple rounds with shaping to form the characteristic sections. It is intentionally compact so you can make several in different colors and sizes. The project uses basic stitches, making it accessible for new crocheters.
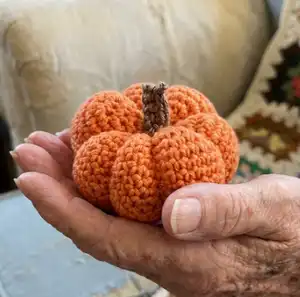
Designed to be quick and satisfying, this small pumpkin makes a lovely accent or a set for a seasonal display. The finished pumpkin has a plush, stuffed shape and a small crocheted stem for a finished look.
Why You'll Love This Small Pumpkin Amigurumi Pattern
I absolutely love this pattern because it captures the cozy essence of autumn in a tiny, easy-to-make form. I enjoy how quickly one pumpkin comes together, making it perfect for last-minute decorations or gifts. The segmentation trick gives it a professional, sculpted look without complicated stitches. I also love that you can customize colors and sizes to create a whole harvest display with minimal effort.
Switch Things Up
I love experimenting with color changes to make playful versions of this pumpkin; try pale pastels for a sweet, modern take.
You can make the pumpkin larger by using bulky yarn and a larger hook for a chunky, decorative piece.
For a tiny keychain version, use sport or DK weight yarn and a 2.5-3.0mm hook to create a miniature pumpkin.
I often add embroidered veins or a French knot cluster on the top for added texture and a handmade look.
Try using variegated yarn to get a mottled, natural pumpkin skin effect without changing colors manually.
I sometimes attach a small loop of ribbon or cord at the top to convert the pumpkin into an ornament or gift topper.
Use a darker yarn for the stem or wrap a metallic thread around it for a subtle shimmer that catches the light.
If you want a rustic look, use natural fiber yarns like cotton or linen blends for a matte, earthy finish.
I recommend adding a small felt leaf if you want a quick, no-sew decorative touch that still looks polished.
To create a set, make pumpkins in graduated sizes and place them together for an instant autumn vignette that looks curated and cozy.
Common Mistakes & How to Fix Them
✗ Skipping stitch markers during rounds can cause you to lose the start of the round; place a marker at the first stitch of each round and move it up as you work.
✗ Overstuffing the pumpkin makes it difficult to shape the segments properly; stuff gradually and check the shape frequently to maintain a soft, rounded look.
✗ Inconsistent tension leads to uneven segments and stitch counts; practice maintaining even tension and count stitches at the end of each round.
✗ Placing the stem without pinning first can result in lopsided placement; pin or mark the center and try the stem position before sewing it securely.