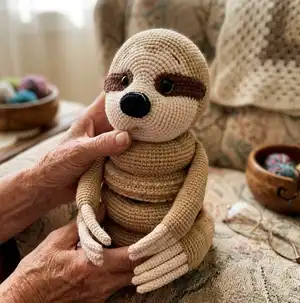
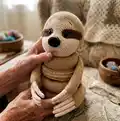
🧢 Beautiful ✨ Detailed πŸ’ Adorable

Sloth Stacking Toy Amigurumi Pattern

Sloth Stacking Toy Amigurumi Pattern
4.9β˜… Rating
12-15 Hours Time Needed
2.1K Made This
βœ‚οΈ

Intermediate Level

Ideal for those with basic crochet experience, featuring slightly more advanced stitches and techniques to expand your skills.

⏱️

Multi-Day Project

A rewarding 12+ hour journeyβ€”perfect for dedicated crafters who love detailed work.

🧸

Cute Companion

An adorable friend to cherish, handcrafted with love to bring comfort and joy for years to come.

About This Sloth Stacking Toy Amigurumi Pattern

This pattern creates a sloth stacking toy made of stacked rings with a removable head and poseable arms. The design uses simple amigurumi shaping, color changes and front/back loop techniques to get the characteristic sloth face and stacked body. You will crochet claws, rings and rings with pretty edges, then assemble them into a charming toy perfect for gifting or display.

Sloth Stacking Toy Amigurumi Pattern crochet pattern - detailed view of completed project

Includes full round-by-round instructions for each piece, material list and helpful assembly tips. Photos show placement and finishing to make assembly simple and accurate.

Why You'll Love This Sloth Stacking Toy Amigurumi Pattern

I absolutely love this pattern because it brings a playful stacking concept to a classic amigurumi sloth, combining sculpted shaping with soft, tactile rings. I enjoy the color changes that create the sloth face and the little claws that give so much personality. The pattern is satisfying to make β€” you can see steady progress as rings and pieces come together. I like that the construction is modular, so you can personalize ring counts or colors to make your own unique version.

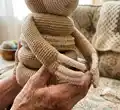
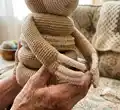
Sloth Stacking Toy Amigurumi Pattern step 1 - construction progress Sloth Stacking Toy Amigurumi Pattern step 2 - assembly progress Sloth Stacking Toy Amigurumi Pattern step 3 - details and accessories Sloth Stacking Toy Amigurumi Pattern step 4 - final assembly and finishing

Switch Things Up

I love how easy it is to customize this sloth by changing yarn colors β€” try pastel tones for a nursery-friendly look or deep caramel and chocolate for a realistic sloth.

You can change the size by using a thicker yarn and larger hooks to make a chunky cuddly version, or use finer yarn and smaller hooks to make a mini keychain-sized sloth.

I sometimes add embroidered smiles or freckles to change the character and personality of the face, which gives each sloth a unique expression.

For a safer toy for babies, use embroidered eyes instead of safety eyes or securely crochet the eye disc and embroider the pupils with black yarn.

Want different stacking options? Make extra rings in different diameters and colors so kids can mix-and-match to create many stacking combinations.

I occasionally add tiny crocheted accessories like a leaf, scarf, or flower to the ring edges as playful accents that can be swapped.

Try adding subtle surface slip stitch stripes around rings for texture, or use the BLO rounds to create a decorative ridge to hold rings in place better.

To make the arms posable, you can thread thin craft wire inside before stuffing, but bend carefully and ensure ends are fully covered and safely secured.

If you prefer a flatter face, reduce a few rounds on the head or adjust stuffing amount to lessen roundness for a different silhouette.

I also like to mix yarn brands β€” keeping color and weight consistent β€” to use leftover yarns and make multicolor rings that give a charming patchwork effect.

Common Mistakes & How to Fix Them

βœ— Skipping stitch markers at the start of rounds makes it easy to lose your stitch count; use a marker to mark the first stitch every round to stay accurate. βœ— Forgetting to stuff progressively causes flats or lumps in rings and limbs; stuff gradually as you go to keep an even, round shape. βœ— Not changing hook size where recommended will alter the gauge and fit of rings; switch to the stated 1.5 mm or 3 mm hooks when the pattern asks to maintain proportions. βœ— Missing the front loop/back loop instructions will ruin the decorative edges; pay close attention to BLO/FLO rounds and work slip stitch or reverse crochet rounds exactly as stated. βœ— Overstuffing rings or limbs makes seams hard to close and distorts shape; stuff firmly but not so tight that stitches are stretched or holes appear.

Sloth Stacking Toy Amigurumi Pattern

Make this cuddly sloth stacking toy with clear step-by-step rounds and handy photos to guide you. This pattern includes full instructions for the base, rings, legs, arms, tail, head, claws and eye patches so you can assemble a charming, poseable sloth. Perfect as a handmade gift or nursery toy, you will enjoy the shaping and color changes that make this sloth full of character.

Intermediate 12-15 Hours

Materials Needed for Sloth Stacking Toy Amigurumi Pattern

β€” Main Fabric

  • 01
    Beige - Alize Cotton Gold 262 (2 balls - 660m / 722 yrd)
  • 02
    Ivory - Alize Cotton Gold 67 (small amount for face and claws)
  • 03
    Brown - Alize Cotton Gold 493 (for eye patches)
  • 04
    Black - small amount for nose or crocheted details
  • 05
    Fiberfill for stuffing (amount enough for rings, head, limbs)

β€” Tools Required

  • 01
    Crochet hook size 1.5 mm
  • 02
    Crochet hook size 3 mm
  • 03
    Scissors
  • 04
    Tapestry needle for sewing
  • 05
    Stitch markers
  • 06
    Safety eyes diameter 12 mm (or black yarn for crochet eyes)
  • 07
    Polyester stuffing (fiberfill)
  • 08
    Pins for assembly
  • 09
    Tweezers (to stuff claws if needed)

Progress Tracker

0% Complete

β€” BASE :

Round 1 :

6 sc in MR (6)

Round 2 :

6 inc (12)

Round 3 :

12 sc (12)

Round 4 :

(1 sc; inc)*6 (18)

Round 5-6 :

18 sc (18)

Round 7 :

(2 sc; inc)*6 (24)

Round 8-10 :

24 sc (24)

Round 11 :

(3 sc; inc)*6 (30)

Round 12-15 :

30 sc (30)

Round 16 :

(4 sc; inc)*6 (36)

Round 17-21 :

36 sc (36)

Round 22 :

(5 sc; inc)*6 (42)

Round 23-28 :

42 sc (42)

Round 29 :

(6 sc; inc)*6 (48)

Round 30-36 :

48 sc (48)

Round 37 :

(7 sc; inc)*6 (54)

Round 38-45 :

54 sc (54)

Round 46 :

(8 sc; inc)*6 (60)

Round 47 :

FLO (9 sc; inc)*6 (66)

Round 48 :

5 sc; inc; (10 sc; inc)*5; 5 sc (72)

Round 49 :

(11 sc; inc)*6 (78)

Round 50 :

6 sc; inc; (12 sc; inc)*5; 6 sc (84)

Round 51 :

(13 sc; inc)*6 (90)

Round 52 :

7 sc; inc; (14 sc; inc)*5; 7 sc (96)

Round 53 :

(15 sc; inc)*6 (102)

Round 54 :

8 sc; inc; (16 sc; inc)*5; 8 sc (108)

Round 55 :

(17 sc; inc)*6 (114)

Round 56-62 :

114 sc (114)

Round 63 :

(17 sc; dec)*6 (108)

Round 64 :

8 sc; dec; (16 sc; dec)*5; 8 sc (102)

Round 65 :

(15 sc; dec)*6 (96)

Round 66 :

7 sc; dec; (14 sc; dec)*5; 7 sc (90)

Round 67 :

(13 sc; dec)*6 (84)

Round 68 :

6 sc; dec; (12 sc; dec)*5; 6 sc (78)

Round 69 :

(11 sc; dec)*6 (72)

Round 70 :

5 sc; dec; (10 sc; dec)*5; 5 sc (66)

Round 71 :

(9 sc; dec)*6 (60)

Round 72 :

connect round 71 with round 47 (BLO) with 60 sc (60) fill with stuffing as you go, then continue to work in rounds.

Round 73 :

(8 sc; dec)*6 (54)

Round 74 :

(7 sc; dec)*6 (48)

Round 75 :

(6 sc; dec)*6 (42)

Round 76 :

(5 sc; dec)*6 (36)

Round 77 :

(4 sc; dec)*6 (30)

Round 78 :

(3 sc; dec)*6 (24)

Round 79 :

(2 sc; dec)*6 (18)

Round 80 :

(1 sc; dec)*6 (12)

Round 81 :

6 dec (6) cut the yarn, pull off hole, hide a tail.

Info :

Sew legs to the base as you can see in the photos, connect as much as you like.

β€” LEGS (make 2) :

Info :

With ivory yarn and 1.5 mm hook make 3 claws, middle claw will be a bit longer, then other two.

Long claw (make 1) :

Round 1. 6 sc in MR (6)

Round 2-6 :

6 sc (6)

Round 7 :

inc; 5 sc (7)

Round 8-12 :

7 sc (7)

Round 13 :

1 sc; inc; 5 sc (8)

Round 14-17 :

8 sc (8)

Round 18 :

2 sc; inc; 5 sc (9)

Round 19-22 :

9 sc (9) fasten off.

Short claws (make 2) :

Round 1. 6 sc in MR (6)

Round 2-5 :

6 sc (6)

Round 6 :

inc; 5 sc (7)

Round 7-10 :

7 sc (7)

Round 11 :

1 sc; inc; 5 sc (8)

Round 12-15 :

8 sc (8)

Round 16 :

2 sc; inc; 5 sc (9)

Round 17-20 :

9 sc (9) fasten off one claw and in second short claw change yarn to beige and from now on use 3 mm hook.

Info :

Connect short, long and short claw to form the leg base.

Round 1 :

9 sc in a short claw; 5 sc in a long claw; 9 sc in a second short claw; 4 sc in a long claw (27)

Round 2 :

9 sc; inc; 3 sc; inc; 10 sc; inc; 2 sc (30)

Round 3-7 :

30 sc (30)

Round 8 :

9 sc; dec; (3 sc; dec)*2; 4 sc; inc; (1 sc; inc)*2 (30)

Round 9-13 :

23 sc; BLO 7 slst (30)

Round 14 :

30 sc (30)

Round 15 :

(3 sc; dec)*6 (24)

Round 16-30 :

24 sc (24)

Round 31 :

(2 sc; dec)*6 (18)

Round 32 :

5 sc, turn fold in half and crochet 9 sc closing the hole (fill with stuffing, not too tight - 3/4 of the leg)

β€” TAIL :

Round 1 :

6 sc in MR (6)

Round 2 :

6 inc (12)

Round 3 :

12 sc (12)

Round 4 :

(1 sc; inc)*6 (18)

Round 5 :

18 sc (18)

Round 6 :

(2 sc; inc)*6 (24)

Round 7 :

24 sc (24)

Round 8 :

(3 sc; inc)*6 (30)

Round 9-13 :

30 sc (30)

Round 14 :

BLO (3 sc; dec)*6 (24)

Round 15 :

(2 sc; dec)*6 (18) fill with stuffing

Round 16 :

(1 sc; dec)*6 (12)

Row 17 :

6 dec (6) fasten off, leave a tail for sewing.

Info :

Sew the tail to the base as you can see in the photos.

β€” LARGE RING :

Round 1 :

60 ch; slst in 1st ch (60)

Round 2 :

(9 sc; inc)*6 (66)

Round 3 :

5 sc; inc; (10 sc; inc)*5; 5 sc (72)

Round 4 :

(11 sc; inc)*6 (78)

Round 5 :

6 sc; inc; (12 sc; inc)*5; 6 sc (84)

Round 6 :

(13 sc; inc)*6 (90)

Round 7 :

7 sc; inc; (14 sc; inc)*5; 7 sc (96)

Round 8 :

(15 sc; inc)*6 (102)

Round 9-11 :

102 sc (102)

Round 12 :

BLO 102 sc (102)

Round 13-15 :

102 sc (102)

Round 16 :

(15 sc; dec)*6 (96)

Round 17 :

7 sc; dec; (14 sc; dec)*5; 7 sc (90)

Round 18 :

(13 sc; dec)*6 (84)

Round 19 :

6 sc; dec; (12 sc; dec)*5; 6 sc (78)

Round 20 :

(11 sc; dec)*6 (72)

Round 21 :

5 sc; dec; (10 sc; dec)*5; 5 sc (66)

Round 22 :

(9 sc; dec)*6 (60)

Info :

Sew round 22 with round 1, fill with stuffing as you go.

β€” MIDDLE RING :

Round 1 :

48 ch; slst in 1st ch (48)

Round 2 :

(7 sc; inc)*6 (54)

Round 3 :

4 sc; inc; (8 sc; inc)*5; 4 sc (60)

Round 4 :

(9 sc; inc)*6 (66)

Round 5 :

5 sc; inc; (10 sc; inc)*5; 5 sc (72)

Round 6 :

(11 sc; inc)*6 (78)

Round 7 :

6 sc; inc; (12 sc; inc)*5; 6 sc (84)

Round 8 :

(13 sc; inc)*6 (90)

Round 9 :

90 sc (90)

Round 10 :

BLO 90 sc (90)

Round 11 :

90 sc (90)

Round 12 :

BLO 90 sc (90)

Round 13 :

90 sc (90)

Round 14 :

BLO 90 sc (90)

Round 15 :

90 sc (90)

Round 16 :

(13 sc; dec)*6 (84)

Round 17 :

6 sc; dec; (12 sc; dec)*5; 6 sc (78)

Round 18 :

(11 sc; dec)*6 (72)

Round 19 :

5 sc; dec; (10 sc; dec)*5; 5 sc (66)

Round 20 :

(9 sc; dec)*6 (60)

Round 21 :

4 sc; dec; (8 sc; dec)*5; 4 sc (54)

Round 22 :

(7 sc; dec)*6 (48)

Info :

Sew round 22 with round 1, fill with stuffing as you go.

Info :

There are two ways to make pretty edges on the rings - in rounds 10, 12, 14 in the front loops make slip stitch round or reverse crochet (crab stitch) round.

β€” ARMS (make 2) :

Info :

With ivory yarn and 1.5 mm hook make 3 claws, middle claw will be a bit longer, then other two.

Long claw (make 1) :

Round 1. 6 sc in MR (6)

Round 2-7 :

6 sc (6)

Round 8 :

inc; 5 sc (7)

Round 9-15 :

7 sc (7)

Round 16 :

1 sc; inc; 5 sc (8)

Round 17-18 :

8 sc (8) fasten off.

Short claws (make 2) :

Round 1. 6 sc in MR (6)

Round 2-6 :

6 sc (6)

Round 7 :

inc; 5 sc (7)

Round 8-13 :

7 sc (7)

Round 14 :

1 sc; inc; 5 sc (8)

Round 15-16 :

8 sc (8) fasten off one claw and in second short claw, change yarn to beige and from now on use 3 mm hook.

Info :

Connect short, long and another short claw to make a single arm unit.

Round 1 :

8 sc in a short claw; 4 sc in a long claw; 8 sc in a second short claw; 4 sc in a long claw (24)

Round 2-7 :

24 sc (24)

Round 8 :

5 sc; dec; (3 sc; dec)*2; 4 sc; 3 inc (24)

Round 9-13 :

18 sc; BLO 6 slst (24)

Round 14 :

24 sc (24)

Round 15 :

(2 sc; dec)*6 (18)

Round 16-34 :

18 sc (18)

Round 35 :

6 sc, turn fold in half and crochet 9 sc closing the hole (fill with stuffing, not too tight - 3/4 of the arm)

Info :

Make the arms the same way you did the legs before, use the previous photos to remember the whole process.

β€” SMALL RING :

Round 1 :

36 ch; slst in 1st ch (36)

Round 2 :

(5 sc; inc)*6 (42)

Round 3 :

3 sc; inc; (6 sc; inc)*5; 3 sc (48)

Round 4 :

(7 sc; inc)*6 (54)

Round 5 :

4 sc; inc; (8 sc; inc)*5; 4 sc (60)

Round 6 :

(9 sc; inc)*6 (66)

Round 7 :

5 sc; inc; (10 sc; inc)*5; 5 sc (72)

Round 8 :

(11 sc; inc)*6 (78)

Round 9-15 :

78 sc (78)

Round 16 :

(11 sc; dec)*6 (72)

Round 17 :

5 sc; dec; (10 sc; dec)*5; 5 sc (66)

Round 18 :

(9 sc; dec)*6 (60)

Round 19 :

(8 sc; dec)*6 (54)

Round 20 :

(7 sc; dec)*6 (48)

Round 21 :

(6 sc; dec)*6 (42)

Round 22 :

(5 sc; dec)*6 (36)

Info :

Sew round 22 with round 1, fill with stuffing as you go.

Info :

Sew arms to the small ring as you can see in the photos.

β€” HEAD :

Info :

Start with black yarn for nose (hook 1.5 mm). Work nose first by chain foundation then continue in rounds to form nose disc.

Row 1 :

5 ch; turn and continue to work in rounds

Round 2 :

inc; 2 sc; 2 inc in first ch; 2 sc; inc in fourth ch (12)

Round 3 :

(1 sc; inc)*6 (18)

Round 4 :

(2 sc; inc)*6 (24)

Round 5-6 :

24 sc (24)

Round 7a :

BLO (2 sc; dec)*6 (18) fill with stuffing

Round 8a :

(1 sc; dec)*6 (12) fasten off, close the hole.

Info :

Start to crochet in front loops of round 6 with ivory yarn and 3 mm hook for the head main part.

Round 7 :

(3 sc; inc)*6 (30)

Round 8 :

30 sc (30)

Round 9 :

(4 sc; inc)*6 (36)

Round 10 :

(5 sc; inc)*6 (42)

Round 11 :

(6 sc; inc)*6 (48)

Round 12 :

(7 sc; inc)*6 (54)

Round 13 :

(8 sc; inc)*6 (60)

Round 14 :

6 sc; 6 inc; 48 sc (66)

Round 15-16 :

66 sc (66)

Round 17 :

6 sc; (1 sc; inc)*6; 48 sc (72)

Round 18 :

72 sc (72)

Round 19 :

14 sc; change to beige-3 sc; change to ivory-55 sc (72)

Round 20 :

6 sc; (2 sc; inc)*2; change to beige - 1 sc; inc; 2 sc; inc; change to ivory - (2 sc; inc)*2; 48 sc (78)

Round 21 :

13 sc; change to beige - 11 sc; change to ivory - 54 sc (78) change to beige color

Round 22 :

(12 sc; inc)*6 (84)

Round 23 :

(13 sc; inc)*6 (90)

Round 24 :

(14 sc; inc)*6 (96)

Round 25 :

62 sc; 18 ch (skip 18 sc); 16 sc (96)

Round 26-34 :

96 sc (96)

Round 35 :

(14 sc; dec)*6 (90)

Round 36 :

(13 sc; dec)*6 (84)

Round 37 :

(12 sc; dec)*6 (78)

Round 38 :

(11 sc; dec)*6 (72)

Round 39 :

(10 sc; dec)*6 (66)

Round 40 :

(9 sc; dec)*6 (60)

Round 41 :

(8 sc; dec)*6 (54)

Round 42 :

(7 sc; dec)*6 (48)

Round 43 :

(6 sc; dec)*6 (42)

Round 44 :

(5 sc; dec)*6 (36)

Round 45 :

(4 sc; dec)*6 (30)

Round 46 :

(3 sc; dec)*6 (24)

Round 47 :

(2 sc; dec)*6 (18)

Round 48 :

(1 sc; dec)*6 (12)

Round 49 :

6 dec (6) fasten off.

β€” Eye patches (make 2) :

Info :

With brown yarn. Sew "eye patches", insert safety eyes as shown in the photos.

Row 1 :

11 ch; turn and continue to work in rounds

Round 2 :

9 sc; 3 sc in 1st ch; 8 sc; inc (22)

Round 3 :

inc; 8 sc; 3 inc; 8 sc; 2 inc (28) leave a tail for sewing

Info :

After attaching (or sewing eyes) fill the head with stuffing and continue to crochet, starting in the spot between rounds 26-27:

Round 1 :

BLO 36 sc (36)

Round 2-4 :

36 sc (36)

Round 5 :

(4 sc; dec)*6 (30)

Round 6-7 :

30 sc (30)

Round 8 :

(3 sc; dec)*6 (24)

Round 9-10 :

24 sc (24)

Round 11 :

(2 sc; dec)*6 (18)

Round 12 :

18 sc (18)

Round 13 :

(1 sc; dec)*6 (12)

Round 14 :

6 dec (6) fasten off.

Assembly Instructions

  • Sew legs to the base by positioning each leg onto the base opening and attaching securely with a whip stitch, using photos as a placement guide and connecting as much as you like for stability.
  • Sew the tail to the base in the indicated spot at the rear of the base, using the tail left from the tail piece to stitch through the base and fasten securely.
  • Sew 'eye patches' to the head, insert safety eyes through patches and head as shown in the photos, then embroider or crochet the nose and secure it centered below the eyes.
  • Sew round 22 of each ring to round 1 to close rings (large, middle and small), fill with stuffing as you go before finishing the seam so rings are evenly stuffed.
  • Attach arms to the small ring by sewing the closed arm end to the ring; position arms on opposite sides so they can wrap around the rings as shown in the photos.
  • Assemble by stacking rings in order, place the head on top ring or neck tube, and sew final head/neck placement securely so the stacking toy remains stable during play.

Important Notes

  • πŸ’‘Use stitch markers to mark the first stitch of each round so you can keep accurate stitch counts during increases and decreases.
  • πŸ’‘Switch hook sizes as instructed (1.5 mm for claws and nose, 3 mm for main body and rings) to maintain correct proportions and gauge.
  • πŸ’‘Stuff rings and limbs gradually while working so stuffing is even and shapes remain smooth; avoid overstuffing which can distort stitches.
  • πŸ’‘Work BLO/FLO rounds and reverse crochet (rev) rounds exactly as written for neat edges on rings and decorative lines.
  • πŸ’‘Weave in ends and hide tails as you go to make finishing and assembly quicker and tidier.

This sloth stacking toy is designed to be tactile and adorable, with removable rings and a sweet expression for endless play and display. The detailed rounds and photos guide every step, making construction satisfying and predictable. Make one for gifts, nurseries, or simply to brighten your craft shelf β€” enjoy the process and the cozy result! 🧢🧡

You ask,

we answer.

FAQs

What size will the finished piece be?

The finished sloth stacking toy measures approximately 30-35 cm tall when stacked depending on yarn tension and how many rings you include.

Can I use different yarn weights for this pattern?

Yes, but changing yarn weight will affect final size; use appropriate hook sizes and expect to adjust stitch counts or ring sizes if you choose a different yarn weight.

Do I need prior crochet experience for this pattern?

This pattern is rated intermediate, so basic knowledge of single crochet, increases, decreases, working in rounds and front/back loop techniques is recommended.

How long does this project typically take to complete?

Most crocheters complete this project in 12-15 hours across multiple sessions, though time may vary based on experience and the number of details you add.