About This Round Bag with T-Shirt Yarn Pattern
This pattern teaches you how to crochet a compact round bag using t-shirt yarn and a 6 mm hook. It includes clear step-by-step rounds to make the circular base, instructions for joining two halves, finishing the edge, and assembling hardware and a decorative tassel. You will also learn ironing/steaming tips to shape the canvas and hide ends for a neat result.
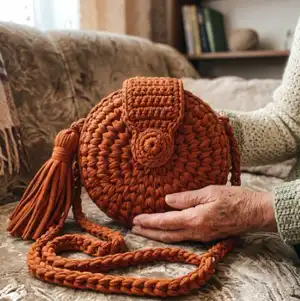
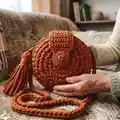
The finished bag measures approximately 7-8 inches (18-20 cm) in diameter and about 4 3/8 inches (11 cm) wide. This beginner-friendly bag uses basic stitches and a few simple finishing steps to create a professional-looking accessory.
Why You'll Love This Round Bag with T-Shirt Yarn Pattern
I absolutely love this pattern because it transforms simple t-shirt yarn into a refined round bag with minimal tools. I enjoy how fast the base grows using increases and split single stitches — it feels satisfying to see the shape form quickly. I also love the flexibility: you can change chain length and hardware to match your style. The steaming step gives the piece a crisp, polished finish that truly elevates a handmade item. Sharing this pattern makes me happy because it helps makers create a useful accessory that looks far more complex than it really is.
Switch Things Up
I love experimenting with different yarns and you can too: try a thicker t-shirt yarn or a chunky cotton rope for a more structured bag and a different texture.
I often change the chain length to make a crossbody or shorter shoulder strap; simply adjust the amount of yarn you thread through the chain or the length of the chain itself.
I sometimes skip threading yarn through the metal chain and instead crochet a full strap in matching yarn to make a softer, fabric strap that is comfortable on the shoulder.
I like adding color-blocking by using two colors of t-shirt yarn for the top half and bottom half—this gives a modern look while following the same assembly steps.
For a more elegant finish, replace the leather valve with a small flap in faux leather or a decorative button and loop closure for a custom touch.
I also add small interior pockets by sewing in a fabric lining piece before fully joining the halves if I want to organize small items inside the bag.
If you want a sturdier base, consider inserting a thin round piece of plastic canvas or fused interfacing after steaming the circle to preserve the shape over time.
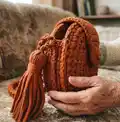
Try changing tassel size and density: more strips make a fuller tassel while fewer strips keep it minimalistic—both look great depending on your style.
I sometimes embellish with metal studs or a small embroidered motif on one half of the bag to create a signature look without changing the core crochet instructions.
Finally, don’t be afraid to mix hardware finishes (silver, brass, gunmetal) with your yarn color to create different styles—matching metals to zippers or purse feet can elevate your finished piece.
Common Mistakes & How to Fix Them
✗ Not taking the yarn from the outside of the bobbin can cause tangles and twists; always pull the thread from the outside so the yarn unwinds smoothly and the loops stay neat.
✗ Crocheting too tightly with t-shirt yarn will make the fabric stiff and uneven; maintain a relaxed, even tension and practice the split single stitch to keep the canvas smooth.
✗ Failing to close the center hole after row 2 leaves a visible gap; pull the end through all stitches of the 1st row from the wrong side, tighten and hide the end to remove the hole.
✗ Skipping the steam/iron step may leave the circle floppy and uneven; steam the circle through a damp cloth at a high setting to set the shape and avoid shine by using the damp cloth.
✗ Not pulling the working thread just above the column when using t-shirt yarn can create holes; hold the hook at an angle and pull the working thread just above the stitch to prevent holes.