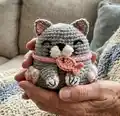
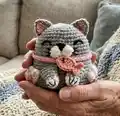
About This Reversible Cat Amigurumi Pattern
This instruction set explains how to join two finished chibiscraft cat amigurumi to make a reversible two-faced cat. It focuses only on the joining process — tying, aligning, inserting, and sewing the last rounds together for a clean reversible finish. The technique preserves both faces and creates a secure, neat seam using the yarn tail from Cat B.
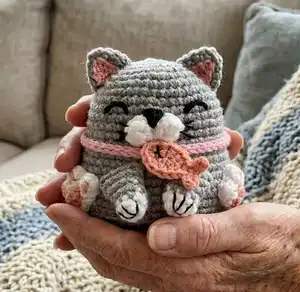
Follow the step-by-step photos and notes to make sure both pieces are worked and joined consistently. No additional stuffing is required during the joining step; the guide shows how to tuck one cat inside the other and sew through the back loops for a tidy result.
Why You'll Love This Reversible Cat Amigurumi Pattern
I absolutely love this reversible cat technique because it turns two independent amigurumi into one playful, surprising toy that reveals a different face when flipped. I enjoy the cleverness of using the yarn tail from one piece to neatly join both pieces without bulky seams. The method keeps both original shapes intact, so you can make two distinct looks and combine them into a single reversible friend. It feels rewarding to finish a project that is both functional and whimsical, and I always smile when I flip it to show someone the other face.
Switch Things Up
I love how easy it is to customize this reversible cat by changing colors for each side to create two distinct personalities.
I sometimes make one cat in pastel shades and the other in bold brights to give a soft-versus-sassy reversible effect.
If you want a smaller or larger finished toy, I change the yarn weight and adjust the hook size accordingly for mini or jumbo versions.
I often experiment with embroidered faces on one side and safety eyes on the other to vary the expression and texture.
To personalize, I add tiny accessories like a crocheted bow, bell, or scarf on one or both cats before joining them.
I recommend practicing the knot gap (1-2 cm) on scrap before doing it on your finished cats so you can see how it affects flip action.
When I want a sturdier seam, I reinforce the join with a second pass of stitches using a matching yarn color hidden inside the back loops.
Try making themed pairs — for example, holiday colors on one side and neutral everyday colors on the other — for a festive reversible toy.
I also enjoy adding different paw or belly details on each cat so when reversed the toy has an interesting contrasting underside.
Finally, I encourage you to experiment with different facial placements and try lining up eyes slightly differently for unique personalities each time.
Common Mistakes & How to Fix Them
✗ Not working both cat amigurumi with the same yarn weight and hook size causes size mismatch; ensure both cats are made with identical yarn, hook, and tension before joining.
✗ Tying the knot too close or with no gap can create a bulge between pieces; leave about 1-2 cm space between knots when joining the magic ring tails to maintain flexibility.
✗ Forgetting to turn Cat B to the right/good side before inserting Cat A may trap wrong sides outward; always turn Cat B back to its right side while Cat A remains inside out before pushing A inside B.
✗ Sewing through both loops instead of back loops only can create a visible seam that interferes with the reversible effect; stitch through the back loops of each piece as instructed for a cleaner finish.