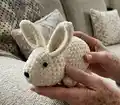
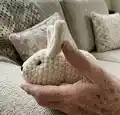
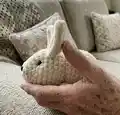
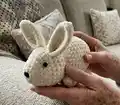
About This Rabbit Amigurumi Pattern
This pattern creates a soft plush rabbit approximately 18 cm tall using Himalaya Dolphin Baby or an equivalent plush yarn. It combines classic round shaping with simple sewing and finishing techniques to produce a polished stuffed toy. Step-by-step rounds and assembly instructions with photos guide you through the process.
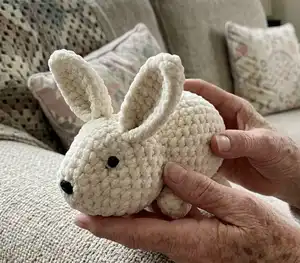
The pattern uses basic amigurumi construction and is suitable for crocheters who know single crochet and increases/decreases. Photos are included to help with positioning and finishing details.
Why You'll Love This Rabbit Amigurumi Pattern
I absolutely love this pattern because it turns simple stitches into a charming, tactile toy that both children and adults adore. I enjoy how fast the body grows with plush yarn — you can see progress quickly which keeps me motivated. The assembly steps let me add personality through ear placement and a tiny nose, making each rabbit unique. It's a relaxed project that still rewards you with a professional-looking finished piece I want to gift to friends and family.
Switch Things Up
I love customizing this rabbit pattern to create different personalities by changing colors — try greys, soft pinks, or bold brights to match your style.
I often make a mini keychain version by using thinner yarn and a smaller hook; the same shaping works beautifully scaled down.
Try embroidering freckles or a mouth for extra expression, or add tiny crocheted accessories like a scarf or bow for seasonal variations.
For a sturdier, poseable figure, I sometimes insert a thin wire into the limbs before stuffing so the rabbit can hold small poses.
Use safety noses for small children, or embroider the nose for a fully washable toy — both work well depending on safety needs.
I recommend experimenting with eye placement to change the rabbit's expression — moving eyes slightly closer creates a cuter look.
You can make a family of rabbits by varying yarn weight and hook size: a chunky version becomes a cuddly pillow, while thin yarn creates tiny collectibles.
I sometimes glue a small felt heart or sew tiny clothes to turn the rabbit into a themed gift for holidays or birthdays.
To make the rabbit more durable, double-stitch seams when attaching limbs and hide all ends inside the body so they don’t come loose with play.
Mix yarn textures for interesting contrast — plush body with a slightly different textured inner ear or accessory adds professional detail and charm.
Common Mistakes & How to Fix Them
✗ Forgetting to place safety eyes at the correct row can throw off facial placement; mark the intended eye row and count stitches before attaching to ensure symmetry.
✗ Overstuffing the head or torso results in a stretched, distorted shape; stuff gradually and check the shape often to maintain the intended proportions.
✗ Skipping the long yarn tails for sewing may make assembly difficult later; leave approximately 30 cm tails when cutting to allow secure sewing and hiding of ends.
✗ Not tightening decreases when closing the body can leave gaps in the toy; when you pull the yarn through the front loops to close, pull gradually and tie securely to avoid holes.
✗ Using a much larger or smaller hook than recommended will change the finished size and stitch tightness; choose a hook that matches gauge for plush yarn and maintain consistent tension.