About This Mr. Buckwheat Amigurumi Pattern
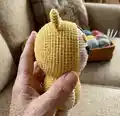
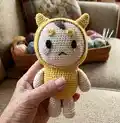
This pattern creates a sweet hooded amigurumi character named Mr. Buckwheat with little horns and a removable hood. It uses cotton 12-ply yarn and a 3.00 mm hook to produce a compact, tactile toy. The pattern includes clear, round-by-round instructions and placement notes for facial features and accessories.
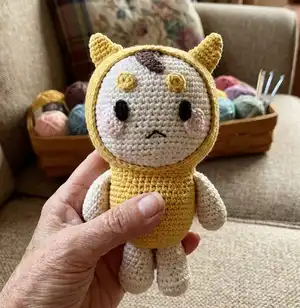
You will learn shaping with increases and decreases, plus small parts like horns, cheeks, and hair. Detailed assembly notes explain where to sew and glue the felt eyes and other pieces.
Why You'll Love This Mr. Buckwheat Amigurumi Pattern
I absolutely love this pattern because it combines simple crochet techniques with adorable details that really bring personality to the doll. I enjoy how the hood and horns add a whimsical touch while remaining quick to make. Sewing the small features is satisfying and allows you to personalize the expression. Making a pair in different colors is one of my favorite ways to gift these to friends.
Switch Things Up
I love experimenting with colors when I make this pattern; switch the hood and body colors to create different personalities for Mr. Buckwheat.
You can use a bulky yarn and a larger hook to make a chunkier, cuddlier version, or choose a finer yarn for a tiny keychain-sized friend.
I often add embroidered details like freckles or a tiny heart on the chest to personalize the doll and make each one unique.
Try replacing the felt eyes with safety eyes for a different look, or embroider the eyes for a softer, handmade appearance.
If you want poseable arms, I sometimes add a thin wire inside the arms before stuffing to allow gentle shaping and posing.
Swap the horn shape by changing the rounds of increases and decreases to create bunny ears, cat ears, or other fantasy shapes.
For a seasonal twist, use sparkly or variegated yarn for the hood or add tiny crocheted accessories like a scarf or hat.
I recommend testing placement of cheeks, eyes, and eyebrows with pins before sewing so you can adjust the expression to your liking.
To make a matching set, change only the accent colors (cheeks or hair tuft) so the dolls look related while still being distinct.
When gifting, I like to create a small removable accessory such as a tiny scarf or bag that can be crocheted separately and attached with a loop.
Common Mistakes & How to Fix Them
✗ Skipping stuffing as you crochet will make shaping difficult later; stuff the head and body gradually while following the rounds to keep an even shape.
✗ Forgetting to mark the beginning of rounds can cause miscounts and misaligned facial features; use a stitch marker and move it each round to maintain round accuracy.
✗ Not leaving long tails when fastening off small pieces prevents secure sewing later; always leave a long tail for sewing horns, cheeks, and arms into position.
✗ Overstuffing the head or body will distort the stitch pattern and make assembly awkward; stuff firmly but in small increments to preserve shape and join smoothly.