🧶 Beautiful ✨ Detailed 💝 Adorable

Minimals Dog Amigurumi Pattern

Minimals Dog Amigurumi Pattern
4.0★ Rating
5-7 Hours Time Needed
2.5K Made This
✂️

Intermediate Level

Ideal for those with basic crochet experience, featuring slightly more advanced stitches and techniques to expand your skills.

⏱️

Weekend Treat

Takes 5-7 hours, making it an enjoyable project to finish over a couple of days.

🧸

Cute Companion

An adorable friend to cherish, handcrafted with love to bring comfort and joy for years to come.

About This Minimals Dog Amigurumi Pattern

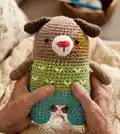
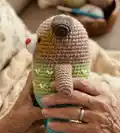
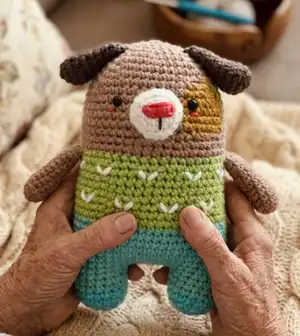
This pattern creates a 15 cm (approx. 5.9 in) minimal dog amigurumi with a cute snout, floppy ears, and sweater detail. The design uses simple single crochet shaping and color changes to form the clothes and legs. Youll work the head, body and legs in one continuous piece and then make small separate parts for arms, ears and snout.

Minimals Dog Amigurumi Pattern crochet pattern - detailed view of completed project

Includes full round-by-round instructions, symbol chart references, and assembly tips. Recommended for crocheters comfortable with amigurumi basics and simple decreases.

Why You'll Love This Minimals Dog Amigurumi Pattern

I absolutely love this pattern because it combines clean, modern design with classic amigurumi shaping. I am always drawn to small projects that finish quickly but feel special, and this dog is exactly that. The color-block sweater and little snout give lots of personality while keeping construction straightforward. I also enjoy the way the flattened arms and ears add charm without complicated finishing.

Minimals Dog Amigurumi Pattern step 1 - construction progress Minimals Dog Amigurumi Pattern step 2 - assembly progress Minimals Dog Amigurumi Pattern step 3 - details and accessories Minimals Dog Amigurumi Pattern step 4 - final assembly and finishing

Switch Things Up

I love how easily this pattern can be customized by changing colors for the sweater—try pastels for a softer look or bold stripes for a playful vibe.

To make the dog larger or smaller, change your yarn weight and hook size; bulky yarn with a larger hook gives you a cuddly chunky version.

I often swap the eye style—use embroidered eyes for baby-safe toys or safety eyes for a glossier finish, depending on the recipient.

Try embroidering tiny patterns on the sweater instead of the white stitch motif for a unique texture and visual interest.

You can add blush to the cheeks using a tiny dab of yarn or fabric paint for an extra pop of personality.

Make seasonal outfits by crocheting removable little scarves or tiny hats that stitch onto the head with a few safety stitches.

If you want posable limbs, insert thin wire inside the arms and legs before flattening to allow gentle posing while keeping the outside look unchanged.

For a keychain version, reduce the hook size and use fingering yarn; attach a keyring to the top via a small loop sewn into the head seam.

I sometimes add tiny accessories like a crocheted bow, star, or mini pocket to the sweater to match holiday themes or to personalize gifts.

Experiment with face placement slightly—moving the eyes up or down will change the expression from curious to sleepy, so try positioning on a test piece first.

Common Mistakes & How to Fix Them

✗ Skipping stitch markers when dividing the legs can cause misplacement and uneven legs; place markers at the 31st stitch and at leg boundaries to keep alignment correct. ✗ Forgetting to change yarn colors at the specified rounds leads to a mismatched sweater; follow the symbol chart and change colors exactly as shown in the illustration. ✗ Overstuffing the head or legs will distort shaping and seams; stuff gradually and stop when the part holds its shape firmly but still soft. ✗ Not weaving the leg tail through the front loops to close leaves a gap; use a yarn needle to weave through each front loop and pull tight to close securely.

Minimals Dog Amigurumi Pattern

Make an adorable minimal-style dog amigurumi with clear step-by-step rounds and simple assembly. This pattern uses color changes to create a cheerful sweater and contrasting snout detail. Youll enjoy the small size and satisfying shaping as you crochet each part. Perfect for gift-making, decorating, or collecting tiny handmade friends.

Intermediate 5-7 Hours

Materials Needed for Minimals Dog Amigurumi Pattern

— Main Fabric

  • 01
    Worsted weight yarn (recommended in pattern)
  • 02
    Soft Brown yarn - main body color (used for head and upper body areas)
  • 03
    Yellow yarn - small face/cheek detail
  • 04
    White yarn - snout and eye details
  • 05
    Brown yarn - ear color (darker brown)
  • 06
    Orange yarn - nose accent
  • 07
    Sky blue yarn - leg / lower body color
  • 08
    Neon blue yarn - foot stripe / leg detail
  • 09
    Light green yarn - sweater/body band color

— Tools Required

  • 01
    Crochet hook 5/0 (3mm)
  • 02
    Yarn needle for sewing and weaving in ends
  • 03
    5mm Black plastic eyes x2
  • 04
    Fiberfill stuffing
  • 05
    Glue (to glue the eyes on the face if desired)
  • 06
    Scissors
  • 07
    Stitch markers (to mark rounds and leg division)
  • 08
    Pins for assembly (optional)

Progress Tracker

0% Complete

— Head / Body / Legs :

Round 1 :

scx6 in the yarn loop, tighten the loop [6 sts]

Round 2 :

(2-sc inc) x 6 [12]

Round 3 :

(scx1, 2-sc inc) x 6 [18]

Round 4 :

(scx2, 2-sc inc) x 6 [24]

Round 5 :

(scx3, 2-sc inc) x 6 [30]

Round 6 :

(scx4, 2-sc inc) x 6 [36]

Round 7 :

(scx5, 2-sc inc) x 6 [42]

Round 8 :

(scx6, 2-sc inc) x 6 [48]

Round 9~36 :

sc in all 48 st [48]

Info :

Do not forget to change the color as shown in the illustration to create the face patch, sweater band and leg colors. (Check page 1 for more details).

Infos :

Use the Soft brown yarn to make MAGIC RING. Change the color of the yarn according to the SYMBOL PATTERNS on page 1. Changing the yarn color is not mentioned in the descriptive design below.

Info :

To make a leg, identify the center space between the legs by the 6 stitches, and each leg identifies the other by 18. Use stitch markers to help.

Info :

Sc at the 31th st of the Rnd 36. This sc is the first st of the first leg (left leg). Continue working on the first leg (left leg).

Round 37~40 :

sc in all 18 st [18]

Round 41 :

(scx1, sc2tog) x 6 [12]

Round 42 :

(sc2tog) x 6 [6]

Info :

Fasten off, leaving a long tail. Stuff the leg. Using a yarn needle, weave the yarn tail through the front loop of each remaining st and pull tight to close.

Item Name (Second leg - Right leg) :

Rejoin the Sky blue yarn to 7th back unworked st of Rnd 36. This sc is the first st for the second leg (right leg). Continue working the second leg the same way as the first leg (left leg) from Rnd 37-42. Using a yarn needle, sew the 6 sts between the legs.

— Arm x2 :

Round 1 :

scx5 in the yarn loop, tighten the loop [5 sts]

Round 2 :

(2-sc inc) x 5 [10]

Round 3~11 :

sc in all 10 st [10]

Info :

Fasten off, Leaving a long tail for sewing. Flatten the ARM, do not stuff.

— Snout :

Round 1 :

Use the White yarn to make 4 chains. scx1 in second ch from hook, scx1 in the next chain, scx3 in the bottom chain, Working up the other side-scx1, scx2 in the next chain, slst [8 sts]

Round 2 :

ch 1, 2-sc inc, scx1, (2-sc inc) x 3, scx1, (2-sc inc) x 2, slst [14]

Round 3 :

ch 1, 2-sc inc, scx3, 2-sc inc, scx2, sc2tog, scx1, sc2tog, scx2, slst [14]

Round 4 :

ch 1, sc in all 14 st, slst [14]

Info :

Fasten off, Leaving a long tail for sewing. Fill in some stuffing to the snout. And then make a nose and mouth on the snout.

Info :

Eyes Location: Between Rnd 13 and 14. Section for the snout stitching on the face: center the snout so its stitching section covers 19 sts width and positions 8 sts across the top as shown in the diagram.

— Ear x2 :

Round 1 :

scx5 in the yarn loop, tighten the loop [5 sts]

Round 2 :

(2-sc inc) x 5 [10]

Round 3 :

(scx1, 2-sc inc) x 5 [15]

Round 4 :

sc in all 15 st [15]

Round 5 :

scx6, sc2tog, scx5, sc2tog [13]

Round 6 :

scx6, sc2tog, scx5 [12]

Round 7 :

sc in all 12 st [12]

Round 8 :

(scx4, sc2tog) x 2 [10]

Round 9~10 :

sc in all 10 st [10]

Info :

Fasten off, Leaving a long tail for sewing. Flatten the EAR, do not stuff. Fix Ear in position by sewing to head at locations shown: top/head sides approximately between Rnd 5 rounds (5rnds from top) as illustrated.

Info :

Arms Location: Between Rnd 20 and 21. Cheek Location: Between Rnd 14 and 15. Clothes pattern: Rnd 22 repeat to the back. Rnd 26 is also indicated for sweater detail.

Assembly Instructions

  • Sew the snout to the center front of the face between Rnd 13 and 14, centering the snout over the 19-st width indicated and secure with whipstitch, leaving no gaps.
  • Attach arms on either side between rounds 20 and 21, flattening the arms and sewing with a whipstitch so each arm sits naturally along the body seam.
  • Fix ears to the top sides of the head using the illustration as a guide (approximately 5 rounds down from the top), sewing through the base of each ear and knotting securely.
  • Sew the 6 stitches between the legs together using a yarn needle to close the gap between legs after completing both leg sections.
  • Glue or sew the 5mm black plastic eyes in position between rounds 13 and 14, then embroider or sew the nose and mouth onto the snout before attaching it.

Important Notes

  • 💡Use the symbol pattern on page 1 for all color changes; change colors exactly where indicated to get the sweater and face patch correct.
  • 💡Use stitch markers to mark the 31st stitch on Rnd 36 and to identify leg boundaries before dividing the legs.
  • 💡Flatten arms and ears and do not stuff them as instructed to achieve the correct look and easier sewing.

This Minimals Dog pattern is a cheerful little amigurumi thats perfect for gifts or quick handmade decor. Its compact size and bold color blocks make it instantly charming and satisfying to crochet. Enjoy the tiny details—the snout, sweater motif, and floppy ears—and share the finished friend with someone special! 🐶🧶

You ask,

we answer.

FAQs

What size will the finished piece be?

The finished amigurumi measures approximately 15 cm (5.9 inches) tall when using the recommended worsted/fingering yarn and a 3mm crochet hook as indicated.

Can I use different yarn weights for this pattern?

Yes, you can use different yarn weights, but this will change the final size. The pattern suggests worsted weight yarn and notes that using fingering weight on a 3mm hook will yield a 15cm doll.

Do I need prior crochet experience for this pattern?

This pattern is rated intermediate; basic amigurumi experience such as working in rounds, increases, decreases, and simple color changes is recommended.

How long does this project typically take to complete?

Most crocheters complete this project in 5-7 hours, though time may vary based on experience level and working pace.

Where should I place the eyes?

Place the eyes between Round 13 and Round 14 as shown in the face diagram and instructions; this centers the snout and facial features correctly.