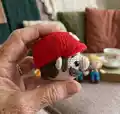
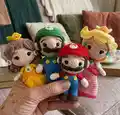
Make your own pocket-sized Mario and Luigi with this full amigurumi pattern. Youll get step-by-step rounds for head, body, legs, arms, hair, cap and facial details so you can recreate these charming characters. Perfect as handmade gifts or collectibles, the pattern includes assembly tips and photo guidance to help you finish with polished results.
Progress Tracker
0% Complete
— Mario — Shoes & legs (make 2) :
Info :
Using light brown color.
Round 2 :
2sc in each st (12)
Round 3 :
1sc in the next 1st, 1inc x 6 (18)
Info :
Change to dark brown color.
Round 4 :
1sc in the next 2st, 1inc x 6 (24)
Round 5-6 :
1sc in each st (24)
Round 7 :
1sc in the next 5st, 1dec in the next 5st, 1sc in the next 7st, 1dec (18)
Round 8 :
1sc in the next 1st, 1dec x 6 (12)
Info :
Change to blue color.
Round 9 :
1sc in each st (12)
Round 10 :
Working behind the ch. 1sc in each st (12)
Round 11-14 :
1sc in each st (12)
Info :
First leg: fasten off and cut yarn. For the second leg: don't cut the yarn, you'll connect it to the other leg and start the body. Stuff the legs with fiber fill.
— Mario — Body :
Info :
Keep using blue color.
Round 1 :
1sc in the next 9st (1 leg), 1sc in the next 12st of the other leg, 1sc in the next 3st (24)
Round 2 :
1sc, 1inc x 8 (36)
Round 3-6 :
1sc in each st (36)
Round 7 :
1sc in the next 4st, 1dec x 6 (30)
Round 8 :
1sc in each st (30)
Info :
Change to red color.
Round 9 :
Working at the back ch. 1sc in the next 3st, 1dec x 6 (24)
Round 10 :
1sc in each st (24)
Round 11 :
1sc in the next 1st, 1dec x 6 (16)
Info :
Don't cut the yarn, we'll begin crocheting the head, CHANGE to peach color.
— Mario — Head :
Round 1 :
1sc in each st (16)
Round 2 :
1sc in the next 1st,1inc x 8 (24)
Info :
Stuff the body with fiber fill up to the neck.
Round 3 :
1sc in the next 2st, 1inc x 8 (32)
Round 4 :
1sc in the next 3st, 1inc x 8 (40)
Round 5 :
1sc in the next 5st, 1sc and 1inc x 7, 1sc in the next 5st, 1sc and 1inc x 7, 1inc in the next 2st (56)
Round 6 :
1sc in the next 55st, 1inc in next 1st (57)
Round 7-11 :
1sc in each st (57)
Round 12 :
1sc in the next 17st, 1dec x 3 (54)
Round 13-20 :
1sc in each st (54)
Info :
It's time you add the safety eyes, I place them in the 9-10 round with 8st between them. Make sure to place them centered at the front of the head.
Round 21 :
1sc in the next 7st, 1dec x 6 (48)
Round 22 :
1sc in the next 6st, 1dec x 6 (42)
Round 23 :
1sc in the next 5st, 1dec x 6 (36)
Round 24 :
1sc in the next 4st, 1dec x 6 (30)
Round 25 :
1sc in the next 3st, 1dec x 6 (24)
Info :
Start stuffing the head.
Round 26 :
1sc in the next 2st, 1dec x 6 (18)
Round 27 :
1sc in the next 1st, 1dec x 6 (12)
Round 28 :
1dec in the next 6st (6)
Info :
Make sure the head is stuffed and firm before closing it up. Fasten off and hide the end.
— Mario — Arms (make 2) :
Round 2 :
2sc in each st (12)
Round 3-5 :
1sc in each st (12)
Round 6 :
1sc in the next 1st, 1dec x 6 (8)
Round 7 :
Working on the front ch. 1sc in each st (8)
Info :
Change to red color.
Round 8 :
Working at the back ch from Round 7. 1sc in each st (8)
Round 9-13 :
1sc in each st (8)
Info :
Finish with 1sl st. Break the yarn and leave a long tail to sew the arms to the body. Only stuff the hand area.
— Mario — Ears (Make 2) :
Round 2 :
2sc in each st (12)
Round 3 :
1sc in each st (12)
Info :
Finish with a sl st and leave long tail to sew to the head. Don't stuff the ears.
— Mario — Moustache :
Info :
In each row you'll make 1ch, turn and start at the 2ch from your hook, unless specified otherwise. Using dark brown color.
Row 2 :
1sc in each st (15)
Row 3 :
1sc in the next 1st, 2dc in the next 1st, 1sc in the next 1st x 5.
Info :
Finish with a sl st. Leave long tail to sew to the face.
— Mario — Nose :
Round 2 :
2sc in each st (12)
Round 3 :
1sc in the next 1st, 1inc x 6 (18)
Round 4-5 :
1sc in each st (18)
Round 6 :
1sc in the next 1st, 1dec x 6 (12)
Info :
Finish with a sl st. Leave long tail to sew to the face. You can stuff the nose or wait until sewed to the face.
— Mario — Overall Buttons :
Info :
Using yellow color.
Round 1 :
Magic Ring (4), 1sl st.
Info :
Leave long tail to sew to the overall.
— Mario — Hair :
Info :
Using dark brown color.
Round 2 :
1inc in each st (14)
Round 3 :
1sc in the next 1st, 1inc x 7 (21)
Round 4 :
1sc in the next 2st, 1inc x 7 (28)
Round 5 :
1sc in the next 3st, 1inc x 7 (35)
Round 6 :
1sc in the next 4st, 1inc x 7 (42)
Round 7 :
1sc in the next 5st, 1inc x 7 (49)
Round 8 :
1sc in the next 6st, 1inc x 7 (56)
Round 9 :
1sc in the next 27st, 1inc x 2 (58)
Round 10-15 :
1sc in each st (58)
Round 16 :
- 1sc in the next 1st, 8ch, turn and start at the 2ch from the hook, 1hdc in the next 7st and finish with 1sl st (sideburn). - 1sc in the next 1st, 2dc in the next 1st, 1sc in the next 1st x 6 - 1sc in the next 1st, 8ch, turn and start at the 2ch from the hook, 1hdc in the next 7st and finish with 1sl st (sideburn). - 1sc in the next 37st.
Info :
In each row you'll make 1ch, turn and start at the 2ch from your hook, unless specified otherwise.
Row 17 :
1dec, 1sc in the next 33st, 1dec (35)
Row 18 :
1dec, 1sc in the next 31st, 1dec (33)
Row 19 :
1sc in the next 1st, 2dc in the next 1st, 1sc in the next 1st x 11
Info :
Finish with 1sl st and leave long tail to sew to the head.
— Mario — Cap :
Round 2 :
1inc in each st (14)
Round 3 :
1sc in the next 1st, 1inc x 7 (21)
Round 4 :
1sc in the next 2st, 1inc x 7 (28)
Round 5 :
1sc in the next 3st, 1inc x 7 (35)
Round 6 :
1sc in the next 4st, 1inc x 7 (42)
Round 7 :
1sc in the next 5st, 1inc x 7 (49)
Round 8 :
1sc in the next 6st, 1inc x 7 (56)
Round 9 :
1sc in the next 7st, 1inc x 7 (63)
Round 10-19 :
1sc in each st (63)
Info :
In each row you'll make 1ch, turn and start at the 2ch from your hook, unless specified otherwise.
Row 20 :
Working in the front ch. 1sc in the next 18st (18)
Row 21 :
1sc in each st (18)
Row 22 :
1dec, 1sc in the next 14st, 1dec (16)
Row 23 :
1sc in each st (16)
Row 24 :
1dec, 1sc in the next 12st, 1dec (14)
Info :
Make your way through the cap with 1sl st. Fasten off and hide the end.
— Mario — Letter on cap :
Round 1 :
Magic Ring (6), 1sl st and 1ch.
Round 2 :
Start in the same st. 1inc in each st (12), finish with a sl st and leave long tail to sew to the cap.
Info :
Embroider a letter M on the circle with red color. The white circle can be sewed to the cap (use the photo as guidance) or you can glue it.
— Mario — Assemble :
Item Name (Arms) :
Attach arms at Round 10 of the body, make sure they are even apart. Fasten off and hide the end.
Item Name (Overall) :
Start at the back, make 1sc in the next 7st in the front ch of Round 9 of the Body, 6ch and go to the front of the Body where you'll make 1sc in the next 7st, 6ch and end at the back of the body (use the photo as guidance). Fasten off and you can sew the bottom of the body together if needed. Fasten off and hide the end. Place the yellow buttons at the front of the overall, you can do it with fabric glue or you can sew them.
Item Name (Eyes) :
Using blue and white color thread, you'll outline the eyes, first with blue and then with white. On top of the eyes, use a black color thread to outline the eye. Use the picture as guidance. Hide the ends.
Item Name (Moustache) :
First, always use pins to see how it'll look. Then, you'll sew the moustache just below the eyes. Only sew the top of the moustache (see the photo, purple line). Fasten off and hide the end.
Item Name (Nose) :
Place the nose at the center between the eyes above the moustache. Sew it to the face, fasten off and hide the ends.
Item Name (Ears) :
First you'll need to use pins to place the hair, so you can know where the ears go. They must be behind the sideburns, for me it was about 4st apart from the moustache. Before placing them, fold them in half and join them together. Once you place the ears, sew them to the head, fasten off and hide the ends.
Item Name (Hair) :
Once the ears are sewed, place the hair again. With the thread you left, start at the back of the head and sew it, use the same thread to embroider the eyebrows. Don't sew the front of the hair, instead use fabric glue to the front and sideburns.
Item Name (Cap) :
Put on the cap, and he's ready!
— Luigi — Shoes & legs (make 2) :
Info :
Using light brown color.
Round 2 :
2sc in each st (12)
Round 3 :
1sc in the next 1st, 1inc x 6 (18)
Info :
Change to dark brown color.
Round 4 :
1sc in the next 2st, 1inc x 6 (24)
Round 5-6 :
1sc in each st (24)
Round 7 :
1sc in the next 5st, 1dec in the next 5st, 1sc in the next 7st, 1dec (18)
Round 8 :
1sc in the next 1st, 1dec x 6 (12)
Info :
Change to blue color.
Round 9 :
1sc in each st (12)
Round 10 :
Working behind the ch. 1sc in each st (12)
Round 11-17 :
1sc in each st (12)
Info :
First leg: fasten off and cut yarn. For the second leg: don't cut the yarn, you'll connect it to the other leg and start the body. Stuff the legs with fiber fill.
— Luigi — Body :
Info :
Keep using blue color.
Round 1 :
1sc in the next 11st (1 leg), 1sc in the next 12st of the other leg, 1sc in the next 1st (24)
Round 2 :
1sc, 1inc x 8 (36)
Round 3-6 :
1sc in each st (36)
Round 7 :
1sc in the next 4st, 1dec x 6 (30)
Round 8 :
1sc in each st (30)
Info :
Change to green color.
Round 9 :
Working at the back ch. 1sc in the next 3st, 1dec x 6 (24)
Round 10-11 :
1sc in each st (24)
Round 12 :
1sc in the next 1st, 1dec x 6 (16)
Info :
Don't cut the yarn, we'll begin crocheting the head, CHANGE to peach color.
— Luigi — Head :
Round 1 :
1sc in each st (16)
Round 2 :
1sc in the next 1st,1inc x 8 (24)
Info :
Stuff the body with fiber fill up to the neck.
Round 3 :
1sc in the next 2st, 1inc x 8 (32)
Round 4 :
1sc in the next 3st, 1inc x 8 (40)
Round 5 :
1sc in the next 5st, 1sc and 1inc x 7, 1sc in the next 5st, 1sc and 1inc x 7, 1inc in the next 2st (56)
Round 6 :
1sc in the next 55st, 1inc in next 1st (57)
Round 7-11 :
1sc in each st (57)
Round 12 :
1sc in the next 17st, 1dec x 3 (54)
Round 13-20 :
1sc in each st (54)
Info :
It's time you add the safety eyes, I place them in the 9-10 round with 8st between them. Make sure to place them centered at the front of the head.
Round 21 :
1sc in the next 7st, 1dec x 6 (48)
Round 22 :
1sc in the next 6st, 1dec x 6 (42)
Round 23 :
1sc in the next 5st, 1dec x 6 (36)
Round 24 :
1sc in the next 4st, 1dec x 6 (30)
Round 25 :
1sc in the next 3st, 1dec x 6 (24)
Info :
Start stuffing the head.
Round 26 :
1sc in the next 2st, 1dec x 6 (18)
Round 27 :
1sc in the next 1st, 1dec x 6 (12)
Round 28 :
1dec in the next 6st (6)
Info :
Make sure the head is stuffed and firm before closing it up. Fasten off and hide the end.
— Luigi — Arms (make 2) :
Round 2 :
2sc in each st (12)
Round 3-5 :
1sc in each st (12)
Round 6 :
1sc in the next 1st, 1dec x 6 (8)
Round 7 :
Working on the front ch. 1sc in each st (8)
Info :
Change to green color.
Round 8 :
Working at the back ch from Round 7. 1sc in each st (8)
Round 9-15 :
1sc in each st (8)
Info :
Finish with 1sl st. Break the yarn and leave a long tail to sew the arms to the body. Only stuff the hand area.
— Luigi — Ears (Make 2) :
Round 2 :
2sc in each st (12)
Round 3 :
1sc in each st (12)
Info :
Finish with a sl st and leave long tail to sew to the head. Don't stuff the ears.
— Luigi — Moustache :
Info :
Using dark brown color. Close it and pass the tail through the middle of the moustache to sew to the face.
Round 2 :
1sc in the next 1st, 1inc x 2 (6)
Round 3 :
1sc in the next 2st, 1inc x 2 (8)
Round 4 :
1sc in the next 3st, 1inc x 2 (10)
Round 5 :
1sc in each st (10)
Round 6 :
1sc in the next 3st, 1dec x 2 (8)
Round 7 :
1sc in the next 2st, 1dec x 2 (6)
Round 8 :
1sc in the next 2st, 1inc x 2 (8)
Round 9 :
1sc in the next 3st, 1inc x 2 (10)
Round 10 :
1sc in each st (10)
Round 11 :
1sc in the next 3st, 1dec x 2 (8)
Round 12 :
1sc in the next 2st, 1dec x 2 (6)
Round 13 :
1sc in the next 1st, 1dec x 2 (4)
Info :
Close it and pass the tail through the middle of the moustache to sew to the face.
— Luigi — Nose :
Round 2 :
2sc in each st (12)
Round 3 :
1sc in the next 1st, 1inc x 6 (18)
Round 4-5 :
1sc in each st (18)
Round 6 :
1sc in the next 1st, 1dec x 6 (12)
Info :
Finish with a sl st. Leave long tail to sew to the face. You can stuff the nose or wait until sewed to the face.
— Luigi — Overall Buttons :
Round 1 :
Magic Ring (4), 1sl st.
Info :
Leave long tail to sew to the overall.
— Luigi — Hair :
Info :
Using dark brown color.
Round 2 :
1inc in each st (14)
Round 3 :
1sc in the next 1st, 1inc x 7 (21)
Round 4 :
1sc in the next 2st, 1inc x 7 (28)
Round 5 :
1sc in the next 3st, 1inc x 7 (35)
Round 6 :
1sc in the next 4st, 1inc x 7 (42)
Round 7 :
1sc in the next 5st, 1inc x 7 (49)
Round 8 :
1sc in the next 6st, 1inc x 7 (56)
Round 9 :
1sc in the next 27st, 1inc x 2 (58)
Round 10-15 :
1sc in each st (58)
Round 16 :
- 1sc in the next 1st, 8ch, turn and start at the 2ch from the hook, 1hdc in the next 7st and finish with 1sl st (sideburn). - 1sc in the next 1st, 2dc in the next 1st, 1sc in the next 1st x 6 - 1sc in the next 1st, 8ch, turn and start at the 2ch from the hook, 1hdc in the next 7st and finish with 1sl st (sideburn). - 1sc in the next 37st.
Info :
In each row you'll make 1ch, turn and start at the 2ch from your hook, unless specified otherwise.
Row 17 :
1dec, 1sc in the next 33st, 1dec (35)
Row 18 :
1dec, 1sc in the next 31st, 1dec (33)
Row 19 :
1sc in the next 1st, 2dc in the next 1st, 1sc in the next 1st x 11
Info :
Finish with 1sl st and leave long tail to sew to the head.
— Luigi — Cap :
Round 2 :
1inc in each st (14)
Round 3 :
1sc in the next 1st, 1inc x 7 (21)
Round 4 :
1sc in the next 2st, 1inc x 7 (28)
Round 5 :
1sc in the next 3st, 1inc x 7 (35)
Round 6 :
1sc in the next 4st, 1inc x 7 (42)
Round 7 :
1sc in the next 5st, 1inc x 7 (49)
Round 8 :
1sc in the next 6st, 1inc x 7 (56)
Round 9 :
1sc in the next 7st, 1inc x 7 (63)
Round 10-19 :
1sc in each st (63)
Row 20 :
Working in the front ch. 1sc in the next 18st (18)
Row 21 :
1sc in each st (18)
Row 22 :
1dec, 1sc in the next 14st, 1dec (16)
Row 23 :
1sc in each st (16)
Row 24 :
1dec, 1sc in the next 12st, 1dec (14)
Info :
Make your way through the cap with 1sl st. Fasten off and hide the end.
— Luigi — Letter on cap :
Round 1 :
Magic Ring (6), 1sl st and 1ch.
Round 2 :
Start in the same st. 1inc in each st (12), finish with a sl st and leave long tail to sew to the cap.
Info :
Embroider a letter L on the circle with green color. The white circle can be sewed to the cap (use the photo as guidance) or you can glue it.
This Mario Bros set brings a bit of video game nostalgia to your crochet hook. These small amigurumi characters are perfect as handmade gifts or a cute shelf display, and the clear step-by-step rounds make them fun to make. 🧶 Make a set for a friend or craft a whole crew to brighten your day! ✨