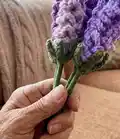
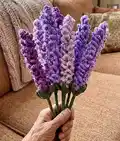
🧢 Beautiful ✨ Detailed πŸ’ Adorable

Lavender Pattern

Lavender Pattern
3.9β˜… Rating
2-3 Hours Time Needed
1.2K Made This
βœ‚οΈ

Beginner Friendly Level

Perfect for those just starting their crochet journey, with clear instructions and simple techniques

⏱️

Bite-Sized Project

Finishes in 2-4 hoursβ€”perfect for an afternoon of creative relaxation.

🏑

Cozy Accent

A warm touch for your space that transforms ordinary corners into inviting nooks filled with handmade charm.

About This Lavender Pattern

This pattern teaches you how to crochet realistic-looking lavender stalks with optional leaves and assemble them onto floral stems. It uses Weight 4 yarn and simple stitches like chains, treble, slip stitch and half double crochet. The instructions include step-by-step notes for creating lavender spikes, optional leaves, and a clear assembly guide using floral wire or wooden skewers.
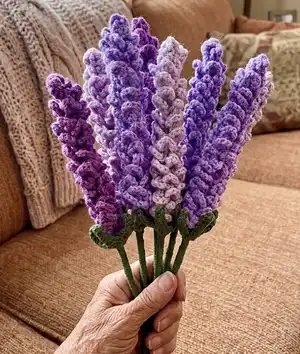
Lavender Pattern crochet pattern - detailed view of completed project

Perfect for beginners with basic crochet knowledge, the pattern includes helpful photos and tips. Make individual sprigs to arrange into bouquets, wrap as gifts, or use as long-lasting decor for your home.

Why You'll Love This Lavender Pattern

I absolutely love this pattern because it turns simple crochet stitches into a beautiful, lifelike lavender bouquet you can keep forever. I love how fast it comes together yet still looks detailed and delicate. I enjoy offering a project that beginners can complete with confidence while still leaving room for creative customization. Making these always brightens my workspace and they make wonderful gifts that feel handmade and thoughtful.

Lavender Pattern step 1 - construction progress Lavender Pattern step 2 - assembly progress Lavender Pattern step 3 - details and accessories Lavender Pattern step 4 - final assembly and finishing

Switch Things Up

I love experimenting with color variations; try pale lilac, dusty mauve, or deep violet to create a mixed bouquet that looks naturally variegated.

I often change yarn weight and hook size to make miniature or oversized lavender β€” using a finer yarn with a smaller hook creates tiny sprigs perfect for miniatures.

I like to add embroidered or felt details at the base for a more finished look, such as tiny buds or a wrapped twine collar.

I sometimes use floral tape over the wrapped yarn for a cleaner, florist-style stem finish that looks polished in bouquets.

I recommend trying wooden skewers as an easy alternative to floral wire if you want stiffer stems without buying specialty supplies.

I enjoy combining these lavender sprigs with faux eucalyptus or other crocheted leaves to make fuller arrangements and add texture.

I sometimes glue a small bead or button at the very top before attaching the lavender to add a subtle weight and help anchoring the spikes.

I like to twist multiple lavender stalks together for a thicker, more dramatic stem that reads well in a vase from a distance.

I recommend experimenting with different lengths by varying the starting chain so you can create tiered bouquets with a natural, cascading shape.

I also add a small scent sachet or a drop of essential oil near the base to give the bouquet a light lavender aroma and enhance the sensory gift experience.

Common Mistakes & How to Fix Them

βœ— Choosing a thicker yarn than recommended will make the lavender look chunky and lose detail; use a Weight 4 yarn as suggested to maintain the delicate loops and texture. βœ— Not leaving the magic ring center hole large enough will prevent the floral wire from fitting through; pull the MR tail tightly but leave the hole big enough for your wire to pass. βœ— Skipping the note about chain length will create lavender that is too long or too short; adjust the initial chain (Ch 63 suggested) to change the finished lavender length intentionally. βœ— Applying too much hot glue when attaching yarn to the wire can cause lumps or visible glue spots; use small amounts and press the yarn carefully in place until set. βœ— Forgetting to wind the green yarn tightly around the floral wire can cause the yarn to slip; twist and wrap the yarn securely along the full length before trimming and gluing. βœ— Not checking which side of your work is the right side before inserting the stem can make the leaves curl the wrong way; always orient the correct side up so leaves curl upwards and inwards.
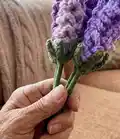
Lavender Pattern

Create a charming bouquet of crocheted lavender sprigs with this easy-to-follow pattern. You will make delicate lavender stalks and optional leaves using Weight 4 yarn and basic stitches. The pattern is designed to be approachable and quick, perfect for gifting or home decor. Follow the step-by-step instructions for assembly and finishing to achieve a realistic lavender look.

Beginner Friendly 2-3 Hours

Materials Needed for Lavender Pattern

β€” Main Fabric

  • 01
    Weight 4 acrylic yarn (Worsted/#4) - Purple (main color) - quantity as desired for multiple sprigs
  • 02
    Weight 4 acrylic yarn (Worsted/#4) - Green (for stems and leaves) - quantity for wrapping stems and optional leaves
  • 03
    Recommended brands: Big Twist Value or Red Heart Super Saver (use similar worsted weight yarn)
  • 04
    Floral wire stems (2mm, 15" long) OR wooden skewers if you do not have floral wire stems
  • 05
    Ribbon and decorative paper or mesh for bouquet finishing

β€” Tools Required

  • 01
    Crochet hook size 4.0mm
  • 02
    Darning needle (yarn needle)
  • 03
    Scissors
  • 04
    Hot glue and hot glue gun
  • 05
    Floral wire stems (2mm, 15" long) or wooden skewers as alternatives
  • 06
    Ribbon for bouquet finishing
  • 07
    Decorative paper and mesh for wrapping bouquet

Progress Tracker

0% Complete

β€” Lavender Pattern :

Step 1 :

Ch 63*

Step 2 :

In the fourth chain from the hook, place 4 TR, ch 3, sl st to the same ch you started with.

Step 3 :

Sl st to the next ch. [Ch 7. Sl st back to the same ch you started with. Sl st to the next stitch.] Repeat [_] down the entire length of your chain.

Step 4 :

FO once you reach the last ch. Leave a 6" tail. Using a darning needle, weave in the end.

Info :

* The length of your chain will alter the length of your lavender. If you want a shorter lavender, chain fewer stitches.

β€” Lavender Leaf :

Info :

**OPTIONAL** In green:

Step 1 :

Place 5 HDC in a MR. After the fifth HDC, sl st to the top of your first HDC to form a ring. Pull the end of the MR tail tightly to close the circle. Make sure to leave the center hole large enough for your floral wire to fit through.

Step 2 :

Ch 6. Working down the chain, 4 sl st, 1 sc in the last chain. Sl st to the next stitch from the MR. Repeat this process until you have 5 leaves. FO and leave a tail of a few inches. Using a darning needle, weave in the ends.

β€” Lavender Assembly :

Step 1 :

Cut your floral wire to your desired length.

Step 2 :

Put a small amount of hot glue on one end of the floral wire. Before the glue dries, place your green yarn on the glue to attach it.

Step 3 :

Twist the floral wire to wind the green yarn around the entire length of the wire.

Step 4 :

Place a small amount of hot glue on the other end of the wire, cut your green yarn, and glue it down.

Step 5 :

Place a small amount of hot glue on the end of the lavender where you made the 4 treble crochet stitches. Attach the lavender to the end of the floral wire.

Step 6 :

Wind the lavender around the floral wire. Make sure the chain loops face outwards. Once you reach the end of the lavender, glue the end down to the floral to secure it.

Step 7 :

With the correct side of your work facing upwards, insert the stem through the center of the magic ring. Make sure the correct side faces upwards so the leaves curl upwards and inwards.

Step 8 :

Place a small amount of hot glue in a circle around the MR. Slide the leaf upwards to the bottom of the lavender stalk to glue it in place.

Assembly Instructions

  • Cut floral wire stems to your desired length before wrapping with yarn to prevent uneven lengths in your bouquet.
  • Attach a small dab of hot glue to one end of the floral wire and place green yarn on the glue to secure the starting point; twist and wrap the yarn down the length of the wire.
  • Glue the end of the wrapped yarn securely and trim any excess to create a neat stem.
  • Apply a small amount of hot glue to the end of the lavender spike (where the 4 TR were made) and attach it to the end of the floral wire; press until set.
  • Wind the lavender spray around the floral wire with the chain loops facing outwards and glue the tail end down to secure the lavender in place.
  • If using leaves, slide the leaf up around the magic ring and glue in a circle around the MR so the leaf sits at the base of the lavender stalk.

Important Notes

  • πŸ’‘This pattern is written in US crochet terminology; confirm your stitch definitions before starting.
  • πŸ’‘The length of your initial chain will determine the final length of each lavender sprig, so chain fewer stitches for shorter stalks.
  • πŸ’‘Leave the center hole of the magic ring large enough for floral wire to pass through easily to make assembly simpler.
  • πŸ’‘Use small amounts of hot glue when attaching yarn or leaves to avoid visible glue spots and lumps.

This delightful Lavender Pattern helps you create long-lasting floral decor you can gift or display with pride.🌿 Make bouquets, single stems, or decorative bunches to brighten any room and celebrate handmade charm.πŸ’œ Each sprig is quick to make and full of texture for a realistic look.🧢

You ask,

we answer.

FAQs

What size will the finished piece be?

The length of each lavender sprig depends on your starting chain; Ch 63 produces a long stalk, but you can chain fewer stitches for shorter sprigs.

Can I use different yarn weights for this pattern?

You can use different yarn weights, but using a thicker yarn will make the lavender bulkier and lose some of the delicate loop details; the pattern recommends Weight 4 yarn.

Do I need prior crochet experience for this pattern?

This pattern is beginner friendly for crocheters who know basic stitches such as chain, treble, slip stitch, and half double crochet.

How long does this project typically take to complete?

Most crafters finish individual lavender sprigs in a short session; making a bouquet of multiple stems typically takes around 2-3 hours depending on experience and number of sprigs.