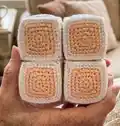
🧢 Beautiful ✨ Detailed πŸ’ Adorable

Infinity Cube Amigurumi Pattern

Infinity Cube Amigurumi Pattern
4.7β˜… Rating
5-7 Hours Time Needed
4.1K Made This
βœ‚οΈ

Intermediate Level

Ideal for those with basic crochet experience, featuring slightly more advanced stitches and techniques to expand your skills.

⏱️

Weekend Treat

Takes 5-7 hours, making it an enjoyable project to finish over a couple of days.

🧸

Cute Companion

An adorable friend to cherish, handcrafted with love to bring comfort and joy for years to come.

About This Infinity Cube Amigurumi Pattern

This pattern teaches you how to crochet an Infinity Cube fidget toy made from 48 small squares assembled into 8 soft cubes. It uses simple stitches like single crochet and half double crochet, with a special inc3 corner increase. Photos and assembly diagrams guide you through joining squares, stuffing, and connecting cubes to make a fully functional twistable toy.
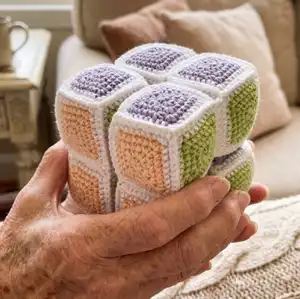
Infinity Cube Amigurumi Pattern crochet pattern - detailed view of completed project

The finished toy measures approximately 10 cm using the recommended materials and hook. Pattern is written in US crochet terms and includes a materials list, abbreviations, and step-by-step assembly notes.

Why You'll Love This Infinity Cube Amigurumi Pattern

I absolutely love this pattern because it turns simple squares into a surprising, interactive toy that both children and adults enjoy. I enjoy how the color layout creates a neat visual rhythm as you fold and twist the cube. The assembly stage is satisfying β€” stitching squares into cubes and watching the fidget mechanism come to life is always rewarding. It is also a perfect project for practicing consistent tension and neat finishing, which makes each cube look professional and tidy. Finally, I appreciate that this toy is practical and playful: it encourages fine motor skills and quiet focus.

Infinity Cube Amigurumi Pattern step 1 - construction progress Infinity Cube Amigurumi Pattern step 2 - assembly progress Infinity Cube Amigurumi Pattern step 3 - details and accessories Infinity Cube Amigurumi Pattern step 4 - final assembly and finishing

Switch Things Up

I love how easy it is to customize the color palette for a different look; try pastel tones for a softer baby-friendly cube or bold contrasting colors for a high-impact fidget toy.

Want a mini keychain version? I often make smaller squares with thinner yarn and a 1.5mm hook to create tiny cubes suitable for bag charms.

If you'd like a chunkier cube, use a bulkier yarn and a larger hook; the cube becomes more tactile and squishy for sensory play.

I sometimes embroider numbers or shapes on the square faces before assembling to create an educational counting or matching toy for toddlers.

Try varying the border color on each square so seams form a subtle pattern when cubes are joined β€” this gives a mosaic effect when folded.

I like to add a loop of ribbon inside one seam as a pull tab for easier handling by small hands; sew it securely and hide the ends.

For a machine-washable version, use a washable cotton yarn and secure all seams with extra reinforcing stitches, and use polyester stuffing that is safe for laundering.

To make the cube quieter, add a small piece of fleece inside before stuffing to muffle crinkling and make the toy softer to squeeze.

If you prefer no-sew assembly, you can join squares with surface slip stitches and hide tails carefully, but I recommend sewing for maximum durability.

I often experiment with different corner increases β€” keeping inc3 but substituting a different middle stitch (e.g., DC) will change the face curvature and give a new look.

For a themed set, coordinate colors to match nursery decor or gift recipient preferences β€” alternating two colors across the 48 squares creates a striking striped effect.

Finally, I sometimes add tiny embroidered eyes on one face to turn a cube into a playful character while keeping the twisting function intact.

Common Mistakes & How to Fix Them

βœ— Skipping the incremental stitch counts when making the square corners can distort the shape; always follow inc3 placement exactly and count stitches after each round to keep the square even. βœ— Stuffing the cubes too tightly will deform the cube faces and ruin the twisting action; stuff lightly with small amounts and adjust shape by hand as you go to maintain soft, even edges. βœ— Not hiding or securing ends before working the white border can leave visible tails; fasten off and weave ends into the wrong side or hide them when crocheting the edging row in white. βœ— Joining squares carelessly will leave weak seams and misaligned faces; sew with a stitch-to-stitch seam in the white sc row, pin or align pieces before stitching, and use small, even stitches for strength.
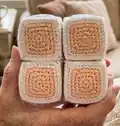
Infinity Cube Amigurumi Pattern

Make a tactile, twistable Infinity Cube fidget toy with this colorful crochet pattern. You will create 48 small squares assembled into 8 soft cubes that fold and turn for playful sensory fun. The pattern uses basic stitches and clear assembly photos so you can follow along step by step. Perfect as a handmade gift or a calming toy to keep on your desk.

Intermediate 5-7 Hours

Materials Needed for Infinity Cube Amigurumi Pattern

β€” Main Fabric

  • 01
    YarnArt Jeans 75 (blue) - small amount for faces
  • 02
    YarnArt Jeans 72 (purple) - small amount for faces
  • 03
    YarnArt Jeans 53 (light green) - small amount for faces
  • 04
    YarnArt Jeans 23 (carrot) - small amount for faces
  • 05
    YarnArt Jeans 88 (yellow) - small amount for faces
  • 06
    YarnArt Jeans 73 (peach) - small amount for faces
  • 07
    Alize Cotton Gold 55 (white) - for edging and seams
  • 08
    Holofiber filler (polyester stuffing) for cubes

β€” Tools Required

  • 01
    Crochet hook No. 2
  • 02
    Holofiber filler (polyester stuffing)
  • 03
    Sewing needle for finishing
  • 04
    Scissors

Progress Tracker

0% Complete

β€” Notes :

Info :

You can use any yarn and a suitable hook. If you work with other colors than indicated in the pattern, I would recommend you to write down which color you use and which color you are replacing with. The size of the finished toy from the indicated materials is ~10 cm. Pattern is written in US crochet terms.

β€” Abbreviations :

Infos :

ar - amigurumi ring. sc - single crochet. hdc - half double crochet. inc3 - increase (1 sc, 1 hdc, 1 sc)*in one stitch. ch - chain. sl st - slip stitch. (...) -the number in brackets at the end of the row means the number of stitches in the row. (...) *-repeat n times.

β€” Materials and tools :

Info :

YarnArt Jeans 75 (blue). YarnArt Jeans 72 (purple). YarnArt Jeans 53 (light green). YarnArt Jeans 23 (carrot). YarnArt Jeans 88 (yellow). YarnArt Jeans 73 (peach). Alize Cotton Gold 55 (white). Crochet hook β„– 2. Holofiber filler. Sewing needle. Scissors.

β€” Square :

Info :

Note! Inc3 - (1 sc, 1 hdc, 1 sc)*in one stitch. All inc3 are in the corners of the square. In the last row (when you work along the edge of the square with white yarn): inc3 - 3 sc in one stitch. Make 8 squares of each color. In total, you should have 48 squares.

Round 1 :

7 sc in ar, sl st, ch (8)

Round 2 :

inc3 in the next stitch (count ch as sc when you count stitches in the rows), (sc, inc3)*3, sl st in ch of the beginning of the row, ch (16)

Round 3 :

inc3 in the next stitch, (3 sc, inc3)*3, 2 sc, sl st in ch of the beginning of the row, ch (24)

Round 4 :

inc3 in the next stitch, (5 sc, inc3)*3, 4 sc, sl st in ch of the beginning of the row (32)

Info :

Fasten off, cut the thread. Hide the end of the thread when you work along the edge of the square with white yarn.

Round 5 :

Attach a white thread to any of the sides of the square and work along the edge of the square with sc, make inc3 in the corners of the square (3 sc (!) in one stitch). Finish with a needle (see photo) and fasten the thread from the inside. As a result - on the sides of the square you should have (7 sc + 3sc (on the tops))*4 (40)

β€” Cube assembly :

Info :

Now you need to make 8 cubes. Work with sc to connect two squares. When you work in the corners that have already been connected, make addition sl st through sc in the corner to "sharp" the corner. Fasten the thread tails and hide them inside of the cube.

Cube making scheme :

Layout for one cube: top - peach. Middle row left to right - light green, purple, carrot, blue (purple is center). Bottom - yellow. Arrange faces as shown in the diagram so colors align when folded into a cube.

Info :

When joining two squares use sc through both loops of both pieces. For corners that already have connections, make an additional sl st through the sc in the corner to make the corner sharp. Hide ends inside the cube.

Info :

When you have one side left open, fill the cube with holofiber. Do not fill tightly (this is important!!!) in order not to deform the cube. After the cube is assembled, give the part the correct shape with your hands.

β€” Cubes connection :

Info :

Make 2 parts, each of them has 4 cubes.

Part 1 :

Assemble 4 cubes as shown in the photo. The faces of the same color of all the cubes are directed in the same direction (the photo is signed in which direction and which color). The places where the cubes are sewed together are shown by dashes and arrows. Sew with simple seam "stitch to stitch" in sc of the white yarn row.

Part 2 :

Assemble 4 cubes for the second part in the same way ensuring the faces of the same color are directed in the same orientation (photos show which face is up or down for each color). At this stage, we do not sew anything between the two parts.

Info :

Now, assemble part 1 and part 2, as in the photo below. The side faces of the same color of all the cubes are directed in the same direction (in the photo it is signed, in which direction which color). The color of the upper and lower faces is the same. At this stage, we do not sew anything.

Info :

At the final stage, we need to turn the toy 180' (two parts at the same time) so that the upper faces are at the bottom. Check the photo below. Sew in places marked with a stroke.

β€” Finishing :

Info :

Your cube is almost ready! Now, to make your cube more dynamic, I advise you to steam it with an iron. Pass the iron along all the faces, giving the cube the correct shape (do not press the iron too much, it can deform the side faces). Pay special attention to the seams between the cubes, apply steam to them several times to make them soft, to make easy to play with the cube.

Info :

Done! Now you can twist it, fold it, turn it! And also - develop imagination, fine motor skills, study colors and shapes with your child. Or just get away from the outside world and calm down☺ I hope you enjoyed the process of creating this mysterious toy! Happy crocheting!

Assembly Instructions

  • Join two colored squares with single crochet through both pieces to create the cube panels, aligning colors exactly and hiding thread tails inside.
  • When three sides of a cube are joined and one side is left open, lightly stuff the cube with holofiber and close the final side, shaping the cube by hand.
  • Sew four completed cubes together to make Part 1 and sew another four to make Part 2, ensuring faces of the same color are directed the same way for both parts.
  • Turn both parts 180 degrees together so the upper faces become the bottom, then sew the two parts together at the marked seams using a stitch-to-stitch seam in the white sc row.
  • After assembly, lightly steam the cube with an iron (do not press hard) to soften seams and shape faces; apply steam to seams multiple times as needed.

Important Notes

  • πŸ’‘Do not overstuff cubes β€” stuffing too tightly will deform faces and interfere with the twisting mechanism.
  • πŸ’‘Hide and secure ends when working the white border to ensure clean seams and avoid visible tails on the finished cube.
  • πŸ’‘Align colors and face orientation for all cubes before sewing parts together so the finished toy folds and operates correctly.
  • πŸ’‘Use small, even stitches when sewing cubes together and sew in the sc row of the white edging for the strongest seam.

This delightful Infinity Cube is a playful handmade fidget toy that folds, twists, and soothes. It combines bright faces and soft stuffing to create a satisfying tactile experience. Perfect as a unique gift or a calming desk companion. 🧢✨

You ask,

we answer.

FAQs

What size will the finished piece be?

The finished toy measures approximately 10 cm tall when using the recommended yarn and crochet hook No. 2.

Can I use different yarn weights for this pattern?

Yes, you can use different yarn weights, but that will change the final size and the amount of stuffing required; adjust the hook size accordingly to keep the fabric neat.

Do I need prior crochet experience for this pattern?

This pattern is rated intermediate and uses basic stitches like sc and hdc plus assembly techniques, so familiarity with circular work and simple seaming is recommended.

How should I sew the cubes together for strength?

Sew with a stitch-to-stitch seam through the white sc edging row using a matching white yarn; small, even stitches will give a secure, neat seam.