🧢 Beautiful ✨ Detailed πŸ’ Adorable

Hermione Granger Amigurumi Pattern

Hermione Granger Amigurumi Pattern
4.0β˜… Rating
5-7 Hours Time Needed
3.7K Made This
βœ‚οΈ

Intermediate Level

Ideal for those with basic crochet experience, featuring slightly more advanced stitches and techniques to expand your skills.

⏱️

Weekend Treat

Takes 5-7 hours, making it an enjoyable project to finish over a couple of days.

🧸

Cute Companion

An adorable friend to cherish, handcrafted with love to bring comfort and joy for years to come.

About This Hermione Granger Amigurumi Pattern

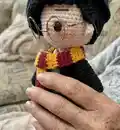
This pattern creates a small Hermione Granger amigurumi complete with school robe, scarf, book and curly hair details. You will make separate pieces (legs, body, head, arms, jacket and accessories) and assemble them for a finished character. It features simple shaping, front/back loop work for the skirt and hair strands applied as individual curls.

Hermione Granger Amigurumi Pattern crochet pattern - detailed view of completed project

Perfect for crafters who enjoy character details and sewing parts together. The instructions include material, abbreviations and clear round-by-round steps for accurate results.

Why You'll Love This Hermione Granger Amigurumi Pattern

I absolutely love this pattern because it brings a beloved character to life with small, thoughtful details like the striped scarf and tiny book. I enjoy the fun of working hair strands individually to create the curly hairstyle that really defines Hermione. Sewing the jacket and arranging the arms is satisfying and gives the doll personality. The pattern balances shaping and simple repetition, so I always feel accomplished finishing one in a weekend.

Hermione Granger Amigurumi Pattern step 1 - construction progress Hermione Granger Amigurumi Pattern step 2 - assembly progress Hermione Granger Amigurumi Pattern step 3 - details and accessories Hermione Granger Amigurumi Pattern step 4 - final assembly and finishing

Switch Things Up

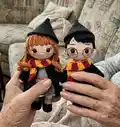
I love experimenting with colors for a unique Hermione: try soft pastels for a whimsical school outfit or bold Gryffindor shades for a faithful look.

You can change the yarn weight and hook size to make the doll larger or smaller; use bulky yarn for a cuddly version and fine thread for a miniature keychain.

I often swap safety eyes for embroidered eyes to give a softer, child-friendly finish β€” this also makes the doll safer for little ones.

Try adding wire to the arms and legs for posability if you want a display piece that can be posed holding a book or wand.

Customize the scarf length and striping by changing the number of rounds per color to create longer or shorter scarves with different patterns.

For different hairstyles, adjust the number and length of hair strands or use boucle yarn for a curly, textured look without knotting individual strands.

Add tiny accessories like a crocheted wand, hat or a crocheted house crest to make the character extra special and personalized.

I like embroidering small facial details like eyelashes or freckles to change the character's expression and personality.

Make an outfit set with alternative jackets, skirts and ties so you can dress your amigurumi for different scenes or seasons.

When making multiples, vary eye size, hair color, and scarf patterns to create a whole collection of schoolmates with unique personalities.

Common Mistakes & How to Fix Them

βœ— Skipping stitch markers during rounds will make counting difficult; place a marker at the start of each round to maintain the correct stitch count. βœ— Overstuffing legs or head can distort the shape and make sewing parts awkward; stuff lightly and evenly, adding more stuffing gradually as you shape. βœ— Changing colors without anchoring tails can cause loose ends and messy joins; carry color neatly or weave in ends as you go to secure transitions. βœ— Forgetting to place safety eyes at the recommended rounds results in mispositioned faces; insert safety eyes between rounds 8 and 9 separated by 6 or 7 stitches as instructed.

Hermione Granger Amigurumi Pattern

Make your own Hermione Granger amigurumi with this friendly intermediate crochet pattern. You will work charming details like her school uniform, scarf, and curly hair while learning shaping and attaching small parts. The pattern includes full round-by-round instructions, a materials list, and finishing notes so you can create a special handmade character to gift or display.

Intermediate 5-7 Hours

Materials Needed for Hermione Granger Amigurumi Pattern

β€” Main Fabric

  • 01
    Cotton thread (colour peach) - small amount for body and face
  • 02
    Cotton thread (colour black) - small amount for robe, shoes, and details
  • 03
    Cotton thread (colour yellow) - small amount for scarf stripes and tie
  • 04
    Cotton thread (colour red) - small amount for scarf stripes and tie
  • 05
    Cotton thread (colour dark gray) - small amount for jacket and skirt details
  • 06
    Cotton thread (colour gray) - small amount for skirt and socks
  • 07
    Cotton thread (colour white) - small amount for neck, book pages
  • 08
    Cotton thread (colour brown) - small amount for hair and book cover

β€” Tools Required

  • 01
    Crochet hook (1.10 mm)
  • 02
    Fiberfill for stuffing
  • 03
    Safety eyes (size as preferred)
  • 04
    Tapestry needle for sewing and weaving ends
  • 05
    A button (for accessory/book if desired)
  • 06
    Embroidery threads red and yellow (for tie and details)
  • 07
    Scissors
  • 08
    Stitch markers
  • 09
    Pins for assembly

Progress Tracker

0% Complete

β€” Arms x 2 :

Info :

Start with peach color

Round 1 :

5 sc in a MR (5)

Round 2 :

5 sc (5)

Info :

Change to gray color

Round 3-8 :

5 sc (5)

Info :

Do not stuff. Close with 2 sc.

β€” Legs x 2 :

Info :

With black color

Round 1 :

6 sc in a MR (6)

Round 2 :

6 sc (6)

Info :

Change to gray color

Round 3-4 :

6 sc (6)

Info :

Change to peach color

Round 5-6 :

6 sc (6)

Info :

Stuff lightly. Make 2. Do not cut the thread of second leg. Continue with the body.

β€” Body :

Round 1 :

Continue with peach color: Ch 4, 6 sc (first leg), 4 sc over the ch, 6 sc (second leg) (20)

Round 2 :

20 sc (20)

Round 3 :

7 sc, 1 dec, 8 sc, 1 dec, 1 sc (18)

Info :

Change to gray color.

Round 4 :

6 sc, 1 dec, 8 sc, 1 dec (16)

Round 5 :

BLO; 6 sc (6)

Round 6-7 :

6 sc (6)

Round 8 :

Attaching the arms: 1 sc (body and arm), 5 sc in body only, 2 sc (body and arm), 7 sc in body only, 1 sc (body and arm) (16). Stuff.

Round 9 :

2 sc, 1 dec, [1 dec, 2 sc] x 3 (12)

Info :

Change to peach color.

β€” Cabeza :

Round 1 :

Continue from the body: 2 sc, 1 dec (8)

Round 2 :

Inc x 9 (18)

Round 3 :

1 sc, 1 inc (27)

Round 4 :

2 sc, 1 inc (36)

Round 5 :

3 sc, 1 inc (45)

Round 6-10 :

45 sc (45)

Info :

SAFETY EYES: between rounds 8 and 9, separated by 6 or 7 stitches.

Round 11 :

7 sc, 1 dec (40)

Round 12 :

8 sc, 1 dec (36)

Round 13 :

4 sc, 1 dec (30)

Round 14 :

3 sc, 1 dec (24)

Round 15 :

2 sc, 1 dec (18)

Round 16 :

1 sc, 1 dec (12)

Round 17 :

6 dec (6)

Info :

--Embroider the eyebrows.

β€” Ears :

Round 1 :

3 sc in a MR (3). Sew them between rounds 7 and 9.

β€” Hair :

Info :

With brown color

Round 1 :

6 sc in a MR (6)

Round 2 :

6 inc (12)

Round 3 :

BLO: 1 sc, 1 inc (18)

Info :

Now we are working each strand over the stitches of round 3. When you finish each strand move to the next stitch of the round 3 with a slst.

Round 1-5 :

Ch 6: from the third ch: 4 hdc (4)

Round 6-18 :

Ch 18: from the second ch: inc of sc x 4, 8 sc, 5 hdc (21)

Info :

Work now in FLO of round 2, the same way:

Round 1-12 :

Ch 12: 12 sc (12)

Info :

Strands 1-5 go on the forehead. The others, covering the head.

β€” Jacket :

Info :

BACK PART x 1: With black color, working in turning rounds, ch1 at the beginning.

Round 1 :

Ch 9: from the second ch, 8 sc (8)

Round 2-10 :

8 sc (8)

Info :

FRONT PART x 2: With black color, working in turning rounds, ch1 at the beginning.

Round 1 :

Ch 4: from the second ch, 3 sc (3)

Round 2-10 :

3 sc (3)

Info :

--Sew the shoulders of the back and the front part. (only 3 stitches on each shoulder) --Sew the side part only 6 stitches (the rest of stitches are the armhole) --Make and edge with sc.

β€” Sleeves :

Info :

Working on the armhole:

Round 1 :

[2 sc, 1 inc] x 3, 1 sc (13)

Round 2-3 :

13 sc (13). Cut.

β€” Book :

Info :

--Brown part x 2: in turning rounds with ch 1 at the beginning:

Round 1 :

Ch 5: 4 sc (4)

Round 2-5 :

4 sc (4). Cut.

Info :

--White part: in turning rounds with ch 1 at the beginning:

Round 1 :

Ch 5: 4 sc (4)

Round 2-10 :

4 sc (4). Cut.

Info :

--Fold in half the white part, put it between both brown parts, sew them finishing the book.

β€” Scarf :

Info :

Start with red color and then change to yellow every other 2 rounds. Working in turning rounds, ch1 at the beginning.

Round 1 :

Ch 3: from the second ch, 2 sc (2)

Round 2 :

2 sc (2). Change to yellow color.

Round 3-4 :

2 sc (2). Change to red color.

Infos :

Continue to round 42 (finishing with red color).

β€” White neck :

Round 1 :

With white color: Ch 18: from the third ch: 1 inc of hdc, 14 sc, 1 inc of hdc (18).

β€” Tie :

Info :

Work with two strands of embroidery threads yellow and 2 red, together.

Round 1 :

Ch 5: from the second ch, 3 sc, inc of 5 hdc, 3 sc on the other side of the ch. Cut.

β€” Skirt :

Info :

Join dark gray color in FLO of round 4 of the body:

Round 1 :

[3 sc, inc] x 4 (20)

Round 2 :

[4 sc, inc] x 4 (24)

Round 3-4 :

24 sc (24). Cut.

β€” Final details :

Info :

--Sew or glue the White neck around the neck of the amigurumi. --Put her the tie.

Assembly Instructions

  • Attach the two legs together and continue with the body as instructed, leaving the thread of the second leg uncut to join seamlessly to the body.
  • Place and insert safety eyes between rounds 8 and 9 of the head, spacing them 6 or 7 stitches apart before stuffing and closing.
  • Attach arms to the body at the positions indicated in Body round 8: sew arm opening to body with 1 sc (body and arm) alignment and secure firmly.
  • Sew the shoulders of the jacket by aligning back and front parts (only 3 stitches on each shoulder) and sew the side parts leaving 6 stitches for the armhole before finishing edges with sc.
  • Sew ears between rounds 7 and 9 on the head and arrange hair strands so that strands 1-5 are placed on the forehead and the remaining strands cover the head.
  • Fold the white book part in half, place it between the two brown parts and sew around the edges to finish the little book accessory.

Important Notes

  • πŸ’‘All the pieces are worked in a spiral unless otherwise indicated, so do not join rounds unless the instructions specify turning rounds.
  • πŸ’‘Use stitch markers to mark the beginning of each round to help keep accurate stitch counts and shaping.
  • πŸ’‘Stuff parts lightly and progressively to maintain correct proportions; overstuffing will distort the join lines and seams.
  • πŸ’‘When changing colors, carry the yarn neatly or weave ends in as you go to avoid long tails and messy joins.

This Hermione Granger amigurumi pattern is crafted to capture charming details like her robe, scarf and curly hair. Create a magical handmade gift that shows off your crochet skills and personality. Perfect for display or for delighting a Harry Potter fan! πŸ§Άβœ¨πŸ“š

You ask,

we answer.

FAQs

What size will the finished piece be?

The finished amigurumi measures approximately 12-15 cm tall when using the recommended cotton thread and 1.10 mm hook; size may vary with yarn and hook.

Can I use different yarn weights for this pattern?

Yes, you can substitute yarn weights but the final size and texture will change; select a suitable hook for your yarn and expect to adjust stitch counts for proportion.

Do I need prior crochet experience for this pattern?

This pattern is rated intermediate, so basic knowledge of single crochet, increases, decreases and working in BLO/FLO is recommended.

How long does this project typically take to complete?

Most crocheters complete this project in 5-7 hours, though time may vary depending on experience, customization, and assembly work.