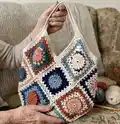
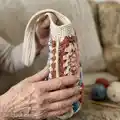
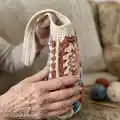
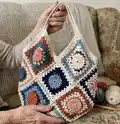
About This Granny shoulder bag Pattern
This pattern creates a soft, slouchy shoulder bag constructed from 13 decorative granny squares worked in rounds. Each square features a popcorn round and layered rounds to form a textured circle-in-square motif in multiple colors. The squares are joined on the diagonal to form the bag shape, with inner edge single crochet rows and crochet handles for a finished look.
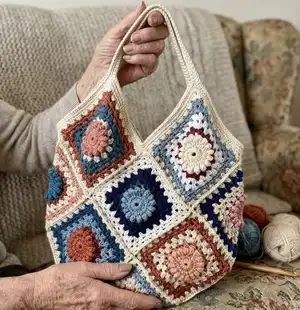
The pattern includes full round-by-round instructions for the granny square, stitch definitions, a joining diagram and finishing steps. Materials and gauge are listed so you can match the sample size or adapt it to your yarn preferences.
Why You'll Love This Granny shoulder bag Pattern
I absolutely love this pattern because it blends classic granny-square construction with playful textured popcorn rounds for a unique look. I enjoy how the diagonal layout gives the bag a modern silhouette that still feels handmade and nostalgic. The pattern allows so much color creativity — I often mix muted and bold shades to create depth. Sewing and joining the squares is satisfying and visual; the finished bag drapes beautifully and is practical for everyday use.
Switch Things Up
I love customizing this project by changing the color palette; try muted pastels for a soft feminine bag or deep jewel tones for a richer look.
I often swap the yarn weight and hook to make larger or smaller versions — bulky yarn and a larger hook create a cozy market tote, while finer yarn makes a delicate purse.
I sometimes replace the chain handle with leather straps for durability and a mixed-material aesthetic; you can buy pre-made handles and sew them on securely.
Adding a sewn fabric lining will stabilize the bag and prevent small items from poking through the granny gaps; consider adding an inside pocket for keys or a phone.
Try substituting the popcorn round with puff stitches or clusters to change the texture while keeping the circular center motif.
I occasionally embroider small motifs or add crocheted flowers to a couple of squares for a personalized embellishment that pops against the neutral joining color.
To make the bag more structured, insert a thin interfacing panel into the lining or crochet a firm base and stitch it to the bottom squares.
If you prefer longer crossbody wear, chain a longer strap or crochet an adjustable strap with button closures to switch between shoulder and crossbody styles.
I recommend experimenting with two-tone squares — use a contrasting color for round 4 or 5 to create a framed effect that changes the visual rhythm across the bag.
For a festival-ready version, add tassels or pom-poms at the bottom corners or use metallic or variegated yarns for occasional sparkle.
You can also adapt the layout: increase the number of squares for a larger tote, or reduce them for a compact clutch; just adjust joining and handle placement accordingly.
Play with the joining technique — try whipstitch or mattress stitch instead of slip-stitch joins if you want an invisible seam and different drape.
Common Mistakes & How to Fix Them
✗ Skipping the magic loop foundation will make the center hole too large; start with a tight magic loop and close it before working round 1.
✗ Not counting popcorns in round 3 can cause mismatched corners later; count each popcorn and mark the start of the round to maintain alignment.
✗ Working popcorns too tightly makes the square pucker; keep popcorns loose enough to allow ch-2 and corner stitches to sit nicely.
✗ Joining squares without matching reverse sides can produce inconsistent texture; place squares with reverse sides matching before slip stitching in the ch-sp for a uniform finish.
✗ Overstretching the handle chains causes handles to sag under weight; use tighter tension and consider adding a lining or an internal cord for reinforcement.