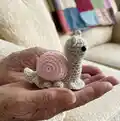
🧢 Beautiful ✨ Detailed πŸ’ Adorable

Garden Snails Amigurumi Pattern

Garden Snails Amigurumi Pattern
4.7β˜… Rating
2-3 Hours Time Needed
1.2K Made This
βœ‚οΈ

Intermediate Level

Ideal for those with basic crochet experience, featuring slightly more advanced stitches and techniques to expand your skills.

⏱️

Bite-Sized Project

Finishes in 2-4 hoursβ€”perfect for an afternoon of creative relaxation.

🎁

Tiny Treasure

Small, sweet, and gift-worthy amigurumi that fits perfectly in the palm of your hand with detailed charm.

About This Garden Snails Amigurumi Pattern

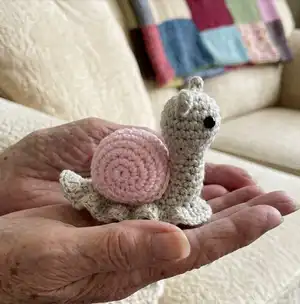
This pattern makes charming little garden snails with a ridged shell and a frilly body skirt. You will work the shell in contrast colour using back loop and 3rd loop ridges for texture. The body is sculpted with antennae and a gathered tail to create a classic snail silhouette.

Garden Snails Amigurumi Pattern crochet pattern - detailed view of completed project

Includes both UK and US term versions of each section to suit your preferred stitch language. Clear assembly and finishing instructions ensure an attractive result every time.

Why You'll Love This Garden Snails Amigurumi Pattern

I absolutely love this pattern because it turns simple stitches into a textured, characterful snail with minimal materials. I enjoy how the shell ridges create a satisfying spiral that looks beautiful from every angle. The pattern is versatile, letting me change colours easily to match any style or season. Sewing the shell to the body and shaping the tail always feels like bringing the character to life, and that moment never gets old.

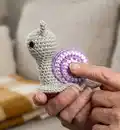
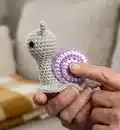
Garden Snails Amigurumi Pattern step 1 - construction progress Garden Snails Amigurumi Pattern step 2 - assembly progress Garden Snails Amigurumi Pattern step 3 - details and accessories Garden Snails Amigurumi Pattern step 4 - final assembly and finishing

Switch Things Up

I love how easy it is to personalise these snails by changing the shell contrast colour, so I often mix and match bright and pastel tones for different effects.

To make a larger snail use a bulkier yarn and a bigger hook; conversely use a finer yarn and smaller hook to create tiny keychain versions.

I often substitute the frill with a scallop or picot edge for a different skirt texture β€” experiment with stitch patterns like shell stitch or puff stitch.

Try embroidering tiny spots or spirals onto the shell for a whimsical look, or add tiny beads for sparkle if making decorative pieces.

For safety-conscious toys, use embroidered eyes rather than thread-through oddment; this keeps a smooth finish and is toddler-friendly.

I sometimes make a set in coordinated colours as gifts, changing only the shell shade to make a matching trio with personality.

If you want posable antennae, consider threading thin craft wire inside the antennae before stuffing them lightly, then secure the base well.

Turn one into a keyring by fastening a sturdy jump ring to the body skirt before closing, or add a little ribbon loop for hanging decorations.

Try using variegated contrast yarn for the shell to produce a lovely random swirl effect without changing colours each row.

I recommend testing a gauge swatch when changing yarns to check the look and adjust stuffing and hook size for the desired firmness and size.

Common Mistakes & How to Fix Them

βœ— Skipping the stitch marker during continuous rounds leads to losing track of the round start; place a marker at the last stitch of each round to maintain correct shaping. βœ— Overstuffing the shell or body causes bulging through the stitches and distorts the shape; stuff gradually and only enough so parts can be squeezed when pinched firmly. βœ— Changing colours mid-stitch will leave a messy join and uneven tension; change colours at the end of a stitch, slip stitch to join and pull the new colour tight. βœ— Not working through the BLO and 3rd loop as instructed removes the ridge texture on the shell; pick up the back loop and third loop exactly as described to create the distinctive ridge pattern. βœ— Pulling yarn too tight on gathering ends will distort the shell or body edges; use running stitches and pull evenly before securing with small stitches to keep shape intact.

Garden Snails Amigurumi Pattern

Make a trio of adorable garden snails using this friendly crochet amigurumi pattern. You will create a textured shell and a sculpted body with antennae and a frilly skirt. The pattern includes both UK and US terms so you can follow your preferred abbreviations. Perfect for gifts, keyrings, or a cute shelf display.

Intermediate 2-3 Hours

Materials Needed for Garden Snails Amigurumi Pattern

β€” Main Fabric

  • 01
    Scheepjes Chunky Monkey Main (Stone 2017) - 20g
  • 02
    Scheepjes Chunky Monkey Contrast (Wild Orchid / Amethyst / Baby Pink) - 10g
  • 03
    Scheepjes Chunky Monkey Black 1002 - oddment for eyes

β€” Tools Required

  • 01
    Hi-Loft quality toy stuffing
  • 02
    4.5mm crochet hook
  • 03
    Wool needle for sewing
  • 04
    Stitch markers
  • 05
    Scissors
  • 06
    Small amount of black yarn or oddment for embroidered eyes

Progress Tracker

0% Complete

β€” Shell (UK Terms) :

Round 1 :

ch2, htr6 into 2nd st from hook (alternatively htr 6sts into magic ring) (6)

Info :

From this point on the shell is worked through the BLO and 3rd LOOP of the st below in order to create the distinctive ridge pattern.

Info :

If you wish to make the shell as a lollipop type swirl change colour after every row, swapping colours up behind work with no sl st joins. Do not change colour mid stitch.

Round 2 :

htrinc x6 (12)

Round 3 :

(htr into next st, htrinc) x6 (18)

Round 4 :

(htr into next 2sts, htrinc) x6 (24)

Round 5-6 :

dc (24) (2 rows)

Round 7 :

(htr into next 2sts, htrdec) x6 (18)

Round 8 :

(htr into next st, htrdec) x6 (12)

Info :

Stuff shell

Round 9 :

htrdec x6 (6)

Info :

F/O leaving a 25cm end

Info :

Using 25cm end, and running sts, thread through front loops of last 6sts and gather tightly. Secure end with a couple of small sts.

β€” Body (UK Terms) :

Round 1 :

ch2, dc6 into 2nd st from hook (alternatively dc 6sts into magic ring) (6)

Round 2 :

inc x2, 1st Antennae: ch6, sl st into 5th and 6th ch from hook, inc x3, 2nd Antennae: ch6, sl st into 5th and 6th ch from hook, inc into last st (12)

Round 3 :

(dc into next st, inc) x6 (18)

Round 4-6 :

dc (18) (3 rows)

Round 7 :

(dc into next st, dec) x6 (12)

Round 8 :

(dc into next 2sts, dec) x3 (9)

Info :

Stuffing throughout, as you work on the next section:

Round 9-26 :

dc (9) (18 rows)

Round 27 :

(dc into next st, dec) x3 (6)

Round 28 :

dc (6)

Info :

Stuff remainder of body.

Info :

F/O leaving a 60cm end

Info :

Using 60cm end, and running sts, thread through front loops of last 6sts and gather tightly. Secure end with a couple of small sts.

Info :

Making sure that the antennae are central to top of head, thread through body and come out 4 rows in front of the tail end.

Info :

Secure end with a couple of small sts being careful not to distort body.

Info :

Pick up the shell and thread through the middle of the outer edge of shell, between the 2 central ridges.

Info :

Come out at the opposite side of shell diameter, making sure that you remain central and on same ridge as previously used.

Info :

Thread end into body at the centre back of neck, 2 rows down from the base of the head. Catch in a single st and then pull tight to create the iconic shape of the snail's body.

Info :

Making sure that the antennae are central at top of head and the shape of the shell has not been distorted, secure end with a couple of small sts.

Info :

Attach the shell to the body along BLO ridge, 1 row out from the centre.

Info :

Secure end with a couple of small sts. Weave end through shell/body and cut flush to finish.

β€” Body Skirt (UK Terms) :

Info :

Place a stitch marker at centre front of body, 8 rows down from the neck.

Round 1 :

Using Main: leaving a 10cm end, sl st into the base of body 1 row down from bottom of shell on the furthest side from you, the base should be facing towards you and the head should be facing left, 1st Side: ch3 and then 3trinc into 1st in every row up to the stitch marker, 2nd Side: turn so you are working down the opposite side and 3trinc into every row, keeping in line with the 1st st down from shell 3trinc until you get to point of tail, 1st Side: turn and 3trinc in every row down 1st side until you are back at the start, sl st to join at top of ch3 to finish.

Info :

F/O leaving a 10cm end. Secure both ends with a couple of small sts before weaving through frill and body. Cut flush to finish.

β€” Features (UK Terms) :

Item Name (Eyes) :

Using black oddment, thread through head 2sts from the centre of face and 1 row down from the antennae. Do 5 small back sts 1 row in depth. Thread through to opposite side of face and repeat. Weave through head and cut flush to finish.

β€” Shell (US Terms) :

Round 1 :

ch2, hdc6 into 2nd st from hook (alternatively hdc 6sts into magic ring) (6)

Info :

From this point on the shell is worked through the BLO and 3rd LOOP of the st below in order to create the distinctive ridge pattern.

Info :

If you wish to make the shell as a lollipop type swirl change colour after every row, swapping colours up behind work with no sl st joins. Do not change colour mid stitch.

Round 2 :

hdcinc x6 (12)

Round 3 :

(hdc into next st, hdcinc) x6 (18)

Round 4 :

(hdc into next 2sts, hdcinc) x6 (24)

Round 5-6 :

sc (24) (2 rows)

Round 7 :

(hdc into next 2sts, hdcdec) x6 (18)

Round 8 :

(hdc into next st, hdcdec) x6 (12)

Info :

Stuff shell

Round 9 :

hdcdec x6 (6)

Info :

F/O leaving a 25cm end

Info :

Using 25cm end, and running sts, thread through front loops of last 6sts and gather tightly. Secure end with a couple of small sts.

β€” Body (US Terms) :

Round 1 :

ch2, sc6 into 2nd st from hook (alternatively sc 6sts into magic ring) (6)

Round 2 :

inc x2, 1st Antennae: ch6, sl st into 5th and 6th ch from hook, inc x3, 2nd Antennae: ch6, sl st into 5th and 6th ch from hook, inc into last st (12)

Round 3 :

(sc into next st, inc) x6 (18)

Round 4-6 :

sc (18) (3 rows)

Round 7 :

(sc into next st, dec) x6 (12)

Round 8 :

(sc into next 2sts, dec) x3 (9)

Info :

Stuffing throughout, as you work on the next section:

Round 9-26 :

sc (9) (18 rows)

Round 27 :

(sc into next st, dec) x3 (6)

Round 28 :

sc (6)

Info :

Stuff remainder of body.

Info :

F/O leaving a 60cm end

Info :

Using 60cm end, and running sts, thread through front loops of last 6sts and gather tightly. Secure end with a couple of small sts.

Info :

Making sure that the antennae are central to top of head, thread through body and come out 4 rows in front of the tail end.

Info :

Secure end with a couple of small sts being careful not to distort body. Pick up the shell and thread through the middle of the outer edge of shell, between the 2 central ridges. Come out at the opposite side of shell diameter, making sure that you remain central and on same ridge as previously used.

Info :

Thread end into body at the centre back of neck, 2 rows down from the base of the head. Catch in a single st and then pull tight to create the iconic shape of the snail's body.

Info :

Making sure that the antennae are central at top of head and the shape of the shell has not been distorted, secure end with a couple of small sts. Attach the shell to the body along BLO ridge, 1 row out from the centre. Secure end with a couple of small sts. Weave end through shell/body and cut flush to finish.

β€” Body Skirt (US Terms) :

Info :

Place a stitch marker at centre front of body, 8 rows down from the neck.

Round 1 :

Using Main: leaving a 10cm end, sl st into the base of body 1 row down from bottom of shell on the furthest side from you, the base should be facing towards you and the head should be facing left, 1st Side: ch3 and then 3dcinc into 1st in every row up to the stitch marker, 2nd Side: turn so you are working down the opposite side and 3dcinc into every row, keeping in line with the 1st st down from shell 3dcinc until you get to point of tail, 1st Side: turn and 3dcinc in every row down 1st side until you are back at the start, sl st to join at top of ch3 to finish.

Info :

F/O leaving a 10cm end. Secure both ends with a couple of small sts before weaving through frill and body. Cut flush to finish.

β€” Features (US Terms) :

Item Name (Eyes) :

Using black oddment, thread through head 2sts from the centre of face and 1 row down from the antennae. Do 5 small back sts 1 row in depth. Thread through to opposite side of face and repeat. Weave through head and cut flush to finish.

Assembly Instructions

  • Pick up the shell and thread through the middle of the outer edge of shell, between the 2 central ridges, then come out at the opposite side of shell diameter to remain central on the same ridge.
  • Thread the shell end into the body at the centre back of the neck, two rows down from the base of the head; catch in a single stitch and pull tight to create the snail body shape before securing with a couple of small stitches.
  • Attach the shell to the body along the BLO ridge, one row out from the centre, sewing evenly so the shell sits centrally on the back.
  • Use the long running stitch end (25cm for shell, 60cm for body) to gather the front loops of the last 6 stitches tightly and secure with a couple of small stitches so the edges are neat.
  • Position the antennae central at the top of the head when threading the 60cm end through the body, ensuring antennae remain aligned and not distorted when finishing.
  • Secure all ends with a couple of small stitches, weave ends through shell/body and cut flush to finish for a clean look.

Important Notes

  • πŸ’‘Unless stated work in continuous rounds marking last stitch of each row with a stitch marker before proceeding with the next.
  • πŸ’‘When stuffing parts make sure that you don’t overstuff them as you don’t want the stuffing to show through when complete; each part should be filled just enough that it can be easily squeezed when pinched firmly.
  • πŸ’‘Where there are multiple repeats the section to be repeated is highlighted in yellow in the original pattern notes.
  • πŸ’‘To change colours, slip stitch to join, change colour (without a knot if 1st time, or by threading up from the back of work), then ch1 and pull 1st colour tight; attach 2nd colour with knot at back if required.
  • πŸ’‘Secure ends with a couple of small stitches being careful not to distort the body or shell shape when finishing.

These little Garden Snails are a delightful pocket-sized project you can finish quickly and gift instantly. They combine simple shaping with a cuddly, textured shell for extra charm. Perfect for craft fairs, keyrings, or a sweet handmade gift. 🐌🧢

You ask,

we answer.

FAQs

What size will the finished piece be?

The finished amigurumi measures approximately 7-10 cm tall depending on yarn tension and how firmly you stuff the body.

Can I use different yarn weights for this pattern?

Yes, you can change yarn weight and hook size to alter the final size, but be aware it will change the stitch counts visually; adjust stuffing and finishing accordingly.

Do I need prior crochet experience for this pattern?

This pattern is rated intermediate and assumes familiarity with increases, decreases, back loop work and reading round-by-round instructions.

How long does this project typically take to complete?

Most crafters complete a single snail in about 2-3 hours, though time will vary by experience, colour changes, and finishing details.