🧶 Beautiful ✨ Detailed 💝 Adorable

Forest Deer Amigurumi Pattern

Forest Deer Amigurumi Pattern
4.1★ Rating
12-15 Hours Time Needed
1.2K Made This
✂️

Intermediate Level

Ideal for those with basic crochet experience, featuring slightly more advanced stitches and techniques to expand your skills.

⏱️

Multi-Day Project

A rewarding 12+ hour journey—perfect for dedicated crafters who love detailed work.

🧸

Cute Companion

An adorable friend to cherish, handcrafted with love to bring comfort and joy for years to come.

About This Forest Deer Amigurumi Pattern

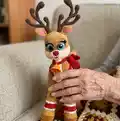
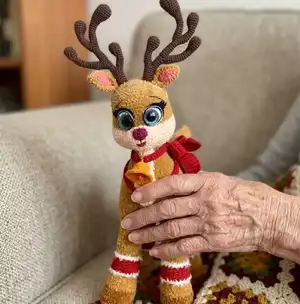
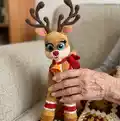
This pattern creates a standing forest deer amigurumi with detailed, photo-illustrated steps and full stitch counts. You will make four legs, join them neatly, shape the body and neck, crochet a defined muzzle and add expressive eyes. Techniques include crocheting in loop stitch velvet yarn, joining multiple pieces and placing safety eyes for a professional finish.

Forest Deer Amigurumi Pattern crochet pattern - detailed view of completed project

Includes a complete materials list with yarn colors and tools, plus specific rounds and assembly tips. Follow the step-by-step rounds and photos to achieve consistent shaping and stable assembly.

Why You'll Love This Forest Deer Amigurumi Pattern

I absolutely love this pattern because it brings a sweet, elegant deer to life using textured velvet yarn that feels luxuriously soft. I enjoy the way the divided legs and joined body create a realistic pose with sturdy construction. The eye assembly and muzzle detailing let you personalize expression, which is always my favorite part. I also love teaching the joining technique — it makes the finished toy much more durable and professional-looking.

Forest Deer Amigurumi Pattern step 1 - construction progress Forest Deer Amigurumi Pattern step 2 - assembly progress Forest Deer Amigurumi Pattern step 3 - details and accessories Forest Deer Amigurumi Pattern step 4 - final assembly and finishing

Switch Things Up

I love how versatile this pattern is for customization; you can easily adjust the colors to create your own unique deer. Try soft pastels for a nursery-friendly version or deeper russet tones for a realistic woodland look.

Want a smaller deer? Use a finer yarn and a smaller hook to create a miniature version perfect for ornaments or keychains. For a chunkier, cuddlier deer, choose bulky velvet yarn and a larger hook.

I often add embroidered freckles, tiny felt patches, or a scarf to give each deer a special personality—small accessories make a big difference. Consider adding a crocheted bell or tiny bow as shown to add charm.

Experiment with eye placement and eyelash shapes to change expression; moving the eyes a stitch or two can make the deer look shy, curious, or surprised.

You can make posable horns by inserting a thin wire frame inside the horns for stability and shaping; wrap the wire with yarn or tape before covering with crochet for safety.

For a festive version, add tiny crocheted garlands or use sparkly lurex yarn accents on the chest and hooves. Metallic thread gives a holiday shimmer without changing the basic construction.

If you prefer embroidered rather than plastic eyes, adapt the eye section by crocheting slightly larger eye pieces and embroidering centers for a softer look suitable for babies.

Change the placement of the white muzzle stripe or use gradient yarn for an ombre body effect to showcase color transitions in a creative way.

I sometimes make coordinated sets—create smaller siblings or a mama and baby pair by altering yarn weight and hook size; pattern repeats scale well across sizes.

Enjoy making small adjustments in stitch counts and increases to tailor the neck length or leg proportions for a personalized silhouette. These small changes let you craft a unique deer every time.

Common Mistakes & How to Fix Them

✗ Skipping stitch markers when joining legs leads to uneven placement; use 8 markers and mark the designated joining points before sewing the legs in place. ✗ Not keeping the working thread position in mind can make rounds difficult to follow; always check photos and place the working thread as shown to maintain correct stitch orientation. ✗ Overstuffing the legs and body creates distortion and bulk in seams; stuff gradually and evenly while shaping, stopping to adjust before closures. ✗ Fastening off too early causes missing tail ends for sewing and shaping; leave long tails for sewing parts together and weave ends securely when assembly is finished.

Forest Deer Amigurumi Pattern

Create an adorable forest deer amigurumi with full step-by-step instructions, clear photos, and complete stitch counts. This pattern guides you through legs, body joining, head shaping, eyes and muzzle with helpful assembly notes. You will learn to join legs into the body and finish expressive eyes for a charming finished toy. Perfect for creating a handmade gift or a cozy decorative companion.

Intermediate 12-15 Hours

Materials Needed for Forest Deer Amigurumi Pattern

— Main Fabric

  • 01
    LaVita Velurex velvet yarn 100 g, 140 m, 10% lurex, 90% polyester, Color 1038 (honey color) - main color, 2.5 skeins
  • 02
    Dolphin Fine Himalaya velvet yarn 100 g, 175 m, 100% polyester, Color 33 (color powder) - small amount for muzzle and breast
  • 03
    Dolphin Fine Himalaya velvet yarn Color 37 (brown color) - 1/3 skein for hooves and foreleg bases
  • 04
    Dolphin Fine Himalaya velvet yarn Color 38 (burgundy color) - small amount for nose
  • 05
    Dolphin Baby Himalaya velvet yarn 100 g, 120 m, 100% polyester, Color 80332 (coral color) - a little for ears
  • 06
    YarnArt Jeans yarn 50 g, 160 m, 55% cotton, 45% acrylic, Color 62 (white) - small amount for eyes detailing
  • 07
    YarnArt Jeans yarn Color 70 (brown) - 1 skein for horns
  • 08
    YarnArt Jeans yarn Color 90 (red) - 1 skein for accessories
  • 09
    YarnArt Jeans yarn Color 53 (black) - a little for eye details and eyelashes
  • 10
    Gazzal Baby Cotton yarn 50 g, 165 m, 40% cotton, 60% acrylic - (used where indicated)
  • 11
    Kamtex mercerized cotton 50 g, 200 m - cotton thread for sewing parts, color powder/brown
  • 12
    YarnArt Mink yarn 50 g, 75 m, 100% polyamide, color 330 (milky) - for small details
  • 13
    Extra small amounts of Color 3416 (orange) for the bell

— Tools Required

  • 01
    Crochet hook size 2.5 mm (US C)
  • 02
    Crochet hook size 1.75 mm (HS 4) for small eye details
  • 03
    Needle for sewing the pieces (thin needle for sewing eyes, thicker needle for ears, and a long needle for needle sculpting)
  • 04
    Scissors
  • 05
    Sewing threads in black and white
  • 06
    Stitch markers (8 recommended for legs joining)
  • 07
    Polyester stuffing (Holofiber)
  • 08
    Black felt for eye lashes
  • 09
    Eyes 20 mm - 2 pcs (blue)
  • 10
    Wire (1 mm) for horn frame, approximately 320 cm (125.98 inches) and tape
  • 11
    Velcro + glue
  • 12
    Pins for assembly
  • 13
    Yarn needle for sewing
  • 14
    Good mood

Progress Tracker

0% Complete

— Forelegs :

Info :

Take Dolphin Fine Himalaya yarn, color 37 (brown color), crochet hook №2.5 (US C).

Round 1 :

make foundation ch8, work 2 sc into the second ch from the hook, 5 sc, work 4 sc into one stitch, turn, along other side of foundation chain crochet 5 sc, 2 sc into one stitch (18)

Round 2 :

2 inc, 5 sc, 4 inc, 5 sc, 2 inc (26)

Round 3 :

(1 sc, 1 inc)*2, 5 sc, (1 sc, 1 inc)*4, 5 sc, (1 sc, 1 inc)*2 (34)

Round 4 :

34 sl sts (34)

Round 5 :

34 sc - crochet in back loops only (34)

Info :

Pay attention, where the working thread is located (see the photo above).

Round 6 :

16 sc, 1 dec, 15 sc, 1 inc (34)

Round 7 :

15 sc, 1 dec, 16 sc, 1 inc (34)

Round 8 :

14 sc, 1 dec, 17 sc, 1 inc (34)

Info :

Next, we crochet yarn LaVita yarn Velurex, color 1038.

Round 9 :

(15 sc, 1 dec)*2 (32) - crochet in back loops only

Round 10 :

32 sc (32)

Round 11 :

(14 sc, 1 dec)*2 (30)

Round 12 :

(13 sc, 1 dec)*2 (28)

Round 13 :

(12 sc, 1 dec)*2 (26)

Round 14 :

(11 sc, 1 dec)*2 (24)

Info :

*** Return to the round 4th . Crochet reverse sc along this round. Fasten off, cut off and weave in. ***

Round 15-23 :

24 sc (24) - repeat 9 times. Stuff the toy as you go. Ensure that the working thread is positioned towards the back and center by crocheting additional loops if needed.

Round 24 :

9 sc, 7 inc, 8 sc (31) - it is recommended to position inc towards the center and at the front.

Round 25 :

31 sc (31)

Round 26 :

9 sc, 7 dec, 8 sc (24) - decs should be located towards the center and at the front.

Round 27-35 :

24 sc (24) - repeat 9 times

Round 36 :

(11 sc, 1 inc)*2 (26)

Round 37 :

(12 sc, 1 inc)*2 (28)

Round 38 :

(13 sc, 1 inc)*2 (30)

Info :

Fasten off, cut off. Stuff it. The first front leg has been completed, and the second front leg is crocheted in a similar manner.

— Hind legs :

Info :

1-23 round: we crochet similarly to the forelegs. Ensure that the working thread is positioned towards the back and center by crocheting additional loops if needed.

Round 24 :

10 sc, 3 inc, 11 sc (27)

Round 25 :

10 sc, (1 sc, 1 inc)*3, 9 sc, 1 dec (29)

Round 26 :

1 dec, 8 sc, (2 sc, 1 inc)*3, 8 sc, 1 dec (30)

Round 27 :

1 dec, 26 sc, 1 dec (28)

Round 28 :

1 dec, 26 sc (27)

Round 29-33 :

27 sc (27) - repeat 5 times

Round 34 :

1 inc, 26 sc (28)

Round 35 :

1 sc, 1 inc, 26 sc (29)

Round 36 :

2 sc, 1 inc, 26 sc (30)

Round 37-38 :

30 sc (30) - repeat 2 times

Info :

Fasten off, cut off. The initial hind leg is completed, and the second one is crocheted in a similar fashion.

— Connecting part for legs :

Info :

Take yarn LaVita yarn Velurex, color 1038, crochet hook №2.5 (US C).

Round 1 :

make foundation ch8, work 2 sc into the second ch from the hook, 5 sc , work 4 sc into one stitch, turn, crochet along other side of the foundation chain 5 sc, work 2 sc into one stitch (18)

Round 2 :

2 inc, 5 sc, 4 inc, 5 sc, 2 inc (26)

Round 3 :

(1 sc, 1 inc)*2, 5 sc, (1 sc, 1 inc)*4, 5 sc, (1 sc, 1 inc)*2 (34)

Round 4 :

(2 sc, 1 inc)*2, 5 sc, (2 sc, 1 inc)*4, 5 sc, (2 sc, 1 inc)*2 (42)

Round 5 :

(3 sc, 1 inc)*2, 5 sc, (3 sc, 1 inc)*4, 5 sc, (3 sc, 1 inc)*2 (50)

— Legs joining (the stitches division) :

Info :

To sew the legs, we will utilize brown Camtex thread (or any other thread that matches the toy's color) and 8 markers. Prior to commencing the sewing process, place the legs uniformly close to the joining piece and position markers at the designated points where the legs will be joined. The photo above illustrates the stitch division, and we will link 6 stitches on each leg.

Round 6 :

iIt is worth noting that 6 stitches from each leg, 24 stitches from the body (6 multiplied by 4), will now be situated inside the toy's body. So we crochet as follows: on the back - 4 sc, on the hind left leg - 24 sc, on the left side - 7 sc, on the left foreleg - 24 sc, on the chest - 6 sc, on the right foreleg - 24 sc, on the right side - 7 sc, on the hind right leg - 24 sc, on the back - 2 sc (122)

Round 7 :

(59 sc, 1 dec)*2 (120)

Round 8 :

(18 sc, 1 dec)*6 (114)

Round 9-20 :

114 sc (114) - repeat 12 times

Info :

Take note of the location of the working thread, as depicted in the photo. The markers should be used to divide the body into two sections: 60 stitches and 54 stitches.

Round 21 :

37 sc, ch20 and join with the stitch on the opposite side with a slip stitch, 23 sc (80)

Info :

This way we have our body «divided» into 2 sections (the 1st one - where the head will be and the 2nd one - where the back part/bottom will be). In the next 22th round we continue crocheting the back/bottom - where we have the circle with 80 stitches.

Round 22 :

(8 sc, 1 dec)*8 (72)

Round 23 :

(7 sc, 1 dec)*8 (64)

Round 24 :

(6 sc, 1 dec)*8 (56)

Round 25 :

(5 sc, 1 dec)*8 (48)

Round 26 :

(4 sc, 1 dec)*8 (40)

Round 27 :

(3 sc, 1 dec)*8 (32)

Round 28 :

(2 sc, 1 dec)*8 (24)

Round 29 :

(1 sc, 1 dec)*8 (16)

Round 30 :

8 dec (8) Draw the thread tightly, cut off, and weave in the tail end.

Info :

Draw the thread tightly, cut off, and weave in the tail end. The legs assembly and back bottom closing is finished.

— We continue to crochet the head :

Info :

Return to the round 21. We are going to crochet the neck and the head along the opening which was formed (It is 74 stitches). So, start the round 22. Stuff the toy as you go.

Round 22 :

(35 sc, 1 dec)*2 (72)

Round 23 :

(16 sc, 1 dec)*4 (68)

Round 24 :

(15 sc, 1 dec)*4 (64)

Round 25 :

(14 sc, 1 dec)*4 (60)

Round 26 :

(13 sc, 1 dec)*4 (56)

Round 27 :

(12 sc, 1 dec)*4 (52)

Round 28 :

(11 sc, 1 dec)*4 (48)

Round 29 :

(10 sc, 1 dec)*4 (44)

Round 30 :

(9 sc, 1 dec)*4 (40)

Round 31 :

(8 sc, 1 dec)*4 (36)

Round 32-38 :

36 sc (36) - repeat 7 times

Info :

Take Dolphin Fine Himalaya yarn, color 33, crochet hook №2.5 (US C) to continue the head shaping.

Round 39 :

(8 sc, 1 inc)*4 (40)

Round 40 :

(4 sc, 1 inc)*8 (48)

Round 41 :

(5 sc, 1 inc)*8 (56)

Round 42 :

(6 sc, 1 inc)*8 (64)

Round 43 :

(7 sc, 1 inc)*8 (72)

Round 44 :

(8 sc, 1 inc)*8 (80)

Round 45-49 :

80 sc (80) - repeat 5 times. Make sure that the working thread is at the middle of the back.

Round 50 :

22 sc, (1 sc, 1 dec)*12, 22 sc (68)

Round 51-61 :

take yarn LaVita yarn Velurex, color 1038, 68 sc (68) - repeat 11 times

Info :

At this point, we proceed with making the eyes. We set the toy aside temporarily and begin crocheting the eyes.

— Eyes :

Info :

Take YarnArt Jeans yarn, color 62 (white), crochet hook №1.75 (HS 4)

Round 1 :

8 sc in MR (8)

Round 2 :

8 inc (16)

Round 3 :

(1 sc, 1 inc)*8 (24)

Round 4 :

(2 sc, 1 inc)*8 (32)

Round 5 :

yarn YarnArt Jeans of black color crochet into front loops of the stitches 32 sl sts (32). Fasten off, cut off.

Info :

We take the eyes and shape them into two separate pieces, positioning them not in the center but along the outline of the eye. It is important not to fasten the eyes too tightly. We cut out felt pieces for the eyes to create eyelashes. When stitching the eyes, it is necessary to position them under the eye and sew through them.

Info :

The subsequent stage involves attaching and sewing the eyes onto the head. I sewed them between the 52nd and 59th rounds, with a distance of 3 sc between them. To attach the eyes to the head, I positioned them at least one division apart (note that it can be a bit challenging), then melted the plastic slightly using a lighter.

Info :

We continue to crochet the head. Stuff the toy as you go.

Round 62 :

(15 sc, 1 dec)*4 (64)

Round 63 :

(6 sc, 1 dec)*8 (56)

Round 64 :

(5 sc, 1 dec)*8 (48)

Round 65 :

(4 sc, 1 dec)*8 (40)

Round 66 :

(3 sc, 1 dec)*8 (32)

Round 67 :

(2 sc, 1 dec)*8 (24)

Round 68 :

(1 sc, 1 dec)*8 (16)

Round 69 :

8 dec (8) Draw the thread tightly, cut off, and weave in the tail end.

Info :

Draw the thread tightly, cut off, and weave in the tail end.

— Muzzle :

Info :

Take Dolphin Fine Himalaya yarn, color 33, crochet hook №2.5 (US C). 1 round: make foundation chain ch8, work 2 sc into the second ch from the hook, work 5 sc, work 4 sc into one stitch, turn, crochet along the other side of the foundation chain 5 sc, 2 sc into one stitch (18)

Assembly Instructions

  • Place the legs uniformly close to the joining piece, mark the designated points with 8 markers, and sew the legs using brown Camtex thread so each leg links 6 stitches to the body.
  • When joining legs to the connecting piece, position the increases and decreases toward the front center as instructed (rounds 24-26) to create a natural leg shape.
  • Attach eyes between rounds 52 and 59 with approximately 3 single crochet distance apart; sew felt lashes under the eyes and slightly melt the plastic eyes to set them if needed.
  • Stuff the toy gradually as you crochet the body and head, stuffing more firmly at shaping points and less in flexible areas to maintain proper proportions.

Important Notes

  • 💡Use stitch markers to keep track of the leg joining points and body divisions before sewing for even placement.
  • 💡Stuff the toy gradually and evenly while shaping; overstuffing will distort the final shape and seams.
  • 💡Weave in tails securely after sewing each part and leave long tails when you need to sew pieces together later.
  • 💡Keep the working thread positioned as shown in photos to maintain correct stitch orientation and ease of joining.

This Forest Deer pattern guides you through a sweet, detailed amigurumi project from legs to head with full photos and stitch counts. The plush velvet yarn gives a luxurious soft texture and beautiful finish to your handmade deer. Make one for a special gift or to brighten up your home with a charming handmade companion. 🧶🎁
You ask,

we answer.

FAQs

What size will the finished piece be?

The finished amigurumi measures approximately 42 cm (16.54 inches) without horns and about 54 cm (21.26 inches) with horns when using the recommended yarn and hook sizes.

Can I use different yarn weights for this pattern?

Yes, you can use different yarn weights, but this will affect the final size and texture—use an appropriate hook size and be prepared to adjust stitch counts for proportional changes.

Do I need prior crochet experience for this pattern?

This pattern is rated intermediate and assumes you understand basic amigurumi techniques including increases, decreases, foundation chains, working in loops, and simple assembly.

How long does this project typically take to complete?

Most crocheters complete this project over multiple sessions; expect around 12-15 hours depending on experience, assembly time and custom details.