🧢 Beautiful ✨ Detailed πŸ’ Adorable

Flower Bouquet C Crochet Pattern

Flower Bouquet C Crochet Pattern
4.5β˜… Rating
5-7 Hours Time Needed
3.7K Made This
βœ‚οΈ

Beginner Friendly Level

Perfect for those just starting their crochet journey, with clear instructions and simple techniques

⏱️

Weekend Treat

Takes 5-7 hours, making it an enjoyable project to finish over a couple of days.

🏑

Cozy Accent

A warm touch for your space that transforms ordinary corners into inviting nooks filled with handmade charm.

About This Flower Bouquet C Crochet Pattern

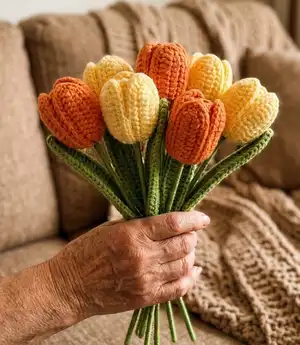
This pattern pack shows you how to crochet a full bouquet of flowers including tulips, daisies, baby daisies, and two styles of roses with leaves. Every piece includes wiring and assembly notes so you can make realistic, moldable stems and arrange a professional-looking bouquet. Colors and yarn choices are flexible so you can adapt the look to your taste or occasion.

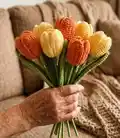
Flower Bouquet C Crochet Pattern crochet pattern - detailed view of completed project

Clear step-by-step rounds and abbreviations are included for each element, plus finishing tips for wrapping stems and securing parts. The pattern is beginner friendly yet offers techniques that make your bouquet look polished and durable.

Why You'll Love This Flower Bouquet C Crochet Pattern

I absolutely love this pattern because it brings classic florals to crochet in a way that is both accessible and beautiful. I enjoy that each flower is modular so you can make as many or as few as you like and mix colors freely. I also love the tactile satisfaction of wiring and shaping petals to create a natural look. The finishing steps for rolling and attaching petals make the flowers look professional and give me joy every time I gift a bouquet.

Flower Bouquet C Crochet Pattern step 1 - construction progress Flower Bouquet C Crochet Pattern step 2 - assembly progress Flower Bouquet C Crochet Pattern step 3 - details and accessories Flower Bouquet C Crochet Pattern step 4 - final assembly and finishing

Switch Things Up

I love how versatile this pattern is for customization; you can change the color palette to fit any season, from pastel spring bouquets to bold autumn tones.

I often adjust yarn weight and hook size to make minis or larger statement flowers β€” swap 4-ply for a thicker yarn and a bigger hook to create chunky blooms.

I like adding wire to individual petals for more control; you can shape petals outward or inward for different bloom styles and give the bouquet a realistic touch.

Try combining different flower types from the pattern to make a mixed bouquet β€” a few roses, daisies and tulips together create a charming, balanced arrangement.

I sometimes embroider small veins on leaf surfaces or add a tiny bead center to flowers for sparkle and texture; these small details make each bouquet unique.

For a keepsake, consider making a mini bunch and turning it into a brooch or keychain by using a smaller stem and securing the back with felt and a pin.

I also experiment with adding blush or dry pigment to petal edges to create gradient effects; a soft brush and a little color make petals look lifelike.

To make the bouquet gift-ready, wrap stems in ribbon or lace and tuck in a handmade tag β€” I always include a small note with care instructions.

Don't be afraid to play with asymmetry β€” a slightly off-center arrangement can look more natural than a perfectly symmetric one.

I recommend making extra baby daisies and leaves so you can audition placements on the stem before final gluing; pins and clips are handy for testing layouts.

Common Mistakes & How to Fix Them

βœ— Skipping to glue petals without adding wire or secure stem; add the thin wire to petals and a thicker stick for the stem before gluing to ensure stability and shape. βœ— Using inconsistent yarn weight or hook size for different flowers causes mismatched sizes; choose 4-ply yarn and a 2-2.5mm hook for the same finished scale, or adjust all elements proportionally. βœ— Forgetting to stuff the center of daisies or to add fibrefill while closing; add a small amount of fibrefill before completely closing the center to preserve a rounded look. βœ— Not rolling or securing the rose petals tightly enough will cause the bloom to unravel; roll the petal strip starting at the chain center and secure with glue, stitching or hot glue to hold shape. βœ— Not adding enough glue or yarn wrap around the wooden stick can let petals slip; roll yarn around the stem after sticking petals in place and use hot glue strategically to anchor each layer of petals and leaves.

Flower Bouquet C Crochet Pattern

Make a beautiful, long-lasting bouquet of crocheted flowers with this detailed pattern. You will learn how to make tulips, roses, daisies and leaves with wiring and finishing tips so your bouquet looks natural and elegant. The instructions are written to be accessible and adaptable so you can change colors, sizes, and finishes to suit any occasion. Perfect for handmade gifts, home decor, or a lasting keepsake bouquet.

Beginner Friendly 5-7 Hours

Materials Needed for Flower Bouquet C Crochet Pattern

β€” Main Fabric

  • 01
    Cotton yarn or milk yarn, 4 ply (recommended) - assorted colors for petals and leaves
  • 02
    Acrylic yarn (4 ply) can be used as alternative depending on preference
  • 03
    Thin moldable metallic wire for leaves/petals - approx 0.6 mm
  • 04
    Thicker wire or wooden stick for stem - approx 2 mm for stem
  • 05
    Small amount of fibrefill or cotton for daisy centers

β€” Tools Required

  • 01
    Crochet hook size 2-2.5mm
  • 02
    Thin moldable metallic wire (~0.6mm) for leaves and petals
  • 03
    Thick wire or wooden stick for stems (~2mm)
  • 04
    Hot glue (glue gun) for assembly
  • 05
    Scissors
  • 06
    Yarn needle for sewing and weaving ends
  • 07
    Stitch markers
  • 08
    Pins for positioning pieces while assembling
  • 09
    Optional: small paint blush or fabric paint for edge shading

Progress Tracker

0% Complete

β€” Tulips :

Small petals (x3) - R1 :

Chain 12.

Small petals (x3) - R2 :

(add wire) sk, sc, hdc, 7dc, hdc, w, hdc, 7dc, hdc, sc

Small petals (x3) - R3 :

23 sc, sl, FO

Big petals (x3) - R1 :

chain 13

Big petals (x3) - R2 :

sk, 11 sc, w, 11 sc

Big petals (x3) - R3 :

(add wire) sc, hdc, 9dc, hdc, w, hdc, 9dc, hdc, sc

Big petals (x3) - R4 :

27sc, sl, FO

Big leaf - R1 :

chain 31

Big leaf - R2 :

(add wire) sk, 3 sc, 3 hdc, 18 dc, 3 hdc, 2 sc, w, 2sc, 3 hdc, 18 dc, 3 hdc, 3 sc, sl, FO

Info :

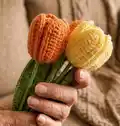
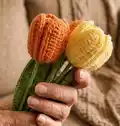
Start sticking with glue around the stick the small petals, and then add the bigger ones, in a circular way. Add the leaf in the down part of the stick, and roll yarn around the stick to secure the leaf and make the stem look more natural.

β€” Daisy flower :

Center of the flower - R1 :

6 sc magic ring

Center of the flower - R2 :

6 inc

Center of the flower - R3 :

12 sc and FO

Info :

(Make one yellow and with the same steps make a green one for the back of the flower, to connect with the stem.) You will have to connect both and stitch it together, before completely closing the stitch add some fibrefill or cotton to fill the inside of the center.

Petals :

(3 ch, dc, 3 ch, sl st) Rep 12. There will be 12 petals in total.

Info :

Connect the wire or wooden stick to the flower, depending on how you want to put the daisies it will be better to put the stem right in the middle of the center in the back of the flower or as the other flowers in between the two centers. Both ways will look good. Don't forget to roll yarn over so the stem looks more realistic.

β€” Baby daisy flower :

Baby daisy - R1 :

5 sc magic ring

Baby daisy - R2 :

(2 ch, 3 dc, 2 ch) Rep 5 times

Info :

The center of the flower just pass the yarn making some stitches in the center. You can make a few baby daisies and connect them to a wire or wooden stick rolling green yarn to make the stem. If you use a light color, there is also the option to add some blush on the edges to make some gradient in the color.

β€” Rose flower type 1 :

Flower petals - R1 :

chain 53

Flower petals - R2 :

52 sc

Flower petals - R3 :

chain 5, dc, sk2, to begin with. The rest rep (dc, 2ch, dc) sk2 until the end. The part inside of the parenthesis has to be worked in the same stitch

Flower petals - R4 :

chain 3, in the next hole work (2dc, 2ch, 2dc); Work on the hole of the upper part (2dc, 2ch, 2dc) Rep until the end

Flower petals - R5 :

*ch 1, and in the hole of the upper part work 8dc. In the next hole work 1 sc. And repeat from* until the end and sl, FO

Info :

To finish the rose, roll it up starting with the first chain at the center of the rose, then stick it together with glue.

Flower bottom - R1 :

(3 ch, 20 dc, sl st) magic ring

Flower bottom - R2 :

8ch, ((sk, 2sc, 2hdc, 2dc, 1 tc) on chain) sk3, sl st Repeat 5 times and sl, FO, making a similar to star figure to put in the bottom of the rose.

Rose leaf - R1 :

12ch, sk, sc, hdc, 7dc, hdc; on the other side of the chain: w, hdc, 7dc, hdc, sc

Rose leaf - R2 :

(add wire), sc, 2ch. Rep until reached the end and sl, FO.

β€” Rose flower type 2 :

Small petal (x4) - R1 :

10 dc magic ring

Small petal (x4) - R2 :

10 hdc inc

Small petal (x4) - R3 :

6 sc, 8 hdc inc, 6 sc

Midi petal (x4) - R1 :

10 dc magic ring

Midi petal (x4) - R2 :

10 hdc inc

Midi petal (x4) - R3 :

(2 sc, sc inc) rep

Midi petal (x4) - R4 :

8 sc, 9 hdc inc, 9 sc

Big petal (x5) - R1 :

10 dc magic ring

Big petal (x5) - R2 :

10 hdc inc

Big petal (x5) - R3 :

(hdc, hdc inc) rep

Big petal (x5) - R4 :

8 sc, 6 hdc inc, (hdc, dc in same st), 3 ch, (dc, hdc in same st), 6 hdc inc, 8 sc

Flower bottom - R1 :

6 sc magic ring

Flower bottom - R2 :

6 inc

Flower bottom - R3 :

6 (sc, inc)

Flower bottom - R4 :

18 sc

Flower bottom - R5 :

[9 ch, (sk1 backward, 2 sl st, 2sc, 2 hdc, dc, tc in chain), sk 2, sl st] rep 6 times.

Rose leaf :

R1: 12ch, sk, sc, hdc, 7dc, hdc; on the other side of the chain: w, hdc, 7dc, hdc, sc. R2: (add wire), sc, 2ch. Rep until reached the end and sl, FO.

Info :

Start sticking and rolling the petals as the image, in order, from the small petals to the big petals. Stick every part together and roll yarn around a wooden stick to make the stem. To add gradient to the flower you can add some blush.

β€” Leafs :

Leaf - R1 :

Chain 12

Leaf - R2 :

(add metallic wire to secure the position) sk, sc, hdc, dc, 5 tc, dc, hdc, w, hdc, dc, 5 tc, dc, hdc, sc, sl, FO.

Info :

Make 5 or 7 leaves (depending if you want to make the leaves branch bigger or smaller), and connect all as the picture to the wooden stick, making leaves coming out of the stem. Don't forget to roll yarn over to wooden stick to make it more realistic.

Assembly Instructions

  • Attach tulip petals to the wooden stick by gluing small petals first in a circular arrangement, then add the bigger petals around them, and roll yarn around the stick to secure and cover the stem.
  • For daisies, make two centers (yellow and a green backing), stitch them together leaving an opening to add fibrefill, then attach the wired or wooden stem into the back of the green center and secure with stitches and glue.
  • Roll rose petal strip starting from the chain at the center of the rose, glue and/or stitch as you roll to secure the shape, then attach the flower bottom (star figure) to the base and glue into place.
  • Attach leaves by inserting or wiring into the stem position and then wrapping yarn around the stem to hide wires; glue leaf bases for extra security and position leaves as in reference photos.
  • Stick smaller decorative flowers (baby daisies) to a thin wire, group several on one thicker stem by wrapping green yarn around the joining point, and finish bouquet assembly with lace or wrapping paper as desired.

Important Notes

  • πŸ’‘This pattern is written using US crochet terms; check abbreviations before starting to avoid confusion.
  • πŸ’‘Use 4-ply yarn and a 2-2.5mm hook to achieve the same scale as the photos; thicker yarn or larger hook will increase finished size.
  • πŸ’‘Add thin wire to every petal or leaf that will need shaping and a thicker wire or wooden stick for the stem so your bouquet will be moldable and stable.
  • πŸ’‘Glue and yarn-wrapping are used extensively for assembly; use a hot glue gun carefully and roll yarn around the stick to secure parts for a neat finish.

Thank you for choosing this Flower Bouquet pack β€” I hope it inspires your next handmade gift or home accent. These flowers are designed to be flexible: pick your favorite colors and mix petals to create a unique arrangement. Have fun shaping, wiring and assembling β€” your bouquet will last for years! 🌸🧢

You ask,

we answer.

FAQs

What size will the finished piece be?

The finished bouquet size will vary depending on stem length and yarn weight, but individual flowers made with 4-ply yarn and a 2-2.5mm hook match the photos and produce small to medium sized blooms suitable for a hand-held bouquet.

Can I use different yarn weights for this pattern?

Yes, you can use different yarn weights, but this will affect the final size and density; if you choose a thicker yarn, use a larger hook and expect larger, more plush flowers.

Do I need prior crochet experience for this pattern?

This pattern is rated beginner friendly, so basic crochet skills like chains, single crochet, half-double and double crochet are recommended; clear abbreviation descriptions are included to help newer crocheters.

How long does this project typically take to complete?

Most crocheters complete a full bouquet in about 5-7 hours depending on the number of flowers and complexity of assembly; you can spread work over a weekend for best results.