About This Desert Crochet Cactus Amigurumi Pattern
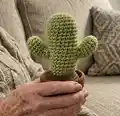
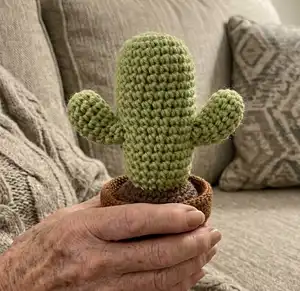
This pattern creates a small terracotta potted cactus with a crocheted soil base, cactus body, two arms and optional flowers. It uses DK weight yarn and a 3.5mm hook to produce a compact, sturdy amigurumi plant. Youll work in rounds, use invisible decreases and sew the pieces together for a tidy finish.
Perfect for making a set of cacti in different shapes, colors and sizes as decor or gifts. The instructions include assembly tips and optional pipe cleaner reinforcement for bendable arms.
Why You'll Love This Desert Crochet Cactus Amigurumi Pattern
I absolutely love this pattern because it turns simple stitches into a delightful tiny plant that brightens any space. I enjoy how quick it is to make, so you can complete several in an afternoon and create a whole mini desert. The shaping techniques are satisfying and teach useful amigurumi skills like invisible decreases and seaming. I also love the option to add a pipe cleaner for poseable arms — it gives each cactus personality and makes them playful keepsakes.
Switch Things Up
I love how easily you can customise this pattern: change the yarn colour to create different cactus varieties, from deep green to soft sage.
Use a thicker yarn and larger hook to make a chunky, cuddly cactus, or a finer yarn for tiny, keychain-friendly versions.
I often add little embroidered spines or French knot details to give each cactus a unique texture and personality.
Swap the terracotta pot for a fabric or felt pot for a softer display, or paint the pot for a pop of colour to match your decor.
Try adding multiple arms in different positions, or make a trio of varying heights to create an attractive grouped display.
If you want a poseable arm, I add a short piece of pipe cleaner inside before stuffing and bend it after sewing so you can adjust the pose.
For the flowers, try layering different coloured yarns (Yarn C and Yarn D) to produce multi-colour blooms that suit the season.
I sometimes alternate rib directions or change the number of rows in the tall cactus to get slimmer or wider shapes — experiment until you find the look you love.
Want a more realistic look? Use heathered or speckled yarns to mimic natural cactus tones and subtle color variation.
I also enjoy making sets where each cactus has a different little accessory, like a tiny crocheted tag or ribbon, to personalise them as gifts.
Common Mistakes & How to Fix Them
✗ Skipping stitch markers during increases and decreases leads to uneven shaping; place a marker at the start of every round and move it each round to maintain correct stitch counts.
✗ Not stuffing as you go causes lumps or gaps when closing the piece; stuff gradually and evenly, checking shape frequently and adding small amounts of fibrefill to maintain form.
✗ Forgetting to work invisible decreases in the front loop only will change the intended ribbed texture; follow the note in the pattern and decrease in the front loops to keep the finish consistent.
✗ Sewing arms in the wrong position makes the cactus look unbalanced; pin each arm in place about six rounds up from the bottom and check symmetry before sewing securely.
✗ Working rows or rounds with inconsistent tension will distort the ribbed panels; maintain an even, slightly firm tension to match the sample and ensure pieces fit the pot.