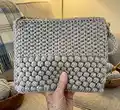
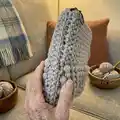
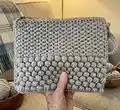
About This Bobble Clutch Pattern
This pattern creates a textured bobble clutch worked in chunky yarn for a plush finish. You will make two identical bag faces, join them with a crochet seam, and add a zipper and simple handle. The design uses a bobble stitch panel and crochet moss stitch for a neat top section.
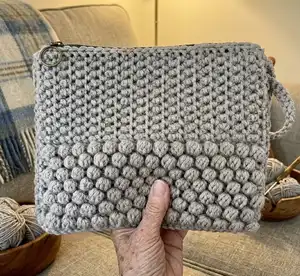
Clear row-by-row instructions and stitch notes are included to guide you through each stage. Finished measurements and tension are listed so you can match gauge for the best results.
Why You'll Love This Bobble Clutch Pattern
I absolutely love this pattern because it pairs a bold bobble texture with a refined moss stitch top, giving a handcrafted piece a modern edge. I enjoy how quickly the chunky yarn builds up, making it satisfying to see progress fast. The construction is straightforward but yields a professional-looking clutch when finished. I also love that you can easily customize the size, color, or handle to make it your own.
Switch Things Up
I love how easily this clutch can be customized — change the color to make a bold statement or keep it neutral for everyday use.
I often try different yarns: a bulky wool gives extra warmth and texture while a cotton blend creates a sleeker, more structured bag.
I sometimes line the clutch with a cotton fabric to protect the interior and add stability; it also hides the wrong side of the bobble panel for a polished finish.
If you want a longer strap, simply extend the chain for the handle and test the length before finishing off; you can also add metal hardware for a detachable option.
To make a mini version for coins or keys, use a smaller hook and lighter yarn — reduce the stitch count proportionally to keep the pattern balance.
Try alternating colored rows in the moss stitch section to create stripes that contrast with the bobble panel for a playful look.
I recommend experimenting with different zipper colors or exposed zippers for extra style — a contrasting zipper can become a focal point.
For a firmer bag, you can insert thin interfacing or a fabric panel before final joining to keep the clutch from sagging when filled.
I sometimes replace the simple crochet handle with a metal ring or chain for a dressier finish — attach securely and reinforce with extra stitching.
Try embroidering a small motif or attaching a crocheted flower to a corner to personalize the clutch as a gift; these small additions make each piece unique.
Common Mistakes & How to Fix Them
✗ Skipping the recommended 6mm hook will change gauge and ruin final size; use the specified hook or adjust gauge carefully before proceeding.
✗ Working bobbles with inconsistent tension will create an uneven textured panel; practice the MB sequence and keep your yarn tension steady for uniform bobbles.
✗ Failing to block or press your pieces can leave them misshapen; press or block using the yarn band recommendations to set the stitches and shape the bag before joining.
✗ Attaching the zipper without trimming to length or securing edges properly can make the zipper sit awkwardly; cut the zipper to length and tack it in place with running stitch before final joining.
✗ Not counting stitches after repeats leads to mismatched edges when joining faces; count your sts after the bobble and moss sections to ensure both pieces match before joining.