About This Colourful Mini Dino Amigurumi Pattern
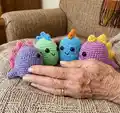
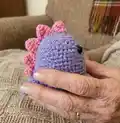
This pattern creates a tiny, rounded dinosaur amigurumi worked in one piece (head and body) with a separate tail and spikes. It uses 8 ply (DK) cotton and a 3mm hook to make a toy approximately 7.5cm tall. The design includes clear round-by-round instructions, spike templates and assembly notes so you can finish a polished little toy.

Worked in continuous rounds using UK terminology, this pattern covers head/body, tail, three spike sizes and an optional x-small spike. Photos and placement notes are included to help you position eyes, mouth and spikes accurately.
Why You'll Love This Colourful Mini Dino Amigurumi Pattern
I absolutely love this pattern because it packs so much charm into a tiny, satisfying make. I enjoy how quickly the dino comes together and how much personality you can add through simple embroidery and colour choices. Making spikes and arranging them on the back is one of my favourite steps — it always gives each dino a unique look. I also appreciate that the pattern uses simple shaping so you can practice increases and decreases while producing a delightful finished toy.
Switch Things Up
I love how easy this pattern is to customise with different colours; try pastel tones for a soft nursery look or neon brights for a playful set.
Want a larger dino? Use a bulkier yarn and a larger hook — this will give you a chunky, squishier toy perfect for cuddling.
To make a tiny keychain version, use finer yarn and a 1.75–2.5mm hook and attach a keyring before finishing the tail seam.
I sometimes add felt accessories like a tiny heart or bow glued or stitched to the side for added personality.
If you prefer embroidered eyes instead of safety eyes, use a backstitch or satin stitch to create expressions that suit your style.
Try mixing spike colours down the back for a rainbow effect, or alternate sizes to create a unique silhouette.
Adding a small piece of wire to the tail or between rounds when sewing spikes can give slight posability to the tail or neck.
I also experiment with face placement — moving eyes slightly higher or lower changes the dino's character dramatically, so try different placements before final sewing.
For durability in toys for children, use securely attached safety eyes and consider embroidering details instead of using glued items.
Lastly, enjoy the process — each change you make turns the pattern into something uniquely yours, and I love seeing adaptations on social media!
Common Mistakes & How to Fix Them
✗ Skipping the stitch marker when working continuous rounds; place a stitch marker or scrap yarn at the start of each round to avoid losing your place.
✗ Placing safety eyes too high or too low which affects the facial expression; place safety eyes between rounds 9 and 10 (st 12 and st 18) as instructed for the intended look.
✗ Not stuffing gradually which causes lumps or collapsed areas; stuff a little at a time during shaping, finishing stuffing before final decreases to maintain a smooth shape.
✗ Pulling your tension too tight during increases and decreases which can distort shaping; keep a consistent, moderate tension to maintain even stitch size and shape.
✗ Forgetting to leave a long tail when instructed for closing pieces; always leave the long thread where the pattern asks so you can thread through front loops and close cleanly.