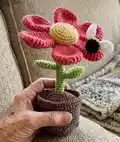
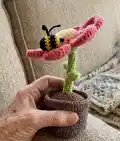
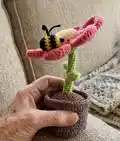
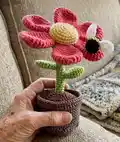
About This Bumble Blossom Amigurumi Pattern
This pattern creates a bright amigurumi flower with six sculpted petals, a sturdy crocheted stem, a pot with removable dirt, and a tiny bumblebee. The design uses sport weight yarn and small hookwork to create crisp shaping and clean edges. Detailed round-by-round instructions and photo guidance help you assemble each piece neatly.
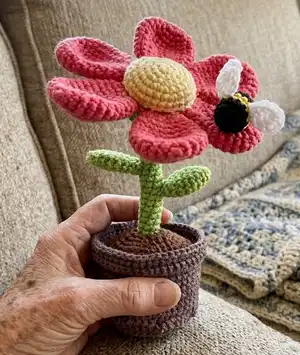
Perfect for makers who enjoy small projects with lots of personality, the finished piece stands about 12cm tall and fits easily on a windowsill. The stem can be reinforced with wire for extra stability.
Why You'll Love This Bumble Blossom Amigurumi Pattern
I absolutely love this pattern because it combines simple amigurumi techniques into a charming, unique home accent that makes people smile. I enjoy the sculptural petals — they look impressive but are quick to crochet. As a maker, I appreciate how the stem and pot construction gives the finished flower real presence and stability. I also love the tiny bumblebee detail; it adds personality and a playful finishing touch that really completes the design.
Switch Things Up
I love how easy it is to customize this pattern — try different color combinations to match your decor or create a whole bouquet of variations.
If you want a sturdier display piece I often add a thin floral wire inside the stem; it allows gentle posing while remaining discreet.
To make a mini keychain version I switch to a finer yarn and a smaller hook, reducing rounds where needed for scale.
For a plush, chunky look try using a bulkier yarn and a larger hook; you may need to add more stuffing and a firmer base in the pot.
I enjoy adding embroidered centers or French knots to the flower center to give additional texture and detail.
Try making the bee slightly larger or smaller by adjusting yarn and hook — it’s a fun accent that changes the personality of the piece.
I sometimes glue a small magnet inside the petal so the bee can be removable and repositioned for play or display.
Play with stitch direction (yarn-over vs yarn-under) to change the surface texture; choose the method that matches your tension and desired look.
Consider swapping the pot pattern for a tiny crochet basket or ceramic base for different stylistic effects.
I recommend experimenting with placement of the leaves and petals before sewing; small shifts create subtly different silhouettes and make each finished flower unique.
Common Mistakes & How to Fix Them
✗ Not stuffing the stem firmly can make the flower flop over; stuff the stem gradually and firmly and consider adding wire for reinforcement.
✗ Skipping back loop or front loop instructions will change the pot and stem edges; follow BLO and FLO notes exactly to achieve the correct shaping.
✗ Sewing petals unevenly around the center leads to gaps or crowding; pin each petal in place first to check spacing before sewing permanently.
✗ Failing to reattach the yarn correctly when making the dirt top can flip the stitch side; insert your hook from the inside to the outside so the "wrong side" of stitches is on the bottom.
✗ Using loose tension on small rounds yields sloppy details on the bee and petals; work tightly and check gauge for consistent stitch definition.