About This Brighten Your Day Crochet Rainbow Stuffie Amigurumi Pattern
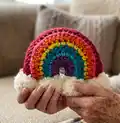
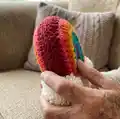
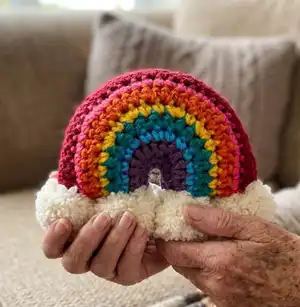
This pattern makes a small stuffed rainbow with a fluffy pom-pom cloud edge. It's worked as two identical single crochet pieces which are seamed and stuffed to create a rounded rainbow shape. The design uses multiple contrast colors to form bright stripes and finishes with soft pom-poms for a playful cloud edge.
Easy color changes are shown so you can swap shades smoothly, and the pattern includes a flat slip stitch join method for neat seaming. Perfect for gifting or quick makes, this pattern is written in standard US crochet terms.
Why You'll Love This Brighten Your Day Crochet Rainbow Stuffie Amigurumi Pattern
I absolutely love this pattern because it packs so much joyful color into a tiny, approachable project. I enjoy how quickly one rainbow comes together — it feels satisfying and bright in just a few hours. The design is playful and makes a great handmade gift that always brings a smile. I also love the pom-pom cloud detail; it adds delightful texture and charm to the finished piece. Because it uses simple stitches, I can make multiples to decorate a nursery or give away to friends.
Switch Things Up
I love changing the color order to create different moods; try pastel shades for a soft nursery look or neon brights for a modern pop of color.
To make a mini keychain version, use a lighter weight yarn and a smaller hook to scale down the size proportionally.
If you want a plush, chunky version, swap to a super bulky yarn and larger hook for an ultra-cuddly rainbow.
I sometimes add embroidered stars or a tiny smile to personalize each rainbow and give it more character.
Try substituting the pom-poms with small crocheted clouds for a fully crocheted finish that is great for gifting to little ones.
I recommend experimenting with leftover scrap yarn to make a set of tiny rainbows in mixed colors — they make lovely garlands.
For a different texture, work the cloud edge in a loop stitch or looped fringe instead of pom-poms.
I often mount a finished rainbow on a simple wooden plaque or ring to create hanging decor for a nursery.
If you want a sturdier toy, insert a small piece of cardboard or interfacing between the two pieces before closing the bottom to help it stand upright.
I enjoy using contrasting yarn for the seaming to create a subtle outline that makes each stripe pop; try a darker tone of the outer color for definition.
Common Mistakes & How to Fix Them
✗ Skipping the final two loops technique when changing color can leave a visible jog; work to last 2 loops, yarn over with the new color and pull through both loops to make a neat color change.
✗ Not aligning stripes when sewing the front and back together causes mismatched rows; pin or clip the pieces with stripes aligned and sew slowly so stripes match across the seam.
✗ Under-stuffing or over-stuffing will distort the rainbow shape; stuff gradually and check the shape frequently to maintain a rounded arc without lumps.
✗ Forgetting to fasten off and weave in ends between color changes can cause messy edges; break yarn and leave tidy tails at each color change and weave them in neatly after seaming.
✗ Rushing the pom-pom trimming step can leave uneven clouds; cut loops carefully and trim to a smooth round shape, checking symmetry as you go.