About This Baby Fledermaus Amigurumi Pattern
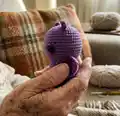
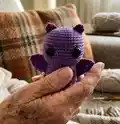
This pattern creates a tiny, lovable baby bat amigurumi crocheted in one piece for the head and body. It includes separate wings, ears and feet that are sewn on, plus clear instructions for placement and finishing. You will learn invisible decreases and row shaping for the wings to achieve a tidy, professional look.

Designed for intermediate crocheters, the pattern is compact and quick to finish with a 2.5 mm hook and cotton yarn. Full materials list, abbreviations and assembly notes are included for an easy make.
Why You'll Love This Baby Fledermaus Amigurumi Pattern
I absolutely love this pattern because it turns simple stitches into a character full of personality. I enjoy the compact size — it makes a lovely gift or seasonal decoration you can finish quickly. The wing shaping in rows is clever and adds a lot of charm without complicated shaping. I also love how the piece is sewn together: small embroidered details like the wing triangles really bring it to life.
Switch Things Up
I love customizing this pattern by changing the color palette; try soft pastels for a cuter, friendlier bat or dark greys and blacks for a spooky vibe.
I often make minis by using thinner yarn and a smaller hook to create keychain-sized bats that are perfect for gifts.
You can enlarge the pattern by using bulkier yarn and a larger hook to create a cuddly plush version suitable for younger children.
I add embroidered mouths or tiny felt fangs to change the character from sweet to mischievous—simple facial tweaks make a big difference.
Swap the 11 mm safety eyes for smaller or larger eyes depending on the size change; always ensure eye size is proportional to the head.
I sometimes add wire in the wings or limbs for posability; use thin, craft-safe wire and wrap it before inserting to protect the yarn.
Try different stitch textures on the body—working some rounds in BLO or adding surface slip stitch ridges adds a unique look.
Embroider patterns on the wings with contrasting yarn for decorative details, or stitch small beads along the wing edge for sparkle.
I recommend experimenting with different stuffing amounts to alter firmness and posture—less stuffing for a floppier toy, more for a sturdy figurine.
For seasonal sets, make multiple bats in varying colors and attach them to a wreath or garland for quick, handmade decor.
Common Mistakes & How to Fix Them
✗ Skipping a stitch marker when working in continuous rounds can lead to losing track of the round start; always place a marker at the first stitch of each round and move it after finishing the round.
✗ Placing the safety eyes too early or too close together will distort the face; place safety eyes between rounds 12 and 13 with 9 stitches between them to maintain proper proportions.
✗ Stuffing unevenly results in lumps or a misshapen head; stuff gradually and firmly as you work, focusing on smoothing the stuffing into the head before closing.
✗ Crocheting with inconsistent tension changes the finished size and stitch counts; use the recommended 2.5 mm hook and maintain steady tension throughout the project to match gauge.