About This Rac the Raccoon Amigurumi Pattern
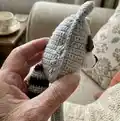
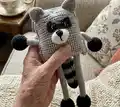
This pattern creates Rac the Raccoon, a stretchy-limbed amigurumi toy with soft square body and long tubular limbs that slide up and down. The toy is designed to support fine motor skill development and playful interaction. Youll crochet separate pieces — body, tail, ears, snout, eyes and two long arm-leg pieces — then join and decorate them for a charming finished friend.

The finished toy measures approximately 27 cm from ears to feet using the recommended yarn and hooks. Clear rounds and assembly guidance are provided, but basic crochet knowledge and amigurumi experience are assumed.
Why You'll Love This Rac the Raccoon Amigurumi Pattern
I absolutely love this pattern because the stretchy limbs give the raccoon so much personality and interactive fun. I designed the simple square body to be quick to make while still allowing plenty of room for expressive facial details. The combination of small hooks and fine yarn creates a neat, professional finish that I find deeply satisfying. Making several of these is addictive — they make charming gifts and quick handmade decorations too. I also enjoy that the pattern teaches careful joining and placement skills that improve overall amigurumi construction.
Switch Things Up
I love customizing this raccoon by changing the yarn colors to create seasonal versions — try soft pastels for a nursery-friendly look or autumn shades for a harvest-themed toy.
I often adjust the size by swapping yarn weight and hook size: use DK yarn with a 3.5 mm hook for a slightly larger raccoon or sport weight with 1.75 mm for a mini version.
I sometimes embroider different facial expressions to change personality — a small smile, a surprised mouth, or thick eyebrows make each raccoon unique.
For a different texture, try a boucle or cotton blend for the body while keeping smooth yarn for details like the snout and stripes.
I add small accessories like a tiny scarf, a felt heart, or a crocheted hat to personalize gifts — these are quick to make and sew on.
Consider using safety joints or lightly stuffing without safety eyes for a baby-safe version and embroider the eyes instead.
I like to experiment with limb length: shorten the long pieces for a squat, chunky friend or extend them for an extra stretchy toy.
Try using contrasting yarn for the inside ear or a variegated yarn for the tail for an eye-catching effect.
If you want posable limbs, insert craft wire inside the limbs before stuffing and secure ends carefully to avoid poking out.
I also recommend creating a set of matching critters by remixing ears or tails — a fox tail or bunny ears can make delightful variations ready for display or gifting.
Common Mistakes & How to Fix Them
✗ Skipping stitch markers during long straight rounds makes it easy to lose track of your beginning of round; place a marker at the start of every round and move it as you go.
✗ Overstuffing the small balls on the limb ends can distort the shape and make sewing difficult; stuff those small sections lightly and gradually until they feel firm but not bulging.
✗ Changing colors without securing the tails neatly causes loose ends and untidy joins; weave in or secure color changes on the wrong side and carry yarn where possible to keep edges neat.
✗ Not aligning the arm-leg insertion between the correct body rows will misplace limbs; follow the instruction to insert the arm-leg between rows 11 and 15 and pin the piece before sewing to confirm placement.