🧢 Beautiful ✨ Detailed πŸ’ Adorable

Pillow-panda Amigurumi Pattern

Pillow-panda Amigurumi Pattern
4.1β˜… Rating
5-7 Hours Time Needed
2.3K Made This
βœ‚οΈ

Intermediate Level

Ideal for those with basic crochet experience, featuring slightly more advanced stitches and techniques to expand your skills.

⏱️

Weekend Treat

Takes 5-7 hours, making it an enjoyable project to finish over a couple of days.

🧸

Cute Companion

An adorable friend to cherish, handcrafted with love to bring comfort and joy for years to come.

About This Pillow-panda Amigurumi Pattern

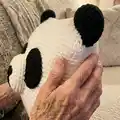
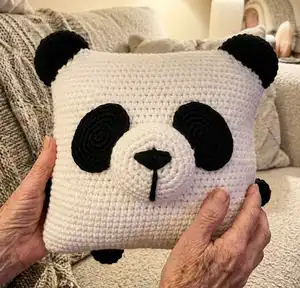
This pattern guides you to crochet a square panda pillow (approximately 29x29 cm using the same yarn and hook) decorated with ears, legs, arms, spots and a rounded nose. It uses plush yarn for a soft, tactile finish and is a great gift for kids or a cozy accent for your home. Full round-by-round instructions and assembly directions are included to help you finish with confidence.

Pillow-panda Amigurumi Pattern crochet pattern - detailed view of completed project

Detailed photos and clear finishing steps make assembly simple even with multiple small pieces. Materials and stitch list are provided so you can begin right away.

Why You'll Love This Pillow-panda Amigurumi Pattern

I absolutely love this pattern because it transforms simple stitches into a lovable panda pillow that looks designer-made. I enjoyed working with plush YarnArt Dolce for a soft, cuddly texture that is fun to crochet and comforting to touch. The construction is satisfying β€” a square pillow base with small amigurumi details sewn on makes assembly fast but rewarding. I also love how customizable it is: you can change yarn color, eye buttons, or make mini versions for keychains.

Pillow-panda Amigurumi Pattern step 1 - construction progress Pillow-panda Amigurumi Pattern step 2 - assembly progress Pillow-panda Amigurumi Pattern step 3 - details and accessories Pillow-panda Amigurumi Pattern step 4 - final assembly and finishing

Switch Things Up

I love making variations of this pillow by changing yarn colors and textures; try soft pastels for a nursery-friendly panda or gray tones for a modern look.

I often change yarn weight and hook size to make mini or oversized versions; use bulky yarn and a larger hook for a chunky, squishy pillow or lighter yarn for a small decorative cushion.

I sometimes substitute buttons with safety eyes or embroidered eyes for a child-safe toy; choose eyes appropriate for the pillow's recipient.

You can personalize the face by repositioning the spots and nose slightly to create different expressions β€” experiment before sewing pieces permanently.

I add accessories like tiny crocheted scarves or bows for seasonal or gift versions, which are quick to make and attach.

I also try mixing yarn types, for example plush for the body and regular acrylic for spots, to create contrasting textures that look intentional and fun.

If you want a weighted pillow, add a small bag of poly pellets inside the stuffing for stability on shelves; keep pellets sealed and inside the stuffing core.

I recommend embroidering small details by hand for a custom look β€” a slightly longer mouth line or tilted nose changes the personality entirely.

Try making a matching set by crocheting two pillows with different expressions or colors to create a coordinated gift set.

I encourage you to experiment with placement and size of eyes, ears and limbs β€” small changes can make dramatic differences and help you create a signature style.

Common Mistakes & How to Fix Them

βœ— Skipping the instruction to fix the beginning of each new circle can cause your rounds to drift; secure the starting loop with a pin or thread so your circles stay even. βœ— Understuffing or stuffing unevenly will make the pillow corners collapse; fill tightly and evenly and pay special attention to each corner for a square shape. βœ— Not leaving long sewing tails on pieces makes assembly fiddly and insecure; leave a long thread for sewing so you can position parts and fasten them neatly. βœ— Forgetting to fasten and hide thread ends leaves loose threads visible on the pillow surface; always fasten off securely and hide the tail inside the pillow or piece.

Pillow-panda Amigurumi Pattern

Make a soft, cuddly panda pillow with this clear intermediate amigurumi pattern. You will crochet a square plush pillow and add ears, legs, arms, spots and a rounded nose to create a charming panda face. The pattern uses plush yarn and includes full round-by-round instructions, assembly photos and finishing tips so you can create a beautiful handmade gift for children and adults.

Intermediate 5-7 Hours

Materials Needed for Pillow-panda Amigurumi Pattern

β€” Main Fabric

  • 01
    YarnArt Dolce plush yarn (120 m / 100 g) - White (approx. 2 skeins)
  • 02
    YarnArt Dolce plush yarn (120 m / 100 g) - Black (approx. 1 skein)
  • 03
    Alternative plush yarn options: Himalaya Dolphin Baby or similar plush yarns
  • 04
    Filler: hollofayber (polyester stuffing), quantity to fill a 29x29 cm pillow

β€” Tools Required

  • 01
    Crochet hook size 3.5 mm (author used No. 3.5; packages may recommend 3.5-5 mm)
  • 02
    Black beads or buttons for eyes, 22 mm (2 pieces) or similar
  • 03
    Tapestry/yarn needle for sewing and embroidering
  • 04
    Scissors
  • 05
    Pins to fix the beginning of rounds and position pieces for sewing
  • 06
    Stitch markers (optional) to mark round starts
  • 07
    Polyester stuffing (hollofayber)

Progress Tracker

0% Complete

β€” Pillow :

Info :

Use white plush yarn

Round 1 :

90 ch, connect with the first loop

Round 2 – 37 :

90 sc

Info :

Leave a long thread and sew the top of the pillow. We fasten the thread and hide inside the pillow.

Info :

Fill tightly and evenly. Fill the angle of the pillow well. Sew and fasten the thread and hide inside the pillow.

β€” Ear (2 details) :

Info :

Use black plush yarn

Round 1 :

6 sc in magic Ring {6}

Round 2 :

(inc) – repeat 6 times {12}

Round 3 :

(1 sc, inc) – repeat 6 times {18}

Round 4 :

(2 sc, inc) – repeat 6 times {24}

Round 5 :

(3 sc, inc) – repeat 6 times {30}

Round 6 :

(4 sc, inc) – repeat 6 times {36}

Round 7 :

(5 sc, inc) – repeat 6 times {42}

Round 8 :

42 sc

Round 9 :

(19 sc, dec) – repeat 2 times {40}

Info :

Leave a long thread for sewing

β€” Nose :

Info :

Use white plush yarn

Round 1 :

6 sc in magic Ring {6}

Round 2 :

(inc) – repeat 6 times {12}

Round 3 :

(1 sc, inc) – repeat 6 times {18}

Round 4 :

(2 sc, inc) – repeat 6 times {24}

Round 5 :

(3 sc, inc) – repeat 6 times {30}

Round 6 :

(4 sc, inc) – repeat 6 times {36}

Round 7 :

(5 sc, inc) – repeat 6 times {42}

Round 8 – 9 :

42 sc

Info :

Leave a long thread for sewing

β€” Leg (2 details) :

Info :

Use black plush yarn

Round 1 :

6 sc in magic Ring {6}

Round 2 :

( inc) – repeat 6 times {12}

Round 3 :

(1 sc, inc) – repeat 6 times {18}

Round 4 :

18 sc

Info :

Leave a long thread for sewing

β€” Arm (2 details) :

Info :

Use black plush yarn

Round 1 :

6 sc in magic Ring {6}

Round 2 :

(inc) – repeat 6 times {12}

Round 3 :

12 sc

Info :

Leave a long thread for sewing

β€” Spot (2 details) :

Info :

Use black plush yarn

Round 1 :

12 ch

Round 2 :

we begin to work from the second loop from the hook: 10 sc, 3 sc in 1 loop. On the other side of the chain: 10 sc, sl st

Round 3 :

1 ch, we begin to work from the second loop from the hook: inc, 9 sc, inc, 1 sc, inc, 11 sc, sl st

Round 4 :

1 ch, we begin to work from the second loop from the hook: 1 sc, inc, 4 sc, hdc, 5 dc, hdc, 1 sc, sl st

Info :

We fasten the thread and leave a long thread for sewing

β€” Assembly :

Info :

Sew ears: we put ears on the angles of the pillow. Sew and fill. Fasten the thread and hide inside the pillow.

Info :

Sew nose between 13 and 21 rounds. Do not sew up to the end. Fill and leave a small hole. We will embroider the nose.

Info :

Use black plush yarn and needle. Embroider the nose. We start from the center.

Info :

We fasten the thread and hide inside the nose, fill and sew a hole.

Info :

Sew spots and fasten the thread and hide inside the pillow.

Info :

Sew eyes on spots and sew arms and legs. Fasten the thread and hide inside the pillow.

Assembly Instructions

  • Sew ears to the four top corner angles of the pillow, stuff the ear slightly before closing, then fasten the thread and hide the end inside the pillow.
  • Sew the nose between rounds 13 and 21 of the pillow front, do not sew fully closedβ€”leave a small opening, stuff the nose, then finish sewing and fasten the thread inside the nose.
  • Embroider the nose with black plush yarn starting from the center to form the triangular nose and vertical mouth line; secure and hide all ends inside the nose.
  • Sew spots in place around the eye area, then sew black beads/buttons (22 mm) onto each spot for eyes and fasten threads securely, hiding ends inside the pillow.
  • Position and sew arms and legs to the sides and bottom of the pillow respectively, leaving long tails for stronger attachment and hiding ends inside after fastening.

Important Notes

  • πŸ’‘Do not forget to fix the beginning of each new circle with a pin or thread so rounds do not shift during work.
  • πŸ’‘Stuff the pillow firmly and evenly for a square shape, paying special attention to stuffing each corner well for structured edges.
  • πŸ’‘Leave long threads when finishing individual pieces so you can sew them securely and hide ends neatly inside the pillow.
  • πŸ’‘Use pins to position pieces on the pillow before sewing to ensure symmetry and even placement.

This panda pillow is both playful and practical β€” a handmade accent that brightens any room. 🧢 Make one for your child, friend, or yourself and enjoy the smiles it brings. 🐼 Carefully assemble and hide all ends for a polished, gift-ready finish. ✨

You ask,

we answer.

FAQs

What size will the finished piece be?

The finished pillow measures approximately 29 x 29 centimeters with the recommended YarnArt Dolce and 3.5 mm hook; final size will vary with yarn and hook choice.

Can I use different yarn weights for this pattern?

Yes, you can use different yarn weights but the final size and texture will change; choose an appropriate hook and expect to adjust stuffing and number of rounds if you change yarn weight.

Do I need prior crochet experience for this pattern?

This pattern is rated intermediate and assumes you know basic rounds, increases and decreases; familiarity with working in the round and sewing amigurumi parts is helpful.

How long does this project typically take to complete?

Most crocheters finish this pillow in about 5-7 hours, depending on experience level and assembly time.