🧶 Beautiful ✨ Detailed 💝 Adorable

Paris Crochet Bag Pattern

Paris Crochet Bag Pattern
4.6★ Rating
12-15 Hours Time Needed
1.6K Made This
✂️

Intermediate Level

Ideal for those with basic crochet experience, featuring slightly more advanced stitches and techniques to expand your skills.

⏱️

Multi-Day Project

A rewarding 12+ hour journey—perfect for dedicated crafters who love detailed work.

Stylish Touch

An elegant detail to elevate any look, combining traditional techniques with contemporary design sensibilities.

About This Paris Crochet Bag Pattern

This pattern creates a structured hexagon-granny crochet bag made from twisted raffia yarn with contrasting hexagon motifs. You will crochet 11 granny star hexagons, join them into a canvas, add a fabric lining and make two long crocheted handles. It includes detailed rows for the granny star, instructions for joining hexagons, lining, assembly and handle finishing.

Paris Crochet Bag Pattern crochet pattern - detailed view of completed project

Perfect for intermediate crocheters comfortable with color changes and working in loops like BLO/FLO. Photos and a video link are provided to help you visualize key steps.

Why You'll Love This Paris Crochet Bag Pattern

I absolutely love this pattern because it blends classic granny motifs with a modern hexagon layout to create a chic, everyday bag. I enjoy the tactile feel of twisted raffia yarn and how the contrasting colors pop in each hexagon. The joining technique creates a sturdy canvas that holds its shape beautifully when lined. Making the long, soft handles by crocheting and folding gives a custom finish that I find both comfortable and durable.

Paris Crochet Bag Pattern step 1 - construction progress Paris Crochet Bag Pattern step 2 - assembly progress Paris Crochet Bag Pattern step 3 - details and accessories Paris Crochet Bag Pattern step 4 - final assembly and finishing

Switch Things Up

I love how this bag pattern adapts to different styles; try swapping the two colors for bold brights, pastels or tonal neutrals to change the whole look.

I often make a mini version by using thinner raffia or cotton and a smaller hook for a compact clutch or coin purse variation.

If you want a softer, less structured bag I recommend a softer yarn instead of twisted raffia and a slightly larger hook to increase drape.

I sometimes add a zipper to the lining for extra security—simply sew a zipper into the lining before inserting it into the bag.

For a different handle style, you can replace the crocheted handles with leather straps or metal chain handles attached with snap hooks or rings.

I like to embroider initials on one hexagon or add small tassels to the corners for a personalized touch.

To make a shoulder bag, lengthen the handle chains and test the drop until it sits comfortably under your arm.

I also experiment with metallic or glitter yarn for the final row of hexagons to create a festive version perfect for evening wear.

Want to make a set? Create matching accessories such as a coin pouch or small makeup bag using the same hexagon motif and lining idea.

Remember to test a small swatch when changing yarn or hook size to keep gauge and final dimensions predictable—this helps me avoid surprises as I customize each project.

Common Mistakes & How to Fix Them

✗ Skipping the step to unwind twisted raffia into balls causes knots and uneven tension; unwind each strand carefully and secure wound balls with a rubber band before you start. ✗ Not pulling the decorative loop to the specified 20 mm in motif rows will change the mock stitch look; consistently pull the loop to 20 mm as instructed for uniform petals. ✗ Changing colors incorrectly can tangle the yarn; do not crochet the new color over the old one—twist the yarn from the wrong side and turn the work away from you after each color change. ✗ Crocheting the handle loops too tightly makes a stiff handle; crochet the chain and first rows loosely and maintain even tension to keep the handle flexible and comfortable. ✗ Failing to work in BLO or FLO as directed will alter the join and edge finish; be sure to insert into back loops only (BLO) or front loops only (FLO) where specified for correct seams and joins.

Paris Crochet Bag Pattern

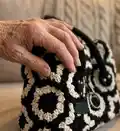
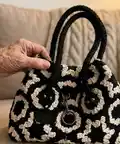
Make a stylish Paris-inspired crochet bag using twisted raffia yarn and hexagon granny motifs. This pattern guides you through crocheting hexagon granny stars, joining them into a canvas, adding a lining and sturdy handles so you end with a ready-to-use handbag. Clear step-by-step instructions and photos help you complete a professional-looking bag you can carry with pride.

Intermediate 12-15 Hours

Materials Needed for Paris Crochet Bag Pattern

— Main Fabric

  • 01
    Paper twisted raffia yarn, approximately 180-200 g (440 yards / 400 m) of each color (base dark and additional light)
  • 02
    Base color (dark) - ~180-200 g
  • 03
    Additional color (light) - ~180-200 g
  • 04
    Fabric for the lining: 40 x 40 inches (1 x 1 m)

— Tools Required

  • 01
    Crochet hook size 3.0-3.5 mm
  • 02
    Any small lock or snap hook (60 x 20 mm) and snap hook ring (35 mm)
  • 03
    Plastic needle with large eyelet
  • 04
    Sewing needle and thread matching the yarn
  • 05
    Scissors
  • 06
    Yarn needle for weaving and strengthening ends
  • 07
    Measuring tape or ruler
  • 08
    Iron or steamer for blocking/steaming hexagons and canvas
  • 09
    Pins for assembly

Progress Tracker

0% Complete

— Material and Tools :

Info :

Paper twisted raffia yarn, 180-200 gr (440 yards (400 m)) of each color; 3-3,5 mm hook; Any small lock, or snap hook (60*20 mm) and snap hook ring (35 mm); Plastic needle with large eyelet; Sewing needle and thread, color of the yarn; Scissors; Fabric for the lining, 40*40 inches (1*1 m).

Info :

Gauge: 24 stitches and 9 rows = 4*4 inches (10*10cm).

— Abbreviations :

Infos :

CH - chain stitch; SlSt - slip stitch; SC - single crochet; DC - double crochet.

— Crochet the Granny Star (Hexagon) (*11) :

Info :

Base color - dark. Additional color - light.

Info :

The diagram for crocheting the granny star is in the appendix 1.

Row 0 :

Take the yarn of the base color. Crochet 5 CH.

Row 1 :

Join in a circle, SlSt.

Row 1 continued :

1 row. Pull the loop 20 mm.

Row 1 technique :

Twist the hook clockwise, then over the loop.

Row 1 technique 2 :

Pull one more loop. Crochet two loops together, then two more. This is mock stitch and the first post of the row, 2 DC, CH.

Row 1 finish :

Next, (3 DC, CH)*4, 3 DC.

Row end :

Crochet the end into this row, cut off the excess.

Row 2 :

2 row. Take the yarn of an additional color. Insert the hook under the 1st loop of the row. Pull the loop 20 mm.

Row 2 continued :

Make the mock stitch, 2 DC, CH, 3 DC, CH.

Row 2 finish :

Next, (3 DC, CH, 3 DC, CH)*4, 3 DC, CH, 3 DC, SlSt.

Info :

Crochet the end into the base thread to this row. Crochet the end into the 1st cluster, cut off the excess.

Row 3 :

3 row. Pull the loop 20 mm. Make the mock stitch, 2 DC, change the color to the base one, CH.

Row 3 continued :

Next, (3 DC, CH, 3 DC, change the color to an additional one, CH, 3 DC, change the color to the base one, CH)*5, 3 DC, CH, 3 DC, SlSt.

Info :

Please note that when changing the thread, do not crochet in another color, but twist the yarn from the wrong side.

Info :

To prevent the yarn from twisting together, turn the work on the hook away from yourself after each color change.

Row 4 :

4 row. Pull the loop 20 mm. Make the mock stitch, 2 DC, CH, 3 DC, change the color to an additional one, CH.

Row 4 continued :

Next, (3 DC, CH, 3 DC, change the color to the base one, CH, 3 DC, CH, 3 DC, change the color to an additional one, CH)*5, 3 DC, CH, 3 DC, SlSt.

Row 5 :

5 row. Pull the loop 20 mm. Make the mock stitch, 2 DC, change the color to the base one, CH, 3 DC, change the color to an additional one, CH, 3 DC, change the color to the base one, CH.

Row 5 continued :

Next, (3 DC, CH, 3 DC, change the color to an additional one, CH, 3 DC, change the color to the base one, CH)*5, 3 DC, CH, 3 DC, change the color to an additional one, CH.

Row finish :

Cut the thread, pull out the end. Insert the hook under the 1st loop of the row, pull the end. Insert the hook under the last loop of the row. Pull the end back to the wrong side.

Row finish 2 :

Tie the knot. Hide the ends between the loops.

Info :

Similarly crochet 10 more granny star.

Info :

Steam each hexagon on the front and wrong side. The hexagon measures approximately 6 inches (15 cm).

— Sew the Canvas :

Info :

Take the two hexagons and turn on the wrong side.

Info :

Take the yarn of the base color. Insert the hook on the back loops only in the corner. Pull the loop. Crochet 3 SlSt on the back loop only (BLO).

Info :

Take the yarn of an additional color, crochet 4 SlSt BLO. Change the color to the base one, 4 SlSt BLO.

Info :

Change the color to an additional one, 4 SlSt BLO. Change the color to the base one, 4 SlSt BLO. Crochet the last SlSt in CH in the corner (=15 SlSt).

Info :

Cut the thread, pull out the end. Strengthen all ends.

Info :

Join 8 hexagons in 4 pairs in the same way.

Info :

Then, join 2 pairs and 1 hexagon into the strip of 5 hexagons.

Info :

After that, take the strip of 5 elements and 1 pair. Place them parallel to each other. Begin to join from the left side.

Info :

Crochet 15 SlSt BLO, make the last SlSt in SlSt of the pair and CH in the corner.

Info :

Make 1 more SlSt in the corner to strengthen the seam. Cut the additional thread. Next crochet with the thread of the base color.

Info :

On the next sides of the hexagons, crochet 15 SlSt BLO + the additional SlSt in the corner. Add and cut off the additional thread at each side of the hexagons.

Info :

Then, join 1 more hexagon to the last pair. On the other side of the strip of 5 elements, add the pair, and then the last hexagon. Strengthen and hide all ends.

Info :

Steam the canvas on the front and wrong sides.

— Lining :

Info :

Fold the fabric in half and draw along the contour of the canvas. Make the lining from two halves if the fabric is not enough.

Info :

Cut out the lining with 10-15 mm seam allowances. If desired, you can cut out a pocket.

Info :

Sew the lining on the side seams. Then, fold the top edge. The shape of the lining repeats the shape of the bag and resembles a 3D trapezoid.

Info :

At this stage, you can give it to the atelier.

— Assembly :

Info :

Join the side seams of the bag in the same way as joined the canvas.

Info :

Strengthen and hide all ends. Twist the towel into the roll. Steam the seams on the wrong side.

Info :

Turn the bag inside out. Straighten the seams with your hands.

— Crochet the Handle (*2) :

Info :

Take the yarn of the base color.

Row 0 :

Crochet 76 CH. Don't tighten the loops, crochet loosely.

Row 1 :

1 row. Crochet 75 SC from the 2nd loop from the hook, CH.

Technique :

Insert the hook through the last SC. Pull out the end. Crochet the end into the next row.

Row 2 :

2 row. 75 SC BLO, CH.

Row 3 :

3 row. 75 SC BLO and the front loop only (FLO) of the pre-previous row, CH.

Rows 4-6 :

4-6 rows. 75 SC BLO and FLO of the pre-previous row, CH.

Row 7 :

7 row. 75 SC BLO and FLO of the pre-previous row.

Finish :

Cut the thread, pull out the end. Strengthen and hide the end.

— Base Trim and Join of the Handle :

Info :

Turn the canvas of the handle with the other side to you.

Step :

Count 4 SC from the left corner. Insert the hook in the 5th SC, pull the loop. Crochet 3 SC. Next crochet 3 SC in 1 in the corner, 3 SC, 3 SC in 1 in the corner, 3 SC.

Info :

Turn the fabric with the wrong side facing up. Fold the handle in half lengthwise. Insert the hook on the 5th loops from the edge. Pull the loop.

Step :

Next crochet 66 SlSt to the other end of the handle. Don't tighten the loops, so as not to tighten the handle. Insert the hook on the loop of the chain and both loops of the SC of the last row.

Assembly Instructions

  • Join the hexagon motifs into pairs and then into strips as shown: crochet 15 SlSt BLO along joining edges and make the last SlSt into the SlSt of the adjacent piece, CH in the corner to secure the seam.
  • After joining both halves of the canvas, place the two matching canvas pieces wrong sides together and sew the side seams using 15 SlSt BLO along each side, strengthening the seam at corners and hiding ends.
  • Cut and sew the lining to mirror the shape of the canvas (with 10-15 mm seam allowances); insert the lining, fold the top edge, then place the folded lining inside the bag and topstitch or slip stitch to finish the top.
  • Make two handles and attach them by crocheting the base trim to the bag edge: count 4 SC from the corner, work 3 SC clusters and secure with SlSts then fold and slip-stitch the handle base to the bag, hiding and strengthening all ends.

Important Notes

  • 💡Unwind twisted raffia into balls before beginning; raffia is sold in strands and must be formed into balls to avoid tangles while you work.
  • 💡When changing colors, do not crochet over the new color—twist the yarn from the wrong side and turn the work on the hook away from you to avoid yarn twisting.
  • 💡Work the mock stitch loops consistently at 20 mm to keep uniform petal shapes across all hexagons.
  • 💡Use BLO and FLO as specified for joining and handle construction to ensure proper seams and to allow the lining to sit smoothly inside the bag.

This Paris-inspired crochet bag combines classic granny motifs with modern hexagon geometry to create a chic everyday accessory. The pattern uses twisted raffia yarn for a structured, textured finish and includes full instructions for motifs, joining, lining and handles. Make one for yourself or gift it to someone special—handmade with love! 👜🧶

You ask,

we answer.

FAQs

What size will the finished piece be?

The finished bag measures approximately 13 inches (33 cm) in length, 9 inches (23 cm) in height and 8 inches (20 cm) in width, with handle length about 24 inches (60 cm) using the recommended materials.

Can I use a different yarn instead of twisted raffia?

Yes, you can substitute other yarns but the texture and stiffness will change; choose a comparable thickness and adjust hook size, and expect a different finished size and drape.

Do I need sewing skills for the lining?

Basic sewing skills are helpful for cutting and sewing the lining; the pattern provides simple steps to trace, cut and sew the lining to match the canvas shape.

How long does it take to complete this bag?

Most crafters complete this bag over multiple sessions; the estimated project time is 12-15 hours depending on experience and finishing detail.