🧶 Beautiful ✨ Detailed 💝 Adorable

Mini Parrot Amigurumi Pattern

Mini Parrot Amigurumi Pattern
4.8★ Rating
2-3 Hours Time Needed
2.2K Made This
✂️

Beginner Friendly Level

Perfect for those just starting their crochet journey, with clear instructions and simple techniques

⏱️

Bite-Sized Project

Finishes in 2-4 hours—perfect for an afternoon of creative relaxation.

🎁

Tiny Treasure

Small, sweet, and gift-worthy creations that fit perfectly in the palm of your hand with detailed charm.

About This Mini Parrot Amigurumi Pattern

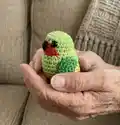
This pattern makes a tiny crocheted parrot approximately 7 cm (3 inches) tall using lightweight cotton yarn. It is worked top-down with simple single crochet shaping, color changes and a small embroidered beak. The pattern includes wing instructions and placement notes for eyes and beak for a charming finished bird.

Mini Parrot Amigurumi Pattern crochet pattern - detailed view of completed project

Minimal sewing is required and the wings attach easily for a neat finish. Photos and tips are included to guide you through tricky bits and finishing.

Why You'll Love This Mini Parrot Amigurumi Pattern

I absolutely love this pattern because it turns a few simple stitches into an adorable little bird with so much character. I enjoy how quick the project is to make, which makes it perfect for gifts or practicing color changes. The minimal sewing keeps finishing fast while still allowing you to add personality with different color combinations. It is satisfying to see the shape form round by round and to add the tiny embroidered beak and eyes at the end.

Mini Parrot Amigurumi Pattern step 1 - construction progress Mini Parrot Amigurumi Pattern step 2 - assembly progress Mini Parrot Amigurumi Pattern step 3 - details and accessories Mini Parrot Amigurumi Pattern step 4 - final assembly and finishing

Switch Things Up

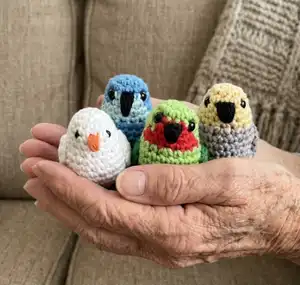
I love customizing the color palette to create different parrot species or playful fantasy birds; change the body, face and wing colors to make a set.

I sometimes use a finer yarn and 1 mm hook for a tiny micro version perfect for keychains and ornaments.

To make a chunkier, cuddlier bird, I use a thicker cotton yarn and a larger hook; this increases the finished size and gives a softer texture.

I often embroider different beak shapes or add a small tuft of yarn on the head to change the birds personality.

Try changing the wing shape—make it longer or add extra rows for a larger wing effect, or add stripes by changing colors in the wing rows.

I like to attach a small jump ring and chain to the top to convert the bird into a keychain or zipper charm; leave a long tail and weave through a ring securely.

For a decorative display, glue a tiny magnet or loop to the underside to attach the bird to metallic surfaces or hanging branches.

Experiment with different eye types: safety eyes, embroidered eyes or French knots all change the finished expression subtly.

If you want posability, insert a short piece of florist wire into the body before stuffing and shape the tail or neck for small poses.

I also enjoy creating mini outfits or tiny hats for seasonal variations—these little accessories make great giftable characters.

Common Mistakes & How to Fix Them

✗ Forgetting to use a stitch marker can make round counting difficult and cause missed increases or decreases; place a marker at the start of every round and move it after each round to stay on track. ✗ Changing color in the wrong stitch can leave awkward color joins; change color in the last stitch of the previous round as instructed to create a neat color transition. ✗ Not stuffing gradually will create lumps or an overstuffed shape; stuff a little at a time from round 15 onwards to maintain an even, rounded body. ✗ Skipping the instruction to weave the thread through the front loops compresses the front shape incorrectly; follow the instruction to weave through the 5 front loops of round 21 and fasten off to close the front neatly.

Mini Parrot Amigurumi Pattern

Make a sweet little mini parrot with this easy-to-follow crochet pattern. Youll create a tiny, gift-sized bird with minimal sewing and delightful results. The pattern uses lightweight cotton yarn and simple stitches, perfect for quick makes. Follow the step-by-step rounds and photos to finish a charming 7 cm (3 in) parrot.

Beginner Friendly 2-3 Hours

Materials Needed for Mini Parrot Amigurumi Pattern

— Main Fabric

  • 01
    Lightweight cotton yarn in turquoise, blue and green (one skein of each color recommended)
  • 02
    Phildar Coton 3 (50 grams, 121 m / 132 yards) used in the pattern (one skein of each color)
  • 03
    Scheepjes Catona or Hobbii Rainbow 8/4 are suitable alternatives
  • 04
    Scheepjes Maxi Sweet Treat used for the white parrot example (used with a 1 mm hook for a smaller version)
  • 05
    A strand of black embroidery yarn to make the beak

— Tools Required

  • 01
    Crochet hook 2.0 mm
  • 02
    Crochet hook 1.0 mm (used for the white parrot example)
  • 03
    Black safety eyes 6 mm (2 pieces)
  • 04
    A stitchmarker to keep track of rounds
  • 05
    A strand of black embroidery yarn to embroider the beak
  • 06
    Filling material: fiberfill
  • 07
    Hot glue (optional, for attaching to props/tree as shown in photos)

Progress Tracker

0% Complete

— Body :

Info :

We are crocheting the parrot from the top down, so start with turquoise.

Round 1 :

6 sc in a magic circle [6]

Round 2 :

2 sc in each sc [12]

Round 3 :

(3 sc, inc) 3x [15] change in the last sc to green

Round 4 :

4 sc, change to turquoise, 11 sc, change in the last sc to green [15]

Round 5 :

4 sc, change to turquoise, 10 sc, change in the last sc to green, sc [15]

Round 6 :

5 sc, change to turquoise, 8 sc, change in the last sc to green, 2 sc [15]

Round 7 :

6 sc, change to turquoise, 3 sc, inc, sc, inc, sc, inc, sc [18]

Round 8 :

2 sc, inc, sc, inc, 13 sc [20]

Info :

Embroider a beak with black and attach the eyes alongside the green face between round 4 and 5. You can also embroider the eyes if you like. The beak is actually a small triangle. Embroider the beak like this, start with the vertical stitches and end with the horizontal stitch. (see pic 1 and 2 on page 3)

Round 9 :

20 sc [20]

Round 10 :

20 sc [20]

Round 11 :

(sc, inc) 4x, 12 sc [24]

Round 12 :

2 sc, dec, 2 sc, dec, and on the middle of the back 2 inc. [24]

Round 13 :

3 sc, dec, 3 sc, dec., 14 sc [22]

Round 14 :

2 sc, dec, 2 sc, dec., 14 sc [20]

Round 15 :

2 sc, dec, 2 sc, dec., 12 sc [18] and start filling the body

Round 16 :

(sc, dec) 6x [12]

Round 17 :

change to blue, (2 sc, dec) 3x [9]

Round 18 :

9 sc [9]

Round 19 :

9 sc [9]

Round 20 :

2 sc, dec, 2 sc, dec, sc [7]

Round 21 :

sc, dec, 2 sc, dec [5]

Info :

Cut thread and weave the thread through the 5 front loops of round 21. Fasten off.

— Wings :

Info :

Make two with dark blue:

Round 1 :

9 sc in magic circle [9]

Round 2 :

(2 sc, inc) 3x [12]

Round 3 :

ch 6, starting in the second stitch from the hook: sc, hdc, dc, 3 tc. The third tc should go in the foundation of the last sc of round 2 (see arrow on pic 3). Skip 2. Then make a sl.st. to attach the tip of the wing to the circle. Leave a long thread.

Info :

Sew both wings on both sides of the body.

Info :

Offcourse you can vary with the colours. Or go freestyling on the tail: make it longer, wider, put a coloured stripe in it. The birds in the picture on the front page of this pattern are attached to their tree with hot glue. Or make them into keychains and give them to your local pirate. He will appreciate the gesture. ;-)

Info :

Have fun making your own mini parrot.

Assembly Instructions

  • Embroider the beak with black embroidery yarn and attach the beak to the green face area; position the black safety eyes alongside the green face between round 4 and 5.
  • Sew both wings to either side of the body using the long tail left on the wing; position them symmetrically around the widest part of the body.
  • Start stuffing from round 15, filling gradually to shape the body before closing; after round 21 weave the thread through the 5 front loops and pull to close the front neatly.
  • Fasten off and weave in all ends securely; trim embroidery yarn ends and secure safety eyes according to manufacturers instructions.
  • If desired, attach the finished bird to a prop or make it into a keychain; the sample birds on the front page are attached with hot glue for display.

Important Notes

  • 💡Use a stitch marker to mark the first stitch of each round so you can easily count and avoid misplaced increases or decreases.
  • 💡Start stuffing early (from round 15) and add stuffing gradually to ensure a smooth, rounded shape without lumps.
  • 💡Place eyes between rounds 4 and 5 as instructed for correct facial placement and consistent look across finished birds.
  • 💡When changing color, make the color change in the last stitch of the previous round to create a tidy transition and fewer loose ends.

This Mini Parrot pattern is a cheerful, quick project thats perfect for gift-making and practicing shaping and color changes. Make a flock in different colors or personalize each bird with a tiny embroidered beak and unique eye placement. Enjoy the process and share your creations with friends and followers—these little birds bring smiles wherever they go. 🧶🐦✨

You ask,

we answer.

FAQs

What size will the finished piece be?

The finished amigurumi measures approximately 7 cm tall when using the recommended Phildar Coton 3 yarn and a 2.0 mm hook.

Can I use different yarn weights for this pattern?

Yes, you can use different yarn weights but it will change the final size; use a suitable hook for your yarn and expect a larger or smaller bird accordingly.

Do I need prior crochet experience for this pattern?

This pattern is beginner friendly, so basic knowledge of single crochet, increases and decreases is helpful for best results.

How long does this project typically take to complete?

Most crocheters complete this mini parrot in about 2-3 hours, depending on experience and whether you add embroidery or multiple color changes.