🧢 Beautiful ✨ Detailed πŸ’ Adorable

Lily the Piglet Amigurumi Pattern

Lily the Piglet Amigurumi Pattern
3.9β˜… Rating
5-7 Hours Time Needed
3.1K Made This
βœ‚οΈ

Intermediate Level

Ideal for those with basic crochet experience, featuring slightly more advanced stitches and techniques to expand your skills.

⏱️

Weekend Treat

Takes 5-7 hours, making it an enjoyable project to finish over a couple of days.

🧸

Cute Companion

An adorable friend to cherish, handcrafted with love to bring comfort and joy for years to come.

About This Lily the Piglet Amigurumi Pattern

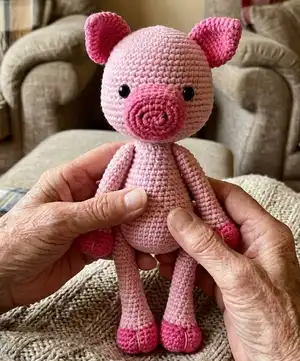
This pattern creates a sweet piglet amigurumi named Lily, designed with soft shaping and playful contrast details. You will work in continuous spiral, practice increases, decreases and a few finishing techniques to make a professional-looking toy. The pattern includes head, body, arms, legs, ears, muzzle and tail plus clear assembly instructions and photos.

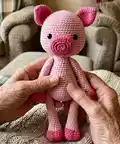
Lily the Piglet Amigurumi Pattern crochet pattern - detailed view of completed project

Perfect for intermediate crocheters who want a charming toy project with helpful step photos. Make Lily in sport weight yarn using a small hook for tight stitches and a neat finish.

Why You'll Love This Lily the Piglet Amigurumi Pattern

I absolutely love this pattern because it balances simple construction with adorable results that feel special. I enjoy the subtle shaping that gives Lily a gentle, cuddly face and the little color-pop hooves and snout that make her look playful. The pattern includes clear placement guides and photos so you can get the expression just right. Making Lily is one of those projects that is fun to sew together and then rewarding to see finished.

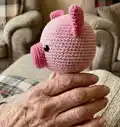
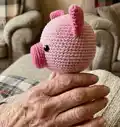
Lily the Piglet Amigurumi Pattern step 1 - construction progress Lily the Piglet Amigurumi Pattern step 2 - assembly progress Lily the Piglet Amigurumi Pattern step 3 - details and accessories Lily the Piglet Amigurumi Pattern step 4 - final assembly and finishing

Switch Things Up

I love how easy it is to customize Lily the Piglet by changing colors; try a pale peach body with contrasting ears for a unique look.

You can make Lily larger or smaller by changing yarn weight and hook size; bulky yarn with a larger hook gives a plush chunky pig, while finer yarn makes mini keychain buddies.

I often add tiny accessories like a crocheted scarf, bow or embroidered heart to personalize each piglet as a gift.

For more character, change eye size or use embroidered eyes for a softer, child-safe finish.

If you want poseable limbs, insert thin wire into the arms and legs before stuffing to make them adjustable.

Try adding a stripe or patchwork belly by changing color mid-round and weaving in ends neatly for a playful design.

I sometimes use felt for small details like a flower or collar tag to add texture and interest to the finished toy.

For sturdier joints, use the plastic doll joints as instructed, or sew on buttons and secure with strong thread for a classic look.

Embroider different expressions by altering nostril placement and mouth shape – a small change can make Lily look sleepy, surprised, or cheeky.

If you want to mass-produce for gifts, consider making a quick assembly line: crochet all parts first, then stuff and sew in batches to save time.

Common Mistakes & How to Fix Them

βœ— Placing safety eyes too high or low on the head can change the expression; mark the center stitch and count stitches carefully between rounds 16 and 17 to place eyes symmetrically. βœ— Forgetting to stuff gradually causes awkward shaping and lumps; stuff a little after every few rounds and shape as you go for a smooth result. βœ— Skipping stitch counts during increases and decreases will give uneven shaping; count stitches at the end of each round, especially after shaping rounds, to stay accurate. βœ— Not using a stitch marker when working in spiral leads to misplaced ends of rounds; use a marker to find your round end and update it when instructed throughout the pattern. βœ— Pulling yarn too tight when closing openings can distort the piece; gently gather stitches and weave ends neatly to avoid puckering around seams. βœ— Attaching limbs without pinning can create crooked placement; always pin limbs and check positioning from photos or stitch numbers before sewing permanently.

Lily the Piglet Amigurumi Pattern

Make a sweet Lily the Piglet amigurumi you will adore. This charming piglet pattern guides you through shaping, color changes and simple assembly so you can create a cuddly handmade toy. With clear step-by-step rounds and helpful photos, you will enjoy crafting this adorable companion for gifting or display.

Intermediate 5-7 Hours

Materials Needed for Lily the Piglet Amigurumi Pattern

β€” Main Fabric

  • 01
    Sport weight cotton-acrylic blend yarn (Alize 'Cotton Gold' or similar) - 329 m = 100 g; approximately 55 g light pink (about 180 m)
  • 02
    Dark pink sport weight yarn - approximately 20 g (about 66 m) for hooves, snout and ears

β€” Tools Required

  • 01
    Crochet hook size 2.50 - 3.00 mm (US size 2/C - 3/D) or according to yarn
  • 02
    Polyester fiberfill for stuffing
  • 03
    9 mm (3/8") safety eyes (2 pieces) or suitable buttons/beads
  • 04
    Two 20 mm (4/5") and two 15 mm (3/5") plastic doll joints or safety eyes/buttons and thread
  • 05
    Black or dark brown embroidery floss for nostrils
  • 06
    Yarn needle for sewing
  • 07
    Scissors
  • 08
    Stitch marker
  • 09
    Pins for assembly (optional)

Progress Tracker

0% Complete

β€” Head :

Round 1 :

mr, sc 6 (6)

Round 2 :

inc x 6 (12)

Round 3 :

(sc, inc) x 6 (18)

Round 4 :

(inc, sc 2) x 6 (24)

Round 5 :

(sc 3, inc) x 6 (30)

Round 6 :

sc, inc, (sc 4, inc) x 5, sc 3 (36)

Round 7 :

(sc 5, inc) x 6 (42)

Round 8 :

sc 2, inc, (sc 6, inc) x 5, sc 4 (48)

Round 9 :

(sc 7, inc) x 6 (54)

Round 10-15 :

sc in each st (54)

Info :

On round 16 place a stitch marker between stitches 24 and 25 (around the loops on top of the 25th stitch). This marks the center of the face, use it as a guide when placing the eyes.

Round 16-17 :

sc in each st (54)

Round 18 :

sc 11, inc, (sc 2, inc) x 2, sc 13, inc, (sc 2, inc) x 2, sc 16 (60)

Round 19-21 :

sc in each st (60)

Round 22 :

sc 3, dec, (sc 8, dec) x 5, sc 5 (54)

Round 23 :

(sc 7, dec) x 6 (48)

Round 24 :

sc 2, dec, (sc 6, dec) x 5, sc 4 (42)

Info :

Attach safety eyes to either side of the stitch marker, between rows 16 and 17, leaving 10 stitches (count 9 holes) between them (see page 7).

Round 25 :

(sc 5, dec) x 6 (36)

Round 26 :

sc, dec, (sc 4, dec) x 5, sc 3 (30)

Round 27 :

(sc 3, dec) x 6 (24)

Round 28 :

(dec, sc 2) x 6 (18)

Info :

Sl st in next stitch. Cut the yarn, leaving a long yarn tail for sewing, and fasten off. Stuff the head firmly.

β€” EARS (make 2) :

Round 1 :

mr, sc 6 (6)

Round 2 :

sc in each st (6)

Round 3 :

(inc, sc) x 3 (9)

Round 4 :

(sc 2, inc) x 3 (12)

Round 5 :

sc, inc, (sc 3, inc) x 2, sc 2 (15)

Round 6 :

(sc 4, inc) x 3 (18)

Round 7-9 :

sc in each st (18)

Round 10 :

(dec, sc) x 6 (12)

Info :

Sl st in next stitch. Cut the yarn, leaving a long yarn tail for sewing, and fasten off. Flatten the ears and sew them to the head (see page 10).

β€” Muzzle :

Round 1 :

mr, sc 6 (6)

Round 2 :

(inc3 x 2, sc) x 2 (14)

Infos :

... Sc in next stitch, count it as the end of the round from now on.

β€” ARMS (make 2) :

Round 1 :

mr, sc 7 (7)

Round 2 :

inc x 7 (14)

Round 3 :

(sc, inc) x 7 (21)

Info :

Crochet round 4 in back loops only.

Round 4 :

sc in each st (21)

Round 5 :

sc 7, dec, (sc, dec) x 2, sc 6 (18)

Round 6 :

sc 4, dec, sc 7, dec, sc 3 (16)

Round 7 :

sc 8, dec, sc 6 (15)

Infos :

Sc in next stitch, count it as the end of the round from now on.

With light pink yarn - Round 8 :

sc in each st (15)

With light pink yarn - Round 9 :

sc 7, dec, sc 6 (14)

Info :

Stuff firmly. Turn the arm so the end of the round is at the back of the arm. Make a long vertical stitch along the front of the hoof with light pink yarn, going from round 7 straight down, draw it very tight and knot the yarn ends together (see page 8). Keep adding a bit of fiberfill after every few rounds, stuffing the arms firmly.

Round 10 :

sc in each st (14)

Round 11 :

sc 7, dec, sc 5 (13)

Round 12 :

sc in each st (13)

Round 13 :

sc 7, dec, sc 4 (12)

Round 14 :

sc in each st (12)

Round 15 :

sc 7, dec, sc 3 (11)

Round 16-23 :

sc in each st (11)

Info :

On the left arm only, sc in next 6 stitches. Count the last sc as the end of the round from now on. Attach the 15 mm joint between rounds 22 and 23, placing it so the stem is facing straight towards the body (see page 9).

Round 24 :

sc 5, dec x 3 (8)

Round 25 :

dec x 2, leave rest of the sts unworked (6)

Info :

Finish stuffing. Cut the yarn, leaving a long yarn tail, and fasten off. Pick up all the remaining stitches and close the opening (see page 9).

β€” LEGS (make 2) :

Round 1 :

mr, sc 6 (6)

Round 2 :

inc x 6 (12)

Round 3 :

(sc, inc) x 6 (18)

Infos :

...

Info :

Sc in next stitch, count it as the end of the round from now on.

With light pink yarn - Round 8 :

sc in each st (15)

With light pink yarn - Round 9 :

sc 7, dec, sc 6 (14)

Info :

Stuff firmly. Turn the leg so the end of the round is at the back of the leg. Make a long vertical stitch along the front of the hoof with light pink yarn, going from round 8 straight down, draw it very tight and knot the yarn ends together (see page 8). Keep adding a bit of fiberfill after every few rounds, stuffing the legs firmly.

Round 11 :

sc in each st (17)

Round 12 :

sc 3, dec, sc 8, dec, sc 2 (15)

Round 13 :

sc in each st (15)

Round 14 :

sc 7, dec, sc 6 (14)

Round 15 :

sc in each st (14)

Round 16 :

sc 7, dec, sc 5 (13)

Round 17-28 :

sc in each st (13)

Info :

On the left leg only, sc in next 7 stitches. Count the last sc as the end of the round from now on. Attach the 20 mm joint between rounds 27 and 28, placing it so the stem is facing straight towards the body (see page 9).

Round 29 :

sc 9, dec, sc 2 (12)

Round 30 :

sc 2, dec x 5 (7)

Round 31 :

sc, dec, leave the rest of the sts unworked (6)

Info :

Finish stuffing. Cut the yarn, leaving a long yarn tail, and fasten off. Pick up all the remaining stitches and close the opening (see page 9).

β€” Body :

Round 1 :

mr, sc 6 (6)

Round 2 :

inc x 6 (12)

Round 3 :

(sc, inc) x 6 (18)

Round 4 :

(inc, sc 2) x 6 (24)

Round 5 :

(sc 3, inc) x 6 (30)

Round 6 :

sc, inc, (sc 4, inc) x 5, sc 3 (36)

Round 7 :

(sc 5, inc) x 6 (42)

Round 8-14 :

sc in each st (42)

Info :

Turn the body so the last stitch of round 14 is at the center of the back. Attach the legs to either side of the body, between rounds 8 and 9 (see page 9).

Round 15 :

sc 9, dec, sc 5, dec, sc 6, dec, sc 5, dec, sc 9 (38)

Round 16 :

sc 18, dec, sc 18 (37)

Round 17 :

(sc 11, dec) x 2, sc 11 (35)

Round 18 :

sc 4, dec, sc 24, dec, sc 3 (33)

Info :

Start stuffing the body. Keep adding a bit of fiberfill after every few rounds, stuffing the body firmly.

Round 19 :

sc 16, dec, sc 15 (32)

Round 20 :

dec, sc 30 (31)

Round 21 :

sc 7, dec, sc 14, dec, sc 6 (29)

Round 22 :

sc 14, dec, sc 13 (28)

Round 23 :

sc 10, dec, sc 6, dec, sc 8 (26)

Round 24 :

(dec, sc 11) x 2 (24)

Round 25 :

sc 6, dec, sc 9, dec, sc 5 (22)

Round 26 :

sc 9, dec, sc 2, dec, sc 7 (20)

Round 27 :

dec, sc 18 (19)

Round 28 :

sc 9, dec, sc 8 (18)

Round 29 :

sc in each st (18)

Info :

Sl st in next stitch. Cut the yarn and fasten off. Attach the arms to either side of the body between rows 24 and 25 (see page 9). Finish stuffing the body. Sew the head to the body (see page 10).

β€” TAIL :

Round 1 :

ch 11, starting in 2nd ch from hook, 2 sc in each ch, crocheted into the loops on the back of the chain (20)

Info :

Cut the yarn, leaving a long yarn tail for sewing, and fasten off. Sew the tail to the body (see page 10).

β€” Assembly :

Info :

Sew the ears to the head: place the ear just below round 6 of the head, push the ear flat and sew it to the head inserting the needle through both layers. Sew the head to the body with whip or mattress stitch, adding a bit more stuffing before closing the seam.

Info :

Sew the tail to the body just above round 9. Attach the arms to either side of the body between rounds 24 and 25, and the legs between rounds 8 and 9. Insert plastic doll joints or sew with buttons as preferred, following the joint instructions on pages 2-3.

Assembly Instructions

  • Place each ear just below round 6 of the head, flatten the ear and sew through both layers to attach them securely.
  • Attach legs to either side of the body between rounds 8 and 9 before finishing stuffing; this helps the pig sit evenly.
  • Sew the head to the body using whip stitch or mattress stitch, adding more stuffing before closing the seam for smooth shaping.
  • Attach arms to either side of the body between rounds 24 and 25, angle slightly forward if desired, and secure firmly.
  • Sew the tail to the body just above round 9 using the long tail left from the tail piece for a tidy finish.

Important Notes

  • πŸ’‘Work in a continuous spiral and do not join rounds or turn your work unless instructed otherwise in the pattern.
  • πŸ’‘Use a stitch marker to mark the end or the beginning of a round and move it every round to keep track.
  • πŸ’‘Stuff pieces gradually after every few rounds for even shaping and to avoid lumps.

This Lily the Piglet is a lovely project to brighten a nursery or make a heartfelt handmade gift. The pattern combines clear shaping and simple sewing to create a professional-finished toy you can be proud of. Happy crocheting and enjoy giving this sweet little piglet a loving home! 🧢🐷

You ask,

we answer.

FAQs

What size will the finished piece be?

The finished amigurumi measures approximately 26 cm (10 1/4") from head to toe when crocheted with sport weight cotton-acrylic yarn and a 2.50 mm hook.

Can I use different yarn weights for this pattern?

Yes, you can use different yarn weights but this will affect the final size; use an appropriate hook for the yarn and expect size variations.

Do I need prior crochet experience for this pattern?

This pattern is rated intermediate, so basic knowledge of single crochet, increases, decreases and working in spiral is recommended for best results.

How long does this project typically take to complete?

Most crocheters complete this project in 5-7 hours, though time may vary depending on experience level, finishing and assembly choices.