🧢 Beautiful ✨ Detailed πŸ’ Adorable

Frog Prince Amigurumi Pattern

Frog Prince Amigurumi Pattern
4.2β˜… Rating
5-7 Hours Time Needed
2.4K Made This
βœ‚οΈ

Intermediate Level

Ideal for those with basic crochet experience, featuring slightly more advanced stitches and techniques to expand your skills.

⏱️

Weekend Treat

Takes 5-7 hours, making it an enjoyable project to finish over a couple of days.

🧸

Cute Companion

An adorable friend to cherish, handcrafted with love to bring comfort and joy for years to come.

About This Frog Prince Amigurumi Pattern

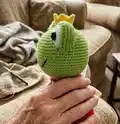
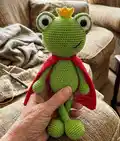
This pattern creates a tall Frog Prince amigurumi with a separate head, body, arms, legs, eyes, eyelids and a tiny crown. You will work pieces in continuous spirals and sew them together for a playful pose. The design highlights large expressive eyes and long limbs for a whimsical silhouette. Clear round-by-round instructions make shaping easy and consistent.
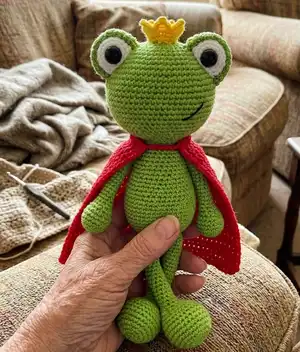
Frog Prince Amigurumi Pattern crochet pattern - detailed view of completed project

Perfect for intermediate crocheters comfortable with increases and decreases, stitch counting and simple assembly. The pattern uses worsted weight yarn and recommended tools for a finished toy about 17 inches tall.

Why You'll Love This Frog Prince Amigurumi Pattern

I absolutely love this pattern because it combines simple amigurumi construction with a charming, elongated silhouette that stands out from typical round dolls. I enjoyed designing the oversized eyes and tiny crown which give the frog so much personality with just a few stitches. I also love that the long legs invite playful posing and make the finished toy feel whimsical and unique. Making this frog always feels rewarding β€” the assembly pulls everything together into a delightful handmade character.

Frog Prince Amigurumi Pattern step 1 - construction progress Frog Prince Amigurumi Pattern step 2 - assembly progress Frog Prince Amigurumi Pattern step 3 - details and accessories Frog Prince Amigurumi Pattern step 4 - final assembly and finishing

Switch Things Up

I love how easy it is to customize this Frog Prince by changing colors and yarn weight to create different personalities.

You can use pastel greens and a cream crown for a soft nursery-friendly version that feels gentle and sweet.

Switch to bright lime or neon yarn for a quirky, eye-catching toy that pops on a shelf or in photos.

If you want a smaller keychain version, use sport or DK weight yarn and a smaller hook to scale the pattern down.

Make a chunky, cuddly frog by using bulky yarn and a larger hook for a plush oversized buddy that is great for hugs.

I often embroider little freckles or a smile with black thread to change the expression and add character.

Add felt clothing or tiny crocheted accessories like a bow tie, scarf or robe for seasonal or theme variations.

Try substituting safety eyes with embroidered eyes for a child-safe option suitable for very young children.

You can also create a whole set of themed frogs (princess, pirate, superhero) by altering accessories and small color details.

I recommend testing placement for eyes and limbs with pins before sewing to adjust proportions to your liking.

Experiment with surface crochet or simple colorwork stripes on the body to give your frog a unique pattern and more visual interest.

Common Mistakes & How to Fix Them

βœ— Skipping stitch markers during continuous spiral work leads to losing track of the beginning of rounds; place a marker and move it every round to maintain correct stitch counts. βœ— Overstuffing the head or body causes visible lumps and distorted shaping; stuff gradually, adding small amounts and smoothing as you go for even shaping. βœ— Forgetting to place safety eyes at the recommended rounds will misplace facial features; insert the safety eyes between rounds 5 and 6 of the eye pieces before finishing those rounds. βœ— Not counting stitches after increase or decrease rounds results in incorrect shaping later on; count after each shaping round and correct any mistakes before continuing to the next rounds.
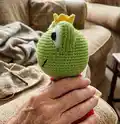
Frog Prince Amigurumi Pattern

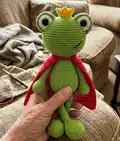
Make a charming Frog Prince amigurumi you will love to display or gift. This pattern guides you through crocheting a tall, playful frog with expressive eyes, long legs, and a tiny crown. You will enjoy clear step-by-step rounds and helpful assembly notes to finish a sweet handmade companion. Perfect for gifting or keeping as a whimsical addition to your handmade collection.

Intermediate 5-7 Hours

Materials Needed for Frog Prince Amigurumi Pattern

β€” Main Fabric

  • 01
    Worsted Weight yarn (#4), approximately 150g main color (Color A: Green)
  • 02
    Accent yarn approximately 50g total (Color B: White for eyes, Color C: Yellow for crown)
  • 03
    Black embroidery thread for mouth details and eye accents
  • 04
    18 mm safety eyes (2 pieces)

β€” Tools Required

  • 01
    Crochet hook size F / 3.75 mm (pattern also references 3.25 mm on cover - use hook recommended for your yarn and tension)
  • 02
    18 mm safety eyes (2 pieces)
  • 03
    Scissors
  • 04
    Yarn needle for sewing and weaving ends
  • 05
    Stitch markers
  • 06
    Polyester fiberfill stuffing
  • 07
    Pins for assembly (optional)
  • 08
    Black embroidery thread and small embroidery needle

Progress Tracker

0% Complete

β€” Head :

Info :

Worked from top to bottom

Info :

With Color A:

Round 1 :

Make 6 sc into a magic ring= 6

Round 2 :

Increase in each st around= 12

Round 3 :

(sc, inc) x 6= 18

Round 4 :

sc, inc, (2 sc, inc) x 5, sc= 24

Round 5 :

(3 sc, inc) x 6= 30

Round 6 :

2 sc, inc, (4 sc, inc) x 5, 2 sc= 36

Round 7 :

(5 sc, inc) x 6= 42

Round 8 :

3 sc, inc, (6 sc, inc) x 5, 4 sc= 48

Round 9 :

(7 sc, inc) x 6= 54

Round 10 :

4 sc, inc, (8 sc, inc) x 5, 4 sc= 60

Round 11 :

(9 sc, inc) x 6= 66

Round 12-19 :

sc in each st around

Round 20 :

(9 sc, dec) x 6= 60

Round 21 :

4 sc, dec, (8 sc, dec) x 5, 4 sc= 54

Round 22 :

(7 sc, dec) x 6= 48

Round 23 :

3 sc, dec, (6 sc, dec) x 5, 3 sc= 42

Round 24 :

(5 sc, dec) x 6= 36

Round 25 :

2 sc, dec, (4 sc, dec) x 5, 2 sc= 30

Round 26 :

(3 sc, dec) x 6= 24

Round 27 :

(2 sc, dec) x 6= 18

Info :

F/O

β€” Body :

Info :

With Color A:

Round 1 :

Make 6 sc into a magic ring= 6

Round 2 :

Increase in each st around= 12

Round 3 :

(sc, inc) x 6= 18

Round 4 :

(2 sc, inc) x 6= 24

Round 5 :

(3 sc, inc) x 6= 30

Round 6 :

(4 sc, inc) x 6= 36

Round 7 :

(5 sc, inc) x 6= 42

Round 8 :

(6 sc, inc) x 6= 48

Round 9-15 :

Sc in each st around

Round 16 :

(6 sc, dec) x 6= 42

Round 17-18 :

Sc in each st around

Info :

Start stuffing the body

Round 19 :

(5 sc, dec) x 6= 36

Round 20-21 :

Sc in each st around

Round 22 :

(4 sc, dec) x 6= 30

Round 23-25 :

Sc in each st around

Round 26 :

(3 sc, dec) x 6= 24

Round 27-29 :

Sc in each st around

Round 30 :

(2 sc, dec) x 6= 18

Round 31-32 :

Sc in each st around

Info :

F/O and leave a long tail for sewing

β€” Eyes(Make 2) :

Info :

With Color B:

Round 1 :

Make 6 sc into a magic ring= 6

Round 2 :

Increase in each st around= 12

Round 3 :

(sc, inc) x 6= 18

Round 4-6 :

sc in each st around

Info :

Place the safety eyes between rounds 5 and 6.

Info :

F/O and leave a long tail for sewing

β€” Eyelids(Make 2) :

Info :

With Color A:

Round 1 :

Make 6 sc into a magic ring= 6

Round 2 :

Increase in each st around= 12

Round 3 :

(sc, inc) x 6= 18

Round 4 :

(2 sc, inc) x 6= 24

Round 5 :

(3 sc, inc) x 6= 30

Round 6-9 :

Sc in each st around

Info :

Fold the eyelid in half and sc it closed. F/O and leave a long tail for sewing

β€” Arms(Make 2) :

Info :

With Color A:

Round 1 :

Make 6 sc into a magic ring= 6

Round 2 :

Increase in each st around= 12

Round 3 :

(sc, inc) x 6= 18

Round 4-6 :

sc in each st around

Info :

Start stuffing the arms

Round 7 :

(4 sc, dec) x 3= 15

Round 8 :

(3 sc, dec) x 3= 12

Round 9 :

(2 sc, dec) x 3= 9

Info :

Stop stuffing the legs

Round 10-27 :

sc in each st around

Info :

Fold the arms in half and sc the opening closed. F/O and leave a long tail for sewing

β€” Legs(Make 2) :

Info :

With Color A:

Round 1 :

Make 6 sc into a magic ring= 6

Round 2 :

Increase in each st around= 12

Round 3 :

(sc, inc) x 6= 18

Round 4 :

(2 sc, inc) x 6= 24

Round 5 :

(3 sc, inc) x 6= 30

Round 6-9 :

Sc in each st around

Info :

Start stuffing the legs

Round 10 :

(2 sc, dec) x 4, 14 sc= 26

Round 11 :

(sc, dec) x 4, 14 sc= 22

Round 12 :

Dec x 4, 14 sc= 18

Round 13 :

(sc, dec) x 6= 12

Round 14 :

(2 sc, dec) x 3= 9

Info :

Stop stuffing the legs

Round 15-35 :

sc in each st around

Info :

Fold the legs in half and sc the opening closed. F/O and leave a long tail for sewing

β€” Crown :

Info :

With Color C:

Instruction :

Ch 12

Round 1 :

sl to to 1st ch to make a ring

Round 2-3 :

sc in each st around

Round 4 :

ch 3, sl st in 2nd ch from hook, sc in next chain, sc in next st on crown.

Info :

Repeat 5 more times to have 6 points

Info :

F/O and leave a long tail for sewing

Assembly Instructions

  • Sew the eyes onto the head. Sew the eyelids around the eyes.
  • Sew the head onto the body using the long tail left on the body and head, matching rounds for a neat seam.
  • Sew the arms and legs onto the body, positioning arms slightly forward and legs at the bottom for balance.
  • Sew the crown in between the eyes onto the head, securing firmly with the long tail left for sewing.
  • For the cape I used a no sew tutorial: http://www.littlepinkmonsters.com/no-sew-superhero-cape/ (use fabric and tie or pin as desired).

Important Notes

  • πŸ’‘Do not join rounds unless stated; work in a continuous spiral for a smooth, invisible seam.
  • πŸ’‘Use a stitch marker to mark the beginning of each round so you can accurately count and track rounds.
  • πŸ’‘All stitches are worked in both loops unless otherwise stated in the pattern for clarity and consistent texture.
  • πŸ’‘Place the safety eyes between rounds 5 and 6 of the eye piece before fastening off to ensure correct placement.

This delightful Frog Prince pattern makes a charming handmade friend that stands tall and full of personality. Perfect for gifting or as a whimsical home accent, the big eyes and tiny crown bring the character to life. Make one in your favorite colors and enjoy the playful details and easy assembly. πŸ§ΆπŸ‘‘

You ask,

we answer.

FAQs

What size will the finished piece be?

The finished amigurumi measures approximately 17 inches from bottom to top of head when using worsted weight (#4) yarn and the recommended hook size.

Can I use different yarn weights for this pattern?

Yes, you can use different yarn weights but this will affect the final size and proportions; adjust your hook size accordingly and check gauge by comparing a small section before continuing.

Do I need prior crochet experience for this pattern?

This pattern is rated intermediate and is best for crocheters comfortable with increases, decreases, continuous spiral work, and basic assembly techniques.

How long does this project typically take to complete?

Most crocheters complete this project in 5-7 hours, though time may vary depending on experience level, stitching speed and assembly detail.