🧢 Beautiful ✨ Detailed πŸ’ Adorable

Frog Amigurumi Pattern

Frog Amigurumi Pattern
4.7β˜… Rating
5-7 Hours Time Needed
2.8K Made This
βœ‚οΈ

Intermediate Level

Ideal for those with basic crochet experience, featuring slightly more advanced stitches and techniques to expand your skills.

⏱️

Weekend Treat

Takes 5-7 hours, making it an enjoyable project to finish over a couple of days.

🧸

Cute Companion

An adorable friend to cherish, handcrafted with love to bring comfort and joy for years to come.

About This Frog Amigurumi Pattern

This pattern creates a colorful minimal frog amigurumi about 15 cm tall using worsted weight yarn and a 3mm hook. The design features a rounded head that continues into the body with divided legs, two stuffed eyes, a snout, arms and a tiny cross bag accessory. Color changes are shown in a symbol chart and detailed in the written rounds for easy tracking.

Frog Amigurumi Pattern crochet pattern - detailed view of completed project

Youll work in continuous rounds using single crochet, increases and decreases to shape each piece, then sew components together with clear photo guides. The finished frog is compact, playful and perfect as a gift or shelf companion.

Why You'll Love This Frog Amigurumi Pattern

I absolutely love this pattern because it balances simple shaping with fun colorwork so you get a lot of personality without complex stitches. I enjoy how the divided-leg construction creates a built-in pant shape that looks great with the striped body. The tiny cross bag accessory is a delightful detail that makes each finished piece look handmade and unique. Working the small stuffed eyes and snout gives the frog a charming expression I cant help but smile at every time I see it.

Frog Amigurumi Pattern step 1 - construction progress Frog Amigurumi Pattern step 2 - assembly progress Frog Amigurumi Pattern step 3 - details and accessories Frog Amigurumi Pattern step 4 - final assembly and finishing

Switch Things Up

I love how easy it is to customize this frog by changing yarn colors; try pastel shades for a softer look or bright stripes for a playful version.

I sometimes switch to fingering weight yarn and a 2.5-3mm hook to make a smaller keychain-friendly frog.

I add embroidered eyebrows or a tiny felt bow to give each frog a unique personality and expression.

I also experiment with different eye styles: safety eyes, embroidered pupils or small beads to change the look.

If you want a sturdier doll, I add a small wooden dowel or toothpick into the feet as shown in the tip to help the frog stand straighter.

I often make a set of frogs with coordinated cross bags in complementary colors to create a themed gift set.

For a textured body, try a surface stitch or a slipped stitch row in the blue area to mimic a sweater pattern for extra detail.

You can enlarge the pattern easily by using bulkier yarn and a larger hook for a cuddlier version perfect for cuddling or gifting to children.

I recommend testing color placements on scrap rounds first so youre happy with the stripe sequence before changing colors on the body.

Dont be afraid to mix in small felt or fabric accessories; a tiny crocheted scarf or hat looks adorable and personalizes your frog even more.

Common Mistakes & How to Fix Them

βœ— Skipping the stitch marker during continuous rounds leads to losing track of the round start; place a marker at the start of each round and move it after each round to stay accurate. βœ— Changing colors without securing ends can create loose tails that show through the fabric; carry yarn neatly or weave in ends after each color change to hide them. βœ— Understuffing the head or legs results in a floppy shape that wont hold the features well; stuff gradually and firmly especially around shaping areas to maintain form. βœ— Forgetting to sew the 6 stitches between legs firmly will make the legs unstable; use a yarn needle and whipstitch the 6 sts between the legs securely and weave in the tail.

Frog Amigurumi Pattern

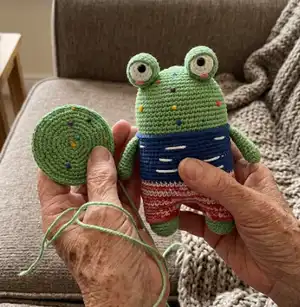
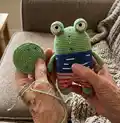
Make a charming minimal frog amigurumi with clear step-by-step rounds and photo guidance. This pattern guides you through the head, body, legs, eyes, snout, arms and a tiny cross bag using simple single crochet techniques. Youll enjoy working color changes and shaping to create a playful handmade companion.

Intermediate 5-7 Hours

Materials Needed for Frog Amigurumi Pattern

β€” Main Fabric

  • 01
    Worsted weight yarn (#4) - Light green yarn (main body and head color)
  • 02
    Worsted weight yarn (#4) - Blue yarn (body top/shirt section)
  • 03
    Worsted weight yarn (#4) - White yarn (striped accents and eye base)
  • 04
    Worsted weight yarn (#4) - Red yarn (striped accents and cross bag)
  • 05
    Worsted weight yarn (#4) - Orange yarn (small details like beak/accents)

β€” Tools Required

  • 01
    Crochet hook 5/0 (3mm)
  • 02
    Yarn needle for sewing and weaving ends
  • 03
    Scissors
  • 04
    Stitch markers
  • 05
    Fiberfill stuffing
  • 06
    Glue (to glue the eyes on the face)
  • 07
    5mm black plastic eyes x2
  • 08
    Pins for assembly (optional)

Progress Tracker

0% Complete

β€” Head / Body / Legs :

Infos :

*Change the color of the yarn according to the SYMBOL PATTERNS on page 1. Changing the yarn color is not mentioned in the descriptive design below.

Info :

Rnd Use the Light green yarn to make MAGIC RING.

Round 1 :

scx6 in the yarn loop, tighten the loop [6 sts]

Round 2 :

(2-sc inc) x 6 [12]

Round 3 :

(scx1, 2-sc inc) x 6 [18]

Round 4 :

(scx2, 2-sc inc) x 6 [24]

Round 5 :

(scx3, 2-sc inc) x 6 [30]

Round 6 :

(scx4, 2-sc inc) x 6 [36]

Round 7 :

(scx5, 2-sc inc) x 6 [42]

Round 8 :

(scx6, 2-sc inc) x 6 [48]

Round 9~35 :

sc in all 48 st [48]

Info :

Do not forget to change the color as shown in the illustration to the right. (Check page 1 for more details.)

Info :

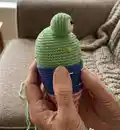
DIVIDE THE LEGS: To make a leg, identify the center space between the legs by the 6 stitches, and each leg identifies the other by 18. (Use stitch markers to help.) Sc at the 31th st of the Rnd 35. *1 This sc is the first st of the first leg (left leg). Continue working on the first leg (left leg).

Round 36~39 :

sc in all 18 st [18]

Round 40 :

(scx1, sc2tog) x 6 [12]

Round 41 :

(sc2tog) x 6 [6]

Info :

Fasten off, leaving a long tail. Stuff the leg. Using a yarn needle, weave the yarn tail through the front loop of each remaining st and pull tight to close.

Info :

SECOND LEG (Right leg): Rejoin the White yarn to 7th back unworked st of Rnd 35. *2 This sc is the first st for the second leg (right leg). Continue working the second leg (right leg) the same way as the first leg (left leg), from Rnd 36~41. Using a yarn needle, sew the 6 sts between the legs. *3

β€” Eye x2 :

Info :

Rnd Use the White yarn to make MAGIC RING.

Round 1 :

scx6 in the yarn loop, tighten the loop [6 sts]

Round 2 :

(2-sc inc) x 6 [12]

Round 3 :

< Light green > (scx1, 2-sc inc) x 6 [18]

Round 4 :

sc in all 18 st [18]

Round 5 :

(scx1, sc2tog) x 6 [12]

Round 6 :

sc in all 12 st [12]

Round 7 :

(sc2tog) x 6 [6]

Info :

Fasten off, Leaving a long tail for sewing. Stuff the eye. Using a yarn needle, weave the yarn tail through the front loop of each remaining st and pull tight to close.

β€” Snout :

Info :

Rnd Use the Light green yarn to make MAGIC RING.

Round 1 :

scx6 in the yarn loop, tighten the loop [6 sts]

Round 2 :

(2-sc inc) x 6 [12]

Round 3 :

(scx1, 2-sc inc) x 6 [18]

Round 4 :

(scx2, 2-sc inc) x 6 [24]

Round 5 :

(scx3, 2-sc inc) x 6 [30]

Round 6 :

(scx4, 2-sc inc) x 6 [36]

Round 7 :

(scx5, 2-sc inc) x 6 [42]

Round 8 :

(scx6, 2-sc inc) x 6 [48]

Round 9 :

(scx7, 2-sc inc) x 6 [54]

Info :

Fasten off, Leaving a long tail for sewing. Connect the same color to the marked points.

Info :

Stitch on the other side three times.

β€” Mini cross bag :

Info :

Rnd Use the Red yarn to make 7 chains.

Round 1 :

scx1 in second ch from hook, scx6 [6 sts]

Round 2~9 :

ch 1, turn, scx6 [6] and ch 55

Info :

Fasten off, Leaving a long tail for sewing. Fold the bag in half and sew it. Connect the hand holder of the cross bag to complete it.

β€” Arm x2 :

Info :

Rnd Use the Light green yarn to make MAGIC RING.

Round 1 :

scx5 in the yarn loop, tighten the loop [5 sts]

Round 2 :

(2-sc inc) x 5 [10]

Round 3~11 :

sc in all 10 st [10]

Info :

Fasten off, Leaving a long tail for sewing. Flatten the ARM, do not stuff.

Assembly Instructions

  • Sew the 6 stitches between the legs with a yarn needle to close and secure the leg split, then weave in the ends securely.
  • Attach the two stuffed eyes to the top of the head at the marked positions; use photos as reference and sew through the base of each eye then pull the tail to close and secure.
  • Position and sew the snout to the front of the head aligning the marked points; stitch across the connection points and fasten off, then weave in the tails.
  • Fold the mini cross bag in half and sew the edges, then attach the strap to the bag and sew the finished bag to the body or leave removable depending on your preference.

Important Notes

  • πŸ’‘Use stitch markers to identify the start of rounds and to mark the leg division points for accurate shaping.
  • πŸ’‘Stuff pieces firmly but gradually to maintain even shape; overstuffing can distort the face and body.
  • πŸ’‘Weave in ends as you go and secure color changes to keep the fabric neat and to prevent loose tails from showing through.

This adorable minimal frog is a compact, playful amigurumi thats perfect for gifting or keeping on a shelf. The pattern uses simple single crochet shaping with fun color stripes and a tiny cross bag for character. Make one to brighten a day or craft a small collection of colorful companions. 🧢😊

You ask,

we answer.

FAQs

What size will the finished piece be?

The finished amigurumi measures approximately 15 cm (5.9 inches) when using the recommended worsted yarn and a 3mm crochet hook.

Can I use different yarn weights for this pattern?

Yes, you can use different yarn weights but the final size will change; use an appropriate hook for your yarn and expect adjustments in stitch counts if substituting yarn weight.

Do I need prior crochet experience for this pattern?

This pattern is rated intermediate because it includes color changes, enclosed shaping and multiple small pieces to sew; basic knowledge of single crochet, increases and decreases is recommended.

How long does this project typically take to complete?

Most crocheters complete this project in 5-7 hours, though time may vary depending on experience level and how much time you spend on assembly and details.