🧢 Beautiful ✨ Detailed πŸ’ Adorable

Felted Bowl Trio Pattern

Felted Bowl Trio Pattern
3.9β˜… Rating
5-7 Hours Time Needed
2.0K Made This
βœ‚οΈ

Beginner Friendly Level

Perfect for those just starting their crochet journey, with clear instructions and simple techniques

⏱️

Weekend Treat

Takes 5-7 hours, making it an enjoyable project to finish over a couple of days.

🏑

Cozy Accent

A warm touch for your space that transforms ordinary corners into inviting nooks filled with handmade charm.

About This Felted Bowl Trio Pattern

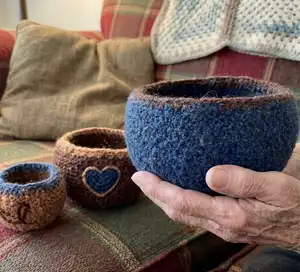
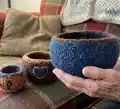
This pattern guides you through crocheting three nesting bowls that are felted for a sturdy, rustic finish. You will work each bowl from the center-bottom outward using single crochet rounds and simple shaping. After crocheting, the bowls are felted and shaped in the washing machine, then decorated with a pen-style felting tool. The result is a practical, decorative trio perfect for storage or gifting.

Felted Bowl Trio Pattern crochet pattern - detailed view of completed project

The pattern uses non-superwash worsted wool and a large hook to create fabric that felts well. Exact gauge is not critical because the bowls are felted, making this a forgiving and fun project.

Why You'll Love This Felted Bowl Trio Pattern

I absolutely love this pattern because it combines fast crochet with the satisfying transformation of felting. The process of watching a crocheted bowl become dense and sturdy in the washer always feels like a little bit of magic. I enjoy how easy it is to personalize the bowls with simple needle-felted details using a pen-style tool. This trio is practical, attractive, and makes a thoughtful handmade gift for friends and family.

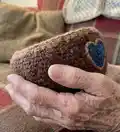
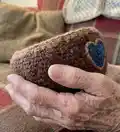
Felted Bowl Trio Pattern step 1 - construction progress Felted Bowl Trio Pattern step 2 - assembly progress Felted Bowl Trio Pattern step 3 - details and accessories Felted Bowl Trio Pattern step 4 - final assembly and finishing

Switch Things Up

I love customizing these bowls by changing the color palette; try tonal shades for a subtle look or bright contrasting colors for a bold statement.

You can adjust the size by working more or fewer increase rounds before the straight sides; larger circles before straight rounds make deeper or wider bowls.

For a chunky look, experiment with a bulkier wool and a larger hook, then felt until dense for a cozy, heavy bowl.

Make mini keychain bowls by using thinner yarn and a smaller hook, then lightly felt to preserve shape without over-densifying.

I often add embroidered or needle-felted words and motifs after felting β€” use the pen-style felting tool to attach short yarn strands for readable designs.

Try ombre effects by changing colors gradually every few rounds for a soft blended finish that shows after felting.

If you prefer a stiffer bowl, felt longer and use hot water cycles carefully, checking frequently to avoid over-felting.

Mix yarn textures in the same color family for subtle surface interest that responds differently in the felting process.

To make a set for gifting, coordinate colors and add a matching small pin cushion or coaster made from the same yarn for a thoughtful bundle.

I sometimes add a thin fabric or leather base after felting for extra stability and a polished look, sewing it in place with a tapestry needle.

Common Mistakes & How to Fix Them

βœ— Using superwash yarn will prevent proper felting; choose non-superwash 100% wool for best results. βœ— Skipping stitch markers can cause lost rounds and uneven shaping; place a marker at the beginning of each round and use a contrasting marker where noted. βœ— Pulling the yarn too tightly during increases or decreases will distort the bowl shape; maintain an even, moderate tension for consistent stitches. βœ— Not weaving in ends before felting can make finishing messy; weave in ends or secure them as instructed before felting the bowls.

Felted Bowl Trio Pattern

Create a set of three nesting felted bowls using 100% wool yarn and simple single crochet techniques. These bowls are perfect for organizing small supplies, gifting, or adding a handmade touch to your home. You will crochet each bowl, then felt and shape them for a sturdy, textured finish. A pen-style felting tool allows you to personalize the bowls with yarn details.

Beginner Friendly 5-7 Hours

Materials Needed for Felted Bowl Trio Pattern

β€” Main Fabric

  • 01
    Non-superwash, worsted weight, 100% wool yarn - Color A (blue) - approximately 115 yards
  • 02
    Non-superwash, worsted weight, 100% wool yarn - Color B (dark brown) - approximately 85 yards
  • 03
    Non-superwash, worsted weight, 100% wool yarn - Color C (light golden brown) - approximately 50 yards

β€” Tools Required

  • 01
    Crochet hook size L (8.0 mm) or size needed to obtain gauge
  • 02
    Locking stitch markers
  • 03
    Tapestry needle
  • 04
    Pen-style felting tool

Progress Tracker

0% Complete

β€” Finished Size :

Info :

Bowls measure about 11 (18, 26)” in circumference before felting and 9 (12.75, 17)” after felting.

β€” Gauge :

Info :

Work the first 5 rnds of Large Bowl Directions, circle measures about 4" [10 cm]in diameter. Because the bowls will be felted, obtaining an exact gauge is not necessary for this project.

β€” Materials :

Info :

Non-superwash, worsted weight, 100% wool yarn in 3 colors: 115 yards of color A (blue). 85 yards of color B (dark brown). 50 yards of color C (light golden brown). Size L (8.0 mm) crochet hook or size needed to obtain gauge. Locking stitch markers. Tapestry needle. Pen-style felting tool.

β€” Notes :

Infos :

Some white or off-white wool yarns will not felt well. Bowl is worked in the round from the center-bottom, out. Decreases at the top edge keep bowl from stretching out of shape. Details are added later using a pen-style felting tool to attach strands of yarn to the bowl.

β€” Abbreviations :

Info :

A: Color A. B: Color B. C: Color C. beg: beginning. ch: chain. rnd(s): round(s). sc: single crochet. sc2tog: single crochet two. sl st: slip stitch. st(s): stitch(es). yo: yarn over.

β€” Instructions :

For Large Bowl :

Using A, work as follows.

Round 1 :

Using A, make an adjustable ring, 6 sc in ring, pull on beg yarn tail to close hole – 6 sts, do not join, but work in the rnd. Use stitch marker to keep track of beg of rnds.

Round 2 :

2 sc in each st around – 12 sts.

Round 3 :

[Sc in next st, 2 sc in next st] 6 times – 18 sts.

Round 4 :

[2 sc in next st, sc in next 2 sts] 6 times – 24 sts.

Round 5 :

[1 sc in next 2 sts, 2 sc in next st, sc in next st] 6 times – 30 sts.

Round 6 :

[1 sc in next 4 sts, 2 sc in next st] 6 times – 36 sts.

Round 7 :

[1 sc in next 2 sts, 2 sc in next st, sc in next 3 sts] 6 times – 42 sts.

Round 8 :

[1 sc in next 5 sts, 2 sc in next st, sc in next st] 6 times – 48 sts.

Round 9 :

[1 sc in next 1 sts, 2 sc in next st, sc in next 5 sts] 6 times – 54 sts.

Round 10 :

Sc around.

Round 11 :

[1 sc in next 3 sts, 2 sc in next st, sc in next 5 sts] 6 times – 60 sts.

Round 12 :

Sc around.

Round 13 :

[1 sc in next 9 sts, 2 sc in next st] 6 times – 66 sts.

Round 14 - 21 :

Sc around. Use contrasting st marker to mark post of first st of Rnd 14. This will help keep track of how many rnds have been worked even.

Round 22 :

[1 sc in next 9 sts, sc2tog] 6 times – 60 sts.

Round 23 :

[1 sc in next 3 sts, sc2tog, sc in next 5 sts] 6 times, sl st in first st of rnd – 54 sts.

Round 24 :

Yo with B and pull up loop, pull on A yarn tail until last A loop disappears, ch 1 (does not count as a stitch), sc around, sl st in first sc to fasten off.

Info :

Weave in ends.

For Medium Bowl :

Using B, work Rnds 1 – 6 of Large Bowl directions.

Round 7 :

Sc around.

Round 8 :

[1 sc in next 2 sts, 2 sc in next st, sc in next 3 sts] 6 times – 42 sts.

Round 9 :

Sc around.

Round 10 :

[1 sc in next 5 sts, 2 sc in next st, sc in next st] 6 times – 48 sts.

Round 11 - 15 :

Sc around. Use contrasting st marker to mark post of first st of Rnd 11. This will help keep track of how many rnds have been worked even.

Round 16 :

[1 sc in next 6 sts, sc2tog] 6 times – 42 sts.

Round 17 :

[1 sc in next 3 sts, sc2tog, sc in next 2 sts] 6 times, sl st in first st of rnd – 36 sts.

Round 18 :

Yo with C and pull up loop, pull on B yarn tail until last B loop disappears, ch 1 (does not count as a stitch), sc around, sl st in first sc to fasten off.

Info :

Weave in ends.

For Small Bowl :

Using C, work Rnds 1 – 3 of Large Bowl directions.

Round 4 :

Sc around.

Round 5 :

[2 sc in next st, sc in next 2 sts] 6 times – 24 sts.

Round 6 :

Sc around.

Round 7 :

[1 sc in next 2 sts, 2 sc in next st, sc in next st] 6 times – 30 sts.

Round 8 - 10 :

Sc around. Use contrasting st marker to mark post of first st of Rnd 8. This will help keep track of how many rnds have been worked even.

Round 11 :

[1 sc in next 4 sts, sc2tog] 6 times-24 sts.

Round 12 :

Yo with A and pull up loop, pull on C yarn tail until last C loop disappears, ch 1 (does not count as a stitch), sc around, sl st in first sc to fasten off.

Info :

Weave in ends.

Finishing :

Felt bowls in washing machine. Shape with hands and air dry after felting is complete. Add strands of yarn to bowls with needle felting tool to decorate.

Assembly Instructions

  • Use a stitch marker at the first stitch of each round to keep track of the beginning of rounds while crocheting and shaping.
  • Place a contrasting stitch marker at the first stitch of the indicated round (Rnd 14 for large, Rnd 11 for medium, Rnd 8 for small) to easily count how many even rounds have been worked.
  • Weave in all yarn ends before felting to prevent loose tails from showing or becoming difficult to secure after felting.
  • Felt the bowls in the washing machine and shape them with your hands while damp; allow them to air dry completely to set the shape.
  • Use a pen-style felting tool to attach short strands of yarn to the bowl surfaces for decorative details after felting is complete.

Important Notes

  • πŸ’‘Some white or off-white wool yarns will not felt well; test a swatch if you plan to use pale colors.
  • πŸ’‘Bowl is worked in the round from the center-bottom outward; follow increases carefully for a neat circle.
  • πŸ’‘Decreases at the top edge keep the bowl from stretching out of shape during use and felting.
  • πŸ’‘Because these bowls are felted, obtaining an exact gauge is not necessary for this project.

Make a charming set of handmade nesting bowls to brighten your space and keep small items tidy. These felted bowls are quick to crochet, delightfully tactile, and endlessly customizable with pen-style felting. Perfect for gifting or sprucing up your home with handcrafted storage. 🧢✨

You ask,

we answer.

FAQs

What size will the finished piece be?

The bowls measure about 11 (18, 26) inches in circumference before felting and about 9 (12.75, 17) inches after felting for the small, medium, and large sizes respectively.

Can I use different yarn weights for this pattern?

This pattern is written for worsted weight 100% wool; using a different yarn weight will change the final size and felting behavior, so I recommend testing a swatch if you choose another weight.

Do I need prior crochet experience for this pattern?

This pattern is beginner friendly and uses only single crochet in the round, but basic knowledge of working in rounds and simple increases and decreases is helpful.

How should I felt and shape the bowls?

Felt the bowls in the washing machine, then shape them with your hands while damp and allow them to air dry; use a pen-style felting tool to add decorative yarn details after felting.