About This Feather Locklear the Chick Amigurumi Pattern
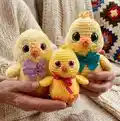
This pattern creates a small, adorable amigurumi chick named Feather Locklear, crocheted from the top of the head to the bottom of the body. It includes complete round-by-round instructions for the head, body, wings, feet, tail and beak plus optional hair and styling tips. The pattern also contains helpful photos, eye placement instructions, and assembly steps to guide you through finishing. Suitable for intermediate crocheters who are comfortable working in continuous rounds.
Youll find materials, abbreviations, exact stitch counts and helpful tips for different yarn versions and eye sizes. Clear assembly directions show how to position eyes, pin and sew parts, and add small facial details for personality.
Why You'll Love This Feather Locklear the Chick Amigurumi Pattern
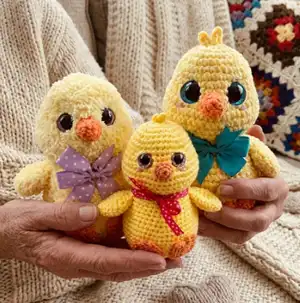
I absolutely love this pattern because it combines simple amigurumi shaping with so much personality in a small package. I enjoy the friendly proportions of the chick and how small details like eye placement and the tiny beak transform the face. I appreciate that the pattern includes options for fluffier or chenille yarns, so I can make several variations to match my mood. I also love teaching the eye-sinking technique here — it really gives the chick a soft, expressive look that I cant help but smile at each time I finish one.
Switch Things Up
I love customizing this chick pattern by changing yarn textures and colors to create different personalities.
Try pastel shades for a soft nursery friend or bright, saturated hues for a playful toy.
Make a fluffy version using chenille yarn or Little Bunny yarn with an F hook for a plush, sleepy look.
Use thinner yarn and a smaller hook to create a mini keychain-sized chick perfect for gifts and charms.
I often swap eye sizes—larger safety eyes give a more whimsical look while smaller eyes are subtler and cuter for adult collectors.
Embroider different expressions by changing the placement of the highlight and mouth stitches to make happy, sleepy or surprised faces.
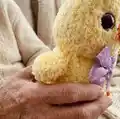
Try felt or crochet tiny accessories like bows, hats or scarves to personalize each chick for holidays or themes.
For posability, I sometimes add a short piece of wire into the wings or neck before stuffing to adjust how the chick sits and poses.
Change the feet or beak color to make seasonal versions—orange feet for autumn, pastel for spring chicks—small color swaps make big differences.
I also enjoy making sets with matching sizes and mixed yarns so each chick in the family has its own texture and charm.
Dont be afraid to experiment with stitch tension and stuffing density — small adjustments help you fine tune size and expression.
Common Mistakes & How to Fix Them
✗ Skipping a stitch marker during continuous rounds causes you to lose track of the start and end of rounds; always place and move a stitch marker at the beginning of each round to stay accurate.
✗ Overstuffing the head and body makes shaping and eye placement difficult and can distort the finished silhouette; stuff gradually and evenly, removing stuffing when needed to fit washers or adjust eye placement.
✗ Placing safety eyes without marking or counting stitches can result in uneven spacing; mark the 6th and 7th increases as instructed and count stitches so eyes are symmetrically placed.
✗ Pulling yarn too tightly when using the eye sinking technique will pucker the fabric and misalign eyes; pull gently and test gradually until you reach the desired sunken look.
✗ Forgetting to fold and stitch wings closed or leaving openings unsewn can cause stuffing or edges to be visible; fold wings exactly as directed and use a long tail to sew the opening closed securely.