About This Feather Locklear the Chick Amigurumi Pattern
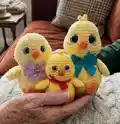
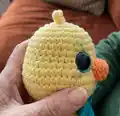
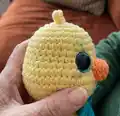
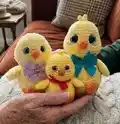
This pattern creates a small, cuddly chick amigurumi crocheted from the top of the head down to the body. You will make the head, body, wings, feet, tail, beak and optional hair with clear round-by-round instructions. The pattern includes eye placement tips, assembly photos, and notes for different yarn variations.
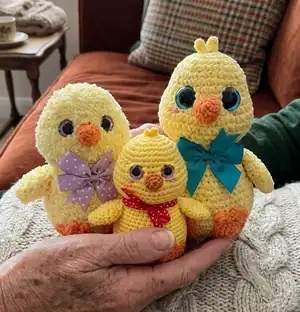
Suitable for intermediate crocheters, the pattern uses worsted weight yarn and a D/3.25 mm hook. Optional fluffy and chenille variations and multiple eye size notes are included for customization.
Why You'll Love This Feather Locklear the Chick Amigurumi Pattern
I absolutely love this pattern because it combines simple shaping with charming details that bring personality to every chick. I enjoy how the single crochet rounds and increases create a compact, lovable shape that is easy to customize. The eye placement technique and optional sunken-eye effect give so much character and make each finished chick unique. I also love offering multiple yarn and eye-size suggestions because it lets you personalize the final size and texture.
Switch Things Up
I love how many ways you can customize this little chick: change the yarn type to create different textures, like a fuzzy chenille or a fluffy acrylic blend.
Try pastel or bright color palettes to give your chick a new personality—subtle pinks and blues make a sweet nursery friend while bold yellows and oranges give a playful look.
For a larger or smaller chick, change your yarn weight and hook size: bulky yarn with a larger hook yields a chunky chick, while sport weight yarn with a smaller hook makes a petite keychain version.
I often add embroidery details like little eyelashes, eyebrows, or a stitched mouth to change facial expressions and bring the character to life.
Swap safety eyes for embroidered eyes for a child-safe toy, or use different eye sizes (18 mm, 23 mm, 28 mm) to alter the expression and scale.
You can make a family of chicks by using the same pattern but varying yarn, eye size and stuffing firmness to create siblings of different sizes and textures.
Try adding tiny accessories like crocheted bows, scarves, or hats to match seasons or holidays—these small props make wonderful gifts.
I sometimes add wire to the wings for a posable look or lightly stuff the beak for a more pronounced profile if desired.
Experiment with colorwork by adding stripes or a belly patch during rounds 21-26 to give your chick a fun sweater or design.
Finally, consider grouping multiple chicks into a seasonal display or mobile; they look delightful in sets and make lovely gifts or decor.
Common Mistakes & How to Fix Them
✗ Leaving out a stitch marker during continuous rounds makes counting difficult; use a stitch marker at the beginning of each round to track your place consistently.
✗ Overstuffing early will make shaping the head and body awkward; stuff gradually and shape as you go so the form remains smooth and even.
✗ Placing eyes without marking rounds may result in uneven spacing; mark the 6th and 7th increases and follow the placement directions to keep the eyes symmetrical.
✗ Skipping the step to remove stuffing before attaching eye washers will make it hard to position backs; remove most stuffing temporarily, fit the washers, then restuff and close the opening.