About This Crochet Hook Holder Pattern
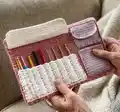
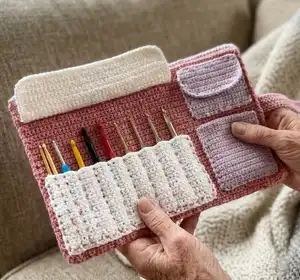
This pattern creates a compact, foldable Crochet Hook Holder with multiple pockets for hooks and a protective flap. You will crochet separate panels and pockets, then sew them together to form a tidy organizer. The design is built with simple single crochet rows and optional snap fasteners for a secure closure.
Ideal for using up small amounts of yarn and creating a customized color palette. Great as a practical handmade gift or a personal tool to keep your hooks neat and accessible.
Why You'll Love This Crochet Hook Holder Pattern
I absolutely love this pattern because it turns basic crochet stitches into a highly practical and beautiful organizer that I reach for every day. I enjoy how quickly the panels work up and how satisfying it is to arrange the pockets to fit different hook sizes. I love that it uses small amounts of yarn and can be customized with your favorite colors and finishes. Sewing the pieces together feels rewarding and the final piece holds everything neatly while looking polished.
Switch Things Up
I love how easy it is to customize this holder by changing colors; try a gradient or bold contrasting pockets for a fresh look.
Want a smaller pocket area? Use lighter weight yarn and a smaller hook to make a mini version perfect for travel or keychains.
Make a larger, roomier holder by using a bulkier yarn and larger hook to fit larger tools and even small notions.
I often add felt or fabric linings to pockets for extra protection and a durable finish; simply sew them in before attaching pockets to the inner layer.
Try different closure types: a button and loop, elastic band, or magnetic snap can all replace the snap fasteners for varied looks and functionality.
I sometimes embroider initials or small motifs on the outer layer for personalization; use contrasting thread for a delightful accent.
If you need more hook slots, add an extra strip of hook pocket fabric and sew it in place, spacing separators to suit your hook collection.
For a more structured case, insert a thin piece of cardboard or plastic between the inner and outer layers before sewing the edges closed.
I enjoy swapping the hook protector flap shape — try a curved flap, a triangular tab, or even a decorative scalloped edge for extra charm.
Consider making coordinating accessories like a stitch marker pouch or small notions pocket to tuck into the back area between layers.
I recommend testing pocket spacing with your actual hooks first; you can then adjust separator lines and pocket widths to fit your most-used tools.
Finally, experiment with trims and edging: a contrasting single crochet border or picot edge adds a polished finish and makes the holder pop.
Common Mistakes & How to Fix Them
✗ Skipping the second chain when starting rows can change your stitch count; always start from the 2nd ch from the hook as instructed.
✗ Not counting stitches at the end of a row leads to mismatched pocket edges; count your stitches regularly and check the pattern counts.
✗ Sewing pockets in the wrong position will make the layout uneven; pin pieces in place and measure before stitching them to the inner layer.
✗ Making hook separator lines too close together can prevent larger hooks from fitting; test with your tallest hook and adjust spacing accordingly.
✗ Overstretching the fabric while sewing can distort the shape; sew with relaxed tension and steam-block if needed to even out the fabric.