About This Christmas Tree Cat Amigurumi Pattern
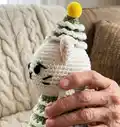
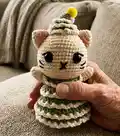
This pattern creates a charming cat dressed like a Christmas tree, complete with layered tree skirt, tiny hat, and pompom. You will work mostly in single crochet with increases and decreases, and add decorative FLO/BLO layers for the tree effect. The pattern includes step-by-step instructions for head, body, ears, hat, arms, legs, tail, and assembly.
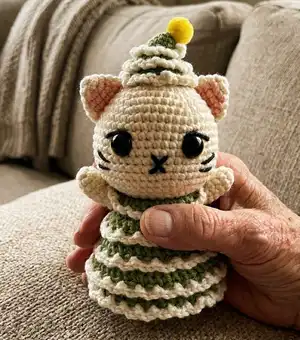
Clear round-by-round directions guide you through shaping and finishing details like embroidered whiskers and sewn-on eyes. Suitable for makers who are comfortable with amigurumi basics and want a festive project.
Why You'll Love This Christmas Tree Cat Amigurumi Pattern
I absolutely love this pattern because it combines classic amigurumi shaping with playful seasonal details that make the piece feel magical. I enjoy designing the layered FLO/BLO tree ruffles — they give the cat such a delightful, textured skirt. Sewing the tiny hat and adding the pompom is one of my favourite finishing touches because it instantly makes the character festive. I also love that you can customise colors and eye sizes to give each cat its own personality, making it a wonderful gift or keepsake.
Switch Things Up
I love how easy it is to customise this pattern by changing colors — try pastel shades for a softer look or bold greens and golds for a festive feel.
You can make a tiny keychain version by using finer yarn and a smaller hook, which creates adorable pocket-sized gifts.
If you want a chunkier, cuddlier cat, try using a bulkier yarn and a larger hook to increase the overall size and plushness.
I often swap safety eyes for embroidered eyes on small versions to keep them toy-safe for children and to change the expression.
To change personality, move the eyes slightly higher or lower and vary the whisker placement — small shifts make big differences in expression.
Try different pompom sizes or a tiny bell on the hat for extra holiday charm and a jingly finish.
Embroider patterns on the tree layers or add tiny sequin 'ornaments' using small beads sewn on for sparkle and detail.
I sometimes add wire to the arms for poseability, or create removable scarves and accessories for mix-and-match play.
Make a set in several color combinations to create a themed collection — green/white for classic, pink/white for whimsical, or red/green for bold holiday contrast.
Don't be afraid to experiment with the ear shape — slightly longer or pointier ears can give the cat a different character and silhouette.
I recommend testing color changes and ruffle spacing on a small swatch first so you can adjust counts and placement for perfect layering.
For gifting, add a small loop to the hat or back so it can hang as an ornament on smaller trees or be displayed as a shelf friend.
Common Mistakes & How to Fix Them
✗ Not using stitch markers during continuous rounds can lead to accidental stitch count drift; place a marker at the beginning of each round and move it up after completing each round to maintain accurate counts.
✗ Forgetting to stuff gradually causes lumps and misshapen parts; stuff small amounts at a time while shaping and add more as needed to keep the surface smooth and even.
✗ Cutting yarn too short when finishing pieces leaves you without enough tail for sewing; always leave a long tail for sewing and finishing so you can attach pieces securely.
✗ Skipping the BLO/FLO instructions for the hat and body layers will remove the ruffle effect; follow the Back Loop Only and Front Loop Only steps exactly to create the layered tree texture.
✗ Pulling the yarn too tightly when embroidering facial features can warp the head; use gentle tension, anchor stitches carefully, and check placement before securing the yarn.