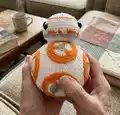
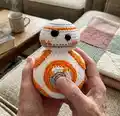
🧶 Beautiful ✨ Detailed 💝 Adorable

BB-8 Amigurumi Pattern

BB-8 Amigurumi Pattern
3.9★ Rating
5-7 Hours Time Needed
1.7K Made This
✂️

Intermediate Level

Ideal for those with basic crochet experience, featuring slightly more advanced stitches and techniques to expand your skills.

⏱️

Weekend Treat

Takes 5-7 hours, making it an enjoyable project to finish over a couple of days.

🧸

Cute Companion

An adorable friend to cherish, handcrafted with love to bring comfort and joy for years to come.

About This BB-8 Amigurumi Pattern

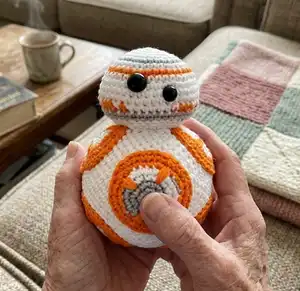
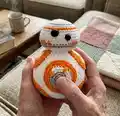
This pattern creates a small BB-8 amigurumi ornament approximately 11x8 cm using mercerized cotton. You will crochet the head and body in continuous spirals, add color changes for the panels, and sew on six decorative circles. The pattern includes circle variations, placement photos, and full assembly instructions to achieve the iconic BB-8 look.

BB-8 Amigurumi Pattern crochet pattern - detailed view of completed project

Designed with clear round-by-round instructions and step photos for tricky parts. Perfect for making a hanging ornament or a small collectible for Star Wars fans.

Why You'll Love This BB-8 Amigurumi Pattern

I absolutely love this pattern because it transforms simple crochet rounds into a recognisable and charming BB-8. I enjoy the color-change details that give the droid its personality without complicated shaping. The little circles and embroidered stitches let me add my own finishing touches and feel creative. It is also very satisfying to sew all pieces together and see the whole character come to life.

BB-8 Amigurumi Pattern step 1 - construction progress BB-8 Amigurumi Pattern step 2 - assembly progress BB-8 Amigurumi Pattern step 3 - details and accessories BB-8 Amigurumi Pattern step 4 - final assembly and finishing

Switch Things Up

I love how easily you can customise this BB-8 by changing colors; try soft pastels for a cute, non-traditional version or metallic threads for a festive ornament.

If you want a larger BB-8, use a thicker yarn and a larger hook; bulky yarn will create a chunky, cuddly version while finer yarn makes a tiny keychain-friendly droid.

I often swap safety eyes for embroidered eyes for a child-safe toy; embroider the eyes with black floss and add a tiny white highlight for personality.

Try different yarn fibers for texture—cotton gives a crisp finish while acrylic adds a softer, plush look; adjust hook size to match gauge.

You can add wire inside the body or head if you want to make posable parts, but be sure to wrap the wire securely so it won’t poke through the fabric.

I like to make sets of droid ornaments and vary circle decorations—add beads, metallic yarn, or tiny buttons for extra detail.

For a hanging ornament, braid a colorful hanger and sew it firmly into the top loops; I usually triple-stitch the hanger for security.

Change the size and spacing of the decorative circles to create alternate panel layouts and give your BB-8 a unique look.

I sometimes embroider extra geometric lines with contrasting yarn across the body for a stylised effect—tiny backstitches and lazy daisy stitches work well.

Don’t be afraid to experiment with eye placement and circle orientation; small changes can completely change the character’s expression and overall style.

Common Mistakes & How to Fix Them

✗ Skipping the locking stitch marker will cause you to lose track of round starts; always place a locking stitch marker at the start of each round to keep your stitch counts accurate. ✗ Not stuffing gradually creates lumps and uneven shape; stuff little by little, especially while closing decreases, to maintain a smooth round body. ✗ Changing colors without securing tails neatly results in messy joinings; weave in color change ends or carry them invisibly before cutting to keep the surface tidy. ✗ Placing safety eyes too early or asymmetrically will affect the finished look; use pins to mark eye placement and check symmetry between rounds before securing. ✗ Forgetting to count stitches after increases or decreases leads to incorrect shaping; count stitches each round and after any complex sequence to confirm the correct total.

BB-8 Amigurumi Pattern

Make your own adorable BB-8 amigurumi with this clear, photo-assisted crochet pattern. You will work in continuous rounds, change colors for the iconic orange and grey details, and sew six decorated circles onto the body. This pattern is perfect if you enjoy small character projects and careful assembly — you will end up with a charming 11x8 cm BB-8 keepsake.

Intermediate 5-7 Hours

Materials Needed for BB-8 Amigurumi Pattern

— Main Fabric

  • 01
    Mercerized cotton in White (Scheepjes Catona White #106)
  • 02
    Mercerized cotton in Orange (Scheepjes Catona Orange #281)
  • 03
    Mercerized cotton in Grey (Scheepjes Catona Grey #074)

— Tools Required

  • 01
    Crochet hook size 2.50 mm (or the size you need depending on your yarn)
  • 02
    Tapestry needle
  • 03
    Polyester stuffing
  • 04
    9 mm safety eye (1 piece)
  • 05
    8 mm safety eye (1 piece)
  • 06
    Black embroidery floss
  • 07
    Locking stitch marker
  • 08
    Scissors
  • 09
    Pins for assembly

Progress Tracker

0% Complete

— Head :

Round 1 :

6 sc into the magic ring (6)

Round 2 :

[1 inc] x6 (12)

Round 3 :

[1 sc, 1 inc] x6 (18)

Round 4 :

1 sc, 1 inc [2 sc, 1 inc] x5, 1 sc (24)

Info :

Change to grey yarn

Round 5 :

[3 sc, 1 inc] x6 (30)

Info :

Change to White yarn

Round 6 :

2 sc, 1 inc [4 sc, 1 inc] x5, 2 sc (36)

Info :

Change to Orange yarn

Round 7 :

36 sc (36)

Info :

Change to White yarn

Round 8 :

[5 sc, 1 inc] x6 (42)

Round 9-11 :

42 sc (3 rounds, 42)

Info :

On round 12 you are going to crochet by switching colours between white and orange.

Round 12 :

orange 1 sc, white 1 sc, orange 3 sc, white 1 sc, orange 1 sc, white 1 sc, orange 3 sc, white 1 sc, orange 1 sc, white 1 sc, orange 3 sc, white 1 sc, orange 1 sc, white 7 sc, orange 3 sc, white 1 sc, orange 1 sc, white 1 sc, orange 3 sc, white 1 sc, orange 1 sc, white 1 sc, orange 3 sc, white 1 sc = (42)

Round 13 :

With grey yarn, 42 sc (42)

Info :

Now it’s time to attach the safety eyes. Place the 9 mm eye between rounds 8 and 9 and place the 8 mm eye between rounds 10 and 11.

Info :

Change to white yarn

Round 14 :

In back loops only, [5 sc, 1 dec] x6 (36)

Round 15 :

[4 sc, 1 dec] x6 (30)

Round 16 :

[3 sc, 1 dec] x6 (24)

Info :

Start stuffing with polyester stuffing and keep doing that as the hole becomes smaller.

Round 17 :

[2 sc, 1 dec] x6 (18)

Round 18 :

[1 sc, 1 dec] x6 (12)

Round 19 :

[1 dec] x6 (6)

Info :

Sew the hole together. Cut yarn but leave a long yarn tail for sewing.

— Body :

Round 1 :

6 sc into the magic ring (6)

Round 2 :

[1 inc] x6 (12)

Round 3 :

[1 sc, 1 inc] x6 (18)

Round 4 :

1 sc, 1 inc [2 sc, 1 inc] x5, 1 sc (24)

Round 5 :

[3 sc, 1 inc] x6 (30)

Round 6 :

2 sc, 1 inc [4 sc, 1 inc] x5, 2 sc (36)

Round 7 :

[5 sc, 1 inc] x6 (42)

Round 8 :

3 sc, 1 inc [6 sc, 1 inc] x5, 3 sc (48)

Round 9 :

48 sc (48)

Round 10 :

[7 sc, 1 inc] x6 (54)

Round 11-20 :

54 sc (10 rounds, 54)

Round 21 :

[7 sc, 1 dec] x6 (48)

Round 22 :

48 sc (48)

Round 23 :

3 sc, 1 dec [6 sc, 1 dec] x5, 3 sc (42)

Round 24 :

[5 sc, 1 dec] x6 (36)

Round 25 :

[2 sc, 1 dec [4 sc, 1 dec] x5, 2 sc (30)

Round 26 :

[3 sc, 1 dec] x6 (24)

Info :

Start stuffing and keep doing that as the hole becomes smaller

Round 27 :

1 sc, 1 dec [2 sc, 1 dec] x5, 1 sc (18)

Round 28 :

[1 sc, 1 dec] x6 (12)

Round 29 :

[1 dec] x6 (6)

Info :

Sew the hole togheter and cut yarn.

— CIRCLE type 1 (make 2) :

Info :

With white yarn. Start with a magic ring.

Round 1 :

6 sc into the magic ring (6)

Round 2 :

[1 inc] x6 (12)

Round 3 :

[1 sc, 1 inc] x6 (18)

Round 4 :

1 sc, 1 inc [2 sc, 1 inc] x5, 1 sc (24)

Info :

Change to orange

Round 5 :

[3 sc, 1 inc] x6 (30)

Round 6 :

2 sc, 1 inc [4 sc, 1 inc] x5, 2 sc (36)

Info :

Finish with 1 sl. Cut yarn but leave a long yarn tail for sewing.

— CIRCLE type 2 (make 2) :

Info :

With grey yarn. Start with a magic ring.

Round 1 :

6 sc into the magic ring (6)

Round 2 :

[1 inc] x6 (12)

Info :

Change to white yarn

Round 3 :

[1 sc, 1 inc] x6 (18)

Round 4 :

1 sc, 1 inc [2 sc, 1 inc] x5, 1 sc (24)

Info :

Change to orange

Round 5 :

[3 sc, 1 inc] x6 (30)

Round 6 :

2 sc, 1 inc [4 sc, 1 inc] x5, 2 sc (36)

Info :

Finish with 1 sl. Cut yarn but leave a long yarn tail for sewing.

— CIRCLE type 3 (make 2) :

Info :

With grey yarn. Start with a magic ring.

Round 1 :

6 sc into the magic ring (6)

Round 2 :

[1 inc] x6 (12)

Round 3 :

With Grey 1 sc, 1 inc, 1 sc, Change to White 1 inc [1 sc, 1 inc] x5 (18)

Round 4 :

With Grey 1 sc, 1 inc, 2 sc, 1 inc, Change to White [2 sc, 1 inc] x4, 1 sc (24)

Info :

Change to orange

Round 5 :

[3 sc, 1 inc] x6 (30)

Round 6 :

2 sc, 1 inc [4 sc, 1 inc] x5, 2 sc (36)

Info :

Finish with 1 sl. Cut yarn but leave a long yarn tail for sewing.

Info :

On every circle do a few stitches using orange yarn to make it look like a cross inside the circle (see picture on pages 8-10).

Info :

Pin the circles to the body and sew them on one by one. Make sure you place them evenly. See picture on pages 10-12.

Info :

When you have sewn on all 6 circles to the body take some grey yarn and embroid a few stitches for extra decoration. See pictures on pages 12-14.

Info :

Pin the head to the body and sew it on.

Info :

Take a nice piece of string or braid a long string and sew it on the top of the BB-8. Make it as long as you need depending on how or where you are going to hang your BB-8.

— Assembly :

Info :

Pin pieces in place and sew securely. Use photos as reference for accurate placement of circles and head.

Assembly Instructions

  • Attach 9 mm safety eye between rounds 8 and 9 and the 8 mm safety eye between rounds 10 and 11 before finishing the head; secure backs and hide tails.
  • Pin each decorated circle to the body using straight pins, spacing them evenly, then sew each circle on one by one with the long tail left from finishing the circle.
  • After sewing all six circles, use grey yarn to embroider a few extra decorative stitches inside each circle for the final details.
  • Pin the head to the top of the body to check placement, then sew the head to the body securely using the long tail left after closing the head.
  • Braid or attach a length of string to the top of the head and stitch it into place if you plan to hang the BB-8 as an ornament.

Important Notes

  • 💡You are going to crochet in a continuous spiral, do not join the rounds; use a locking stitch marker to mark the beginning of the rounds.
  • 💡Use stitch markers and pins to keep track of round starts and placement for eyes and circles to ensure symmetry.
  • 💡Stuff gradually as you decrease to avoid lumps and maintain a smooth spherical shape.
  • 💡Leave long yarn tails when finishing circles to have enough length to sew them onto the body securely.

This BB-8 amigurumi pattern is full of detail and charm, perfect as a gift or collectible for Star Wars fans. The pattern uses simple rounds, color changes and decorative circle panels to recreate BB-8s iconic look. Make one to hang as an ornament or keep as a playful desk companion. 🧶✨
You ask,

we answer.

FAQs

What size will the finished piece be?

The finished BB-8 measures approximately 11 x 8 cm when using the recommended Scheepjes Catona yarn and a 2.50 mm hook.

Can I use different yarn weights for this pattern?

Yes, you can use different yarn weights, but your finished size will change; choose an appropriate hook for gauge and expect a larger or smaller BB-8 accordingly.

Do I need prior crochet experience for this pattern?

This pattern is rated intermediate due to color changes and assembly; you should be comfortable with single crochet, increases, decreases, and sewing pieces together.

How long does this project typically take to complete?

Most crocheters complete this project in 5-7 hours depending on experience and how much time you spend on embroidery and assembly.